


- 116 -
Menu List of the Operator Panel
5
5.
Appendix
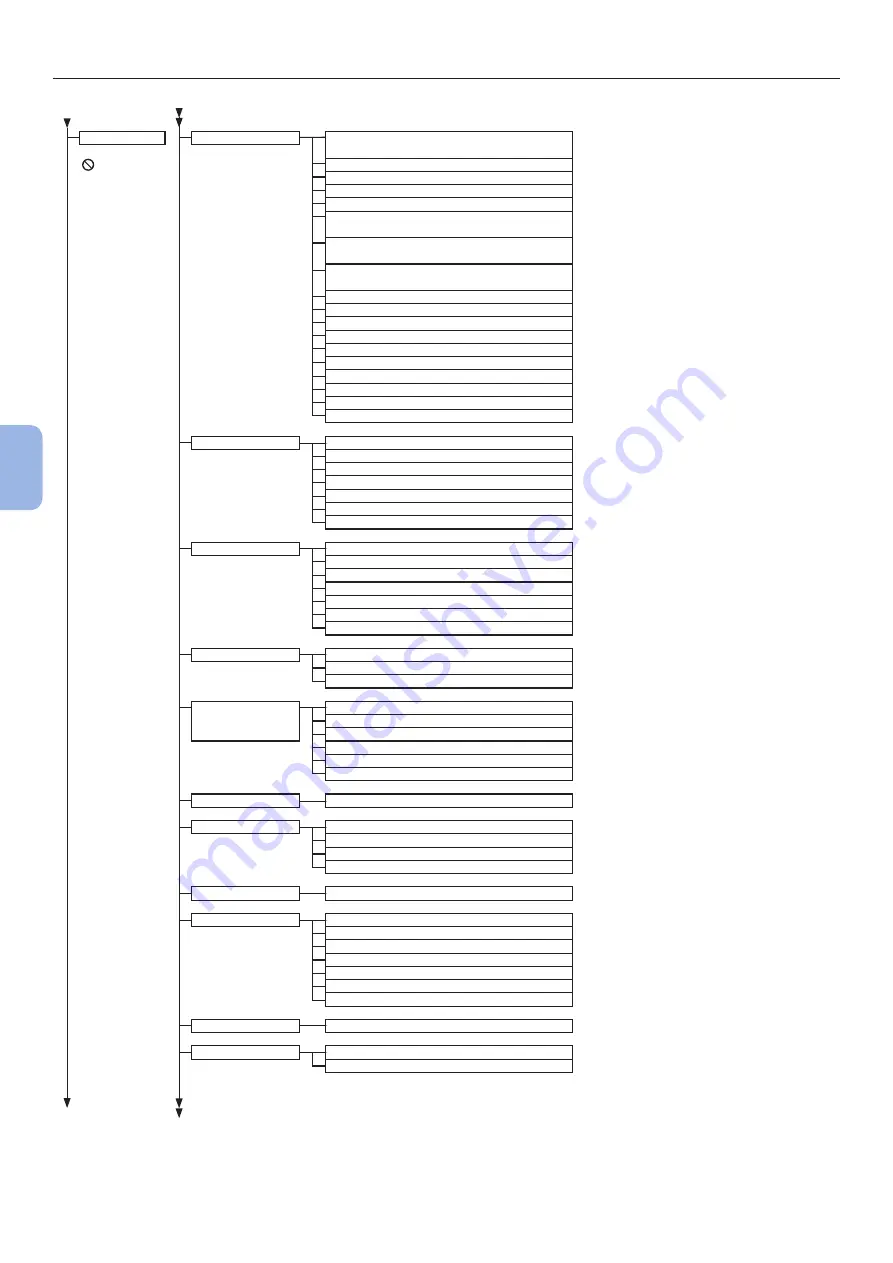
Admin Setup
Network Setup
Enabling Default Gateway
(When Wireless LAN is installed)
: You must input
a password.
Wired (Enable)
TCP/IP (Enable)
NetBIOS over TCP (Enable)
IP Address Set (Auto)
IPv4 Address
(When the IP address is set manually)
Subnet Mask
(When the IP address is set manually)
Gateway Address
(When the IP address is set manually)
DHCPv6 (Disable)
Web (Enable)
Telnet (Disable)
FTP (Disable)
IPSec (if enabled) (Disable)
SNMP (Enable)
Network Scale (Normal)
Gigabit Network (Disable)
Hub Link Setting (Auto Negotiate)
Network Factory Defaults
USB Setup
USB (Enable)
Speed (480Mbps)
Soft Reset (Disable)
Serial Number (Enable)
Offline Receive (Disable)
USB Memory Interface (Enable)
Connected Host (Normal)
Print Setup
Personality (Auto)
Copies (1)
Media Check (Enable)
A4/Letter Override (Yes)
Resolution (600dp)
X Dimension (210millimeter)
Y Dimension (297millimeter)
PS Setup
L1 Tray (Type1)
Network Protocol (RAW)
USB Protocol (RAW)
Private Print Setup
(When SD Memory
card is installed)
Verify job option (Disable)
Erase job option (No overwrite)
Keep job for (2 hours)
Job Limitation (Disable)
Verify job password (Off)
Job Auto Search (On)
Color Setup
CMY 100% Density (Disable)
Panel Setup
Near Life Status (Enable)
Near Life LED (Enable)
Idle Display (Toner Gauge)
Panel Contrast (0)
Buzzer Setup
Paper Jam Error Buzzer Volume (Off)
Time Setup
Date Format (dd/mm/yyyy)
Time Zone (+0:00)
Daylight Saving (Off)
Setting method (Manual Setup)
SNTP Server (Primary)
SNTP Server (Secondary)
Time Setting (01/01/2000 00 :00)
Power Setup
Auto Power Off (Auto Config)
Tray Setup
Unit Of Measure (millimeter)
Default Paper Size (A4)
To NEXT PAGE
Содержание Pro8432WT
Страница 1: ... 1 Pro8432WT ...
Страница 128: ...46603902EE Rev2 www oki com printing November 2017 ...