background image

6  

  MPS711c  

  English 

Print Media Settings

Always make sure the media setting 
matches the print media you are 
using.

Improper media settings:
• cause poor quality printing
• cause flaking
• can damage the printer

Note 

Printer driver settings override 

printer menu settings.

Default Settings

The default media weight setting 

for Tray1 is Light. 
The default setting for the MP 

(Multi Purpose) Tray is Medium.

Resetting to the Defaults 

Note

A password is required  to 

access this area of the printer 

menu. If you have a System 

Administrator, only they can 

reset the defaults.

1. Press 

E

NTER

.

2. Press the down arrow key to 

move down to 

Admin Setup

Press 

E

NTER

.

3. Enter the administrative 

password (the default 

password is aaaaaa).
a. Press the up arrow key (a to 

z, 0 to 9) or the down arrow 

key (9 to 0, z to a) to scan 

through the various 

numbers and letters of the 

alphabet. 

b. Press 

E

NTER

.

c. Repeat a and b above for 

each digit of the password.

4. Press 

E

NTER

.

5. Press the down arrow key to 

move down to 

Settings

. Press 

E

NTER

.

6. Press 

E

NTER

 to select 

Reset 

Settings

7. Press 

E

NTER

 to select 

Execute

.

The printer resets and returns 

to the on-line state.

Содержание MPS711c

Страница 1: ...Handy Reference Guide de référence pratique MPS711c 59406901 my okidata com ...

Страница 2: ...a Jams 14 Troubleshooting 22 Service Support 23 Commande de fournitures 24 Utilisation des menus de l imprimante 25 Déplacement 25 Sommaire des menus 26 Paramètres de support d impression 27 Paramètres de support d impression 28 Bacs 1 2 et 3 optionnel 29 Supports d impression utilisables 29 Chargement des supports d impression 30 Bac multifonction 31 Supports d impression utilisables 31 Chargemen...

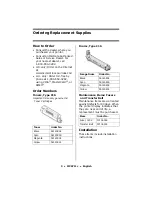
Страница 3: ...rder Numbers Toners Type C16 Important Use only genuine Oki Toner Cartridges Drums Type C16 Maintenance Items Fusers and Transfer Belt Maintenance items are warranted against defects for 90 days When the printer display indicates that they are near end of life a replacement must be purchased Installation These items include installation instructions Toner Order No Black 52123804 Cyan 52123803 Mage...

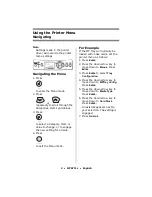
Страница 4: ...or a Value 4 Press to exit the Menu mode For Example If the MP Tray will normally be loaded with index cards set the printer menu as follows 1 Press ENTER 2 Press the down arrow key to move down to Menus Press ENTER 3 Press ENTER to select Tray Configuration 4 Press the down arrow key to move down to MPTray Config Press ENTER 5 Press the down arrow key to move down to Media Type Press ENTER 6 Pres...

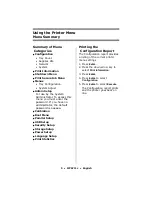
Страница 5: ...sword If you have no administrator the default password is aaaaaa Calibration Boot Menu Parallel Setup USB Setup Security Setup Storage Setup Power Setup Language Setup Print Statistics Printing the Configuration Report The Configuration report provides a listing of the current printer menu settings 1 Press ENTER 2 Press the down arrow key to select Print Information 3 Press ENTER 4 Press ENTER to...

Страница 6: ... this area of the printer menu If you have a System Administrator only they can reset the defaults 1 Press ENTER 2 Press the down arrow key to move down to Admin Setup Press ENTER 3 Enter the administrative password the default password is aaaaaa a Press the up arrow key a to z 0 to 9 or the down arrow key 9 to 0 z to a to scan through the various numbers and letters of the alphabet b Press ENTER ...

Страница 7: ...river as you print the job Media Weight Settings Media weight settings can be made in the printer menu or the printer driver Light 16 17 lb US Bond 60 63 g m Medium Light 18 lb US Bond 64 74 g m2 Medium 20 24 lb US Bond 75 89 g m2 Medium Heavy 24 28 lb US Bond 90 104 g m2 Heavy 28 32 lb US Bond 105 120 g m2 Ultra Heavy 1 Tray 1 32 50 lb US Bond 121 188 g m2 Ultra Heavy 2 50 59 lb US Bond 189 220 g...

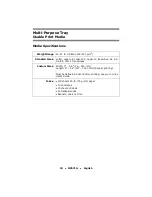
Страница 8: ... Weight Range 16 67 lb US Bond 60 250 g m2 Standard Sizes Letter Legal 14 Legal 13 5 Legal 13 Executive A4 A5 B5 Custom Sizes Min 5 5 x 8 3 140 x 211 mm Max 8 5 x 14 216 x 356 mm Must be defined in driver before printing see your on line User s Guide Capacity 350 sheets of 21 lb 80 g m2 paper ...

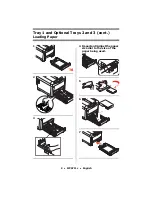
Страница 9: ...9 MPS711c English Tray 1 and Optional Trays 2 and 3 cont Loading Paper 1 2 3 4 Important Adjust the paper size dial to the size of the paper being used 5 6 7 3 ...

Страница 10: ...es Letter Legal 14 Legal 13 5 Legal 13 Executive A4 A5 A6 B5 Com 10 envelopes Custom Sizes Width 3 8 5 76 216 mm Length 5 52 127 1320 mm banner printing Must be defined in driver before printing see your on line User s Guide Takes 100 sheets 20 lb 75 g m2 paper 10 envelopes 20 sheets of labels 50 transparencies Banners one at a time ...

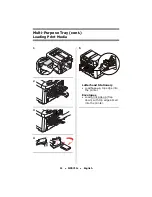
Страница 11: ...S711c English Multi Purpose Tray cont Loading Print Media 1 2 3 4 5 Letterhead Stationery Load face up top edge into the printer Envelopes Load print side up flap down with top edge aimed into the printer 3 ...

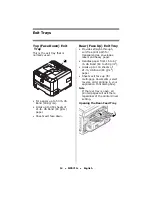
Страница 12: ...es straight through curl free print path for transparencies envelopes labels and heavy paper Handles paper from 16 to 67 lb US Bond 60 to 250 g m2 Holds up to 100 sheets of 21 lb US Bond 80 g m2 paper Sheets exit face up for multi page documents select reverse order printing in your application Print dialog box Note If the rear tray is open all printed pages will exit there regardless of the print...

Страница 13: ...he printer waits before going into standby mode The default is 1 minute This saves energy but the printer requires time to warm up when it receives a print job or if you want to enter the menu and change settings For more information see your on line User s Guide ...

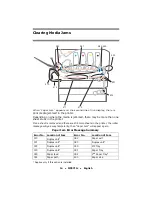
Страница 14: ...e still more sheets in the printer the initial message will go away temporarily then Paper Jam will appear again Paper Jam Error Message Summary Error No Location of Jam Error No Location of Jam 370 Duplex unit Applies only if this option is installed 382 Paper exit 371 Duplex unit 383 Duplex unit 372 Duplex unit 390 MP Tray 373 Duplex unit 391 Paper Tray 380 Paper feed 392 2nd Paper tray 381 Pape...

Страница 15: ...15 MPS711c English Clearing Media Jams cont The box below contains a summary of the basic process for clearing jams For more details see the pages which follow Lower cover but do not latch ...

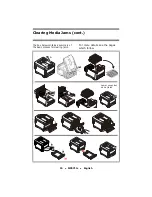
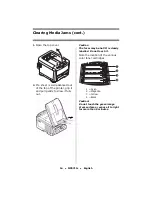
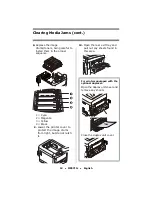
Страница 16: ...f the printer grip it and pull gently to draw it fully out Caution The fuser may be hot It is clearly labelled Do not touch it Note the location of the various color toner cartridges 1 Cyan 2 Magenta 3 Yellow 4 Black Caution Do not touch the green image drum surface or expose it to light for more than 5 minutes ...

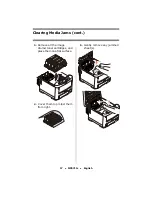
Страница 17: ...17 MPS711c English Clearing Media Jams cont 3 Remove all the image drums toner cartridges and place them on a flat surface 4 Cover them to protect them from light 5 Gently remove any jammed sheet s ...

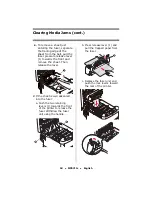
Страница 18: ...towards the front and remove the sheet Then release the lever 7 If the sheet is well advanced into the fuser a Push the two retaining levers 1 towards the front of the printer to release the fuser Withdraw the fuser unit using the handle b Press release lever 1 and pull the trapped paper from the fuser c Replace the fuser unit and push the lock levers toward the rear of the printer ...

Страница 19: ...sequence 1 Cyan 2 Magenta 3 Yellow 4 Black 9 Lower the printer cover to protect the image drums from light but do not latch it 10 Open the rear exit tray and pull out any sheets found in this area For printers equipped with the optional duplexer Open the duplex unit cover and remove any sheets Close the duplex unit cover ...

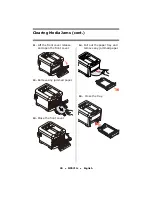
Страница 20: ...nglish Clearing Media Jams cont 11 Lift the front cover release and open the front cover 12 Remove any jammed paper 13 Close the front cover 14 Pull out the paper tray and remove any jammed paper 15 Close the tray ...

Страница 21: ... English Clearing Media Jams cont 16 Press down on the printer cover to latch it For printers equipped with the optional second paper tray Pull out the second paper tray and remove any jammed paper Close the tray ...

Страница 22: ... When an error message appears on the display press HELP The display shows information that will help you correct the error including clearing paper jams Use the ON LINE key to move through the Help information For more information on clearing paper jams see Clearing Media Jams on page 14 ...

Страница 23: ...ties troubleshooting Product news and much more Call 1 800 654 3282 OKI is a registered trademark of Oki Electric Industry Company Ltd AmEx is a registered trademark of American Express Co MasterCard is a registered trademark of MasterCard International Inc VISA is a registered trademark of Visa Windows is either a registered trademark or trademark of Microsoft Corporation in the United States and...

Страница 24: ...Éléments d entretien Unités de fusion et courroie de transfert Les éléments d entretien sont garantis contre tout défaut pendant 90 jours Lorsque l imprimante indique que leur durée utile est presque arrivée à sa fin un élément de remplacement doit être acheté Installation Ces éléments comprennent des directives d installation Cartouche de toner N de réf Noir 52123804 Cyan 52123803 Magenta 5212380...

Страница 25: ... une valeur 1 Appuyez sur pour quitter le mode Menu Exemple Si le bac MF est utilisé pour les cartes d index configurez le menu d impression comme suit 1 Appuyez sur ENTER 2 Appuyez sur la touche fléchée vers le bas jusqu à ce que Menu s affiche Appuyez sur ENTER 3 Appuyez sur ENTER pour sélectionner Tray Configuration Config des bacs 4 Appuyez sur la touche fléchée vers le bas jusqu à ce que MPTr...

Страница 26: ...r défaut est aaaaaa Calibration Étalonnage Boot Menu Menu démarrage Parallel Setup Configuration parallèle USB Setup Configuration USB Security Setup Paramètres de sécurité Storage Setup Configuration de stockage Power Setup Config économie énergie Language Setup Paramétrage de Langue Print Statistics Statisques d impression Impression du rapport de configuration Le rapport de configuration compre...

Страница 27: ... vous avez un administrateur système seul ce dernier peut restaurer les valeurs par défaut 1 Appuyez sur ENTER 2 Appuyez sur la touche fléchée vers le bas jusqu à ce que Admin Setup Config admin s affiche Appuyez sur ENTER 3 Entrez le mot de passe de l administrateur le mot de passe par défaut est aaaaaa a Appuyez sur la touche fléchée vers le haut a à z 0 à 9 ou vers le bas 9 à 0 z à a pour parco...

Страница 28: ...c dans le pilote d imprimante Paramètres de grammage Le paramétrage de grammage du support peut être effectué dans le pilote ou le menu de l imprimante Léger bond US de 16 à 17 lb 60 à 63 g m Moyen léger bond US de 18 64 à 74 g m2 Moyen bond US de 20 à 24 lb 75 à 89 g m2 Moyen lourd bond US de 24 à 28 lb 90 à 104 g m2 Lourd bond US de 28 à 32 lb 105 à 120 g m2 Très lourd 1 bac 1 bond US de 32 à 50...

Страница 29: ...b 60 à 250 g m2 Plage de formats de support Lettre légal 14 légal 13 5 légal 13 Executive A4 A5 B5 Formats personnalisés Min Bac 1 5 5 x 8 3 po 140 x 211 mm Max Bac 1 8 5 x 14 po 216 x 356 mm Doivent être définis dans le pilote d imprimante avant l impression consultez le Guide de l utilisateur en ligne Capacité 350 feuilles de 21 lb 80 g m ...

Страница 30: ...30 MPS711c Français Bacs 1 2 et 3 optionnel suite Chargement des supports d impression 1 2 3 4 Important Sélectionnez le format de papier correspondant au papier utilisé 5 6 7 3 ...

Страница 31: ...légal 13 5 légal 13 Executive A4 A5 A6 B5 et enveloppe COM 10 Plage de formats Largeur 3 à 8 5 po 76 à 216 mm Longueur 5 à 52 po 127 à 1320 mm Bannières Doivent être définis dans le pilote avant l impression voyez le Guide de l utilisateur en ligne pour plus d information Capacités 100 feuilles de 20 lb 75 g m 10 Enveloppes 20 Étiquettes des feuilles 50 transparents Bannières une à la fois ...

Страница 32: ...s supports d impression 1 2 3 4 5 Papier à en tête Chargez la face d impression vers le haut partie supérieure engagée dans l imprimante Enveloppes Chargez le côté d impression vers le haut volet face vers le bas le bord supérieur engagée dans l imprimante 3 ...

Страница 33: ...pression sans courbure et direct pour les transparents les enveloppes les étiquettes et le papier épais Peut contenir du papier bond US de 17 à 58 lb 64 à 220 g m2 Peut contenir jusqu à 100 feuilles de papier bond US de 20 lb 75 g m Les imprimés sont empilés face vers le haut pour les documents comportant plusieurs pages sélectionnez l impression en ordre inversé dans la boîte de dialogue Imprime ...

Страница 34: ...lle soit activé sur l imprimante Le paramètre par défaut est 1 minute Cela permet d économiser de l énergie mais l imprimante requiert un délai de préchauffage lorsqu elle reçoit un travail d impression ou lorsque vous accédez aux menus et modifiez des paramètres Pour plus de renseignements consultez le Guide de l utilisateur en ligne ...

Страница 35: ...l imprimante le message Paper Jam Bourrage de papier initial s effacera temporairement et s affichera de nouveau Messages d erreur de bourrage Numéro d erreur Emplacement Numéro d erreur Emplacement 370 Unité duplex recto verso S applique seulement si cette option est installée 382 Sortie de papier 371 Unité duplex 383 Unité duplex 372 Unité duplex 390 Bac MF 373 Unité duplex 391 Bac papier 380 Al...

Страница 36: ...égagement des bourrages suite Le tableau ci dessous présente un sommaire du processus de base pour éliminer les bourrages Pour plus d informations consultez les pages qui suivent Abaissez le capot mais ne le verrouillez pas ...

Страница 37: ...aire complètement de l imprimante Attention L unité de fusion peut être très chaude Une étiquette est apposée clairement sur cette partie Ne la touchez pas Notez l emplacement des différentes cartouches de toner de couleur 1 Cyan 2 Magenta 3 Jaune 4 Noir Attention Ne touchez pas la surface verte du tambour d impression N exposez jamais la cartouche du tambour d impression à la lumière pendant plus...

Страница 38: ...c Français Dégagement des bourrages suite 3 Retirez les cartouches tambour toner et placez les sur une surface plane 4 Couvrez les pour les protéger contre la lumière 5 Retirez délicatement toute feuille bloquée ...

Страница 39: ...ille Relâchez ensuite le levier 7 Si la feuille est bien avancée dans l unité de fusion a Poussez les deux leviers de verrouillage 1 vers l avant de l imprimante pour libérer l unité de fusion Sortez ensuite l unité de fusion en utilisant sa poignée b Poussez le levier de verrouillage 1 et tirez le papier coincé de l unité de fusion pour le sortir c Remettez en place l unité de fusion et poussez l...

Страница 40: ...ée 1 Cyan 2 Magenta 3 Jaune 4 Noir 9 Abaissez le capot de l impri mante pour protéger les cartouches de la lumière mais ne le verrouillez pas 10 Ouvrez le bac de sortie arrière et retirez toute feuille qui s y trouverait Si votre imprimante est dotée de l unité duplex recto verso Ouvrez le capot Retirez les feuilles coincées dans cette partie Fermez le capot ...

Страница 41: ...urrages suite 11 Soulevez le loquet du capot avant et ouvrez le capot avant en le tirant 12 Retirez tout papier coincé 13 Fermez le capot avant 14 Sortez le bac à papier et retirez tout papier bourré à l intérieur 15 Fermez le bac à papier ...

Страница 42: ... des bourrages suite 16 Fermez le capot en exerçant une pression pour le verrouiller Si votre imprimante est dotée de deuxième bac à papier Sorte le deuxième bac à papier Retirez les feuilles coincées dans cette partie Fermez le bac ...

Страница 43: ...r s affiche appuyez sur HELP AIDE L affichage indique des renseignements qui vous aideront à supprimer l erreur y compris comment dégager les bourrages Utilisez la touche ON LINE pour parcourir les renseignements d aide Pour plus d information sur l élimination des bourrages consultez Dégagement des bourrages es page 35 ...

Страница 44: ...sitez MY OKIDATA COM anglais uniquement 24 heures sur 24 7 jours sur 7 Composez le 1 800 654 3282 Oki est une marque déposée de Oki Electric Industry Company Ltd AmEx est une marque déposée de American Express Co MasterCard est une marque déposée de MasterCard International Inc VISA est une marque déposée de Visa Windows est une marque de commerce ou une marque déposée de Microsoft Corporation aux...

Отзывы: