- 215 -
10. Operating Management/Specifications
Saving Power Consumption with the Power Save
Function
The machine has three Power Save modes: Power Save, Sleep, and Deep Sleep.
In Power Save mode, the display screen turns off and the power saving indicator lights up or
blinks.
Press the
(POWER SAVE) button to enter Power Save mode.
After being left unoperated for a certain period of time (a minute by factory default), the
machine automatically enters Power Save mode.
After being left unoperated for a certain period of time (15 minutes by factory default) in
Power Save mode, the machine enters Sleep mode, Deep Sleep mode.
• For details on how to change the idle time before entering Power Save mode, see "Setting the Length of Idle Time
Before Entering Power Save Mode".
• For details on how to change the idle time before entering Sleep mode, see "Setting the Length of Idle Time Before
Press the
(POWER SAVE) button to recover from Power Save mode. The machine also
recovers from Power Save mode, when some data is received from a computer or another
device, or a document is set.
• Setting the Length of Idle Time Before Entering Power Save Mode
• Setting the Length of Idle Time Before Entering Sleep Mode
• Restrictions in Power Saving Function
• Automatically Turning the Machine Off (Auto Power Off)
• Setting the Length of Idle Time Before Auto Power Off Works
1
Press [Device Settings] on the touch panel.
2
Press
or
several times and press [Admin Setup].
3
Enter the administrator name and password and press [OK].
The factory default administrator name and password are "admin" and "999999"
respectively.
4
Press
or
several times and press [Manage Unit].
5
Press [Power Save].
6
Press [Power Save Time].
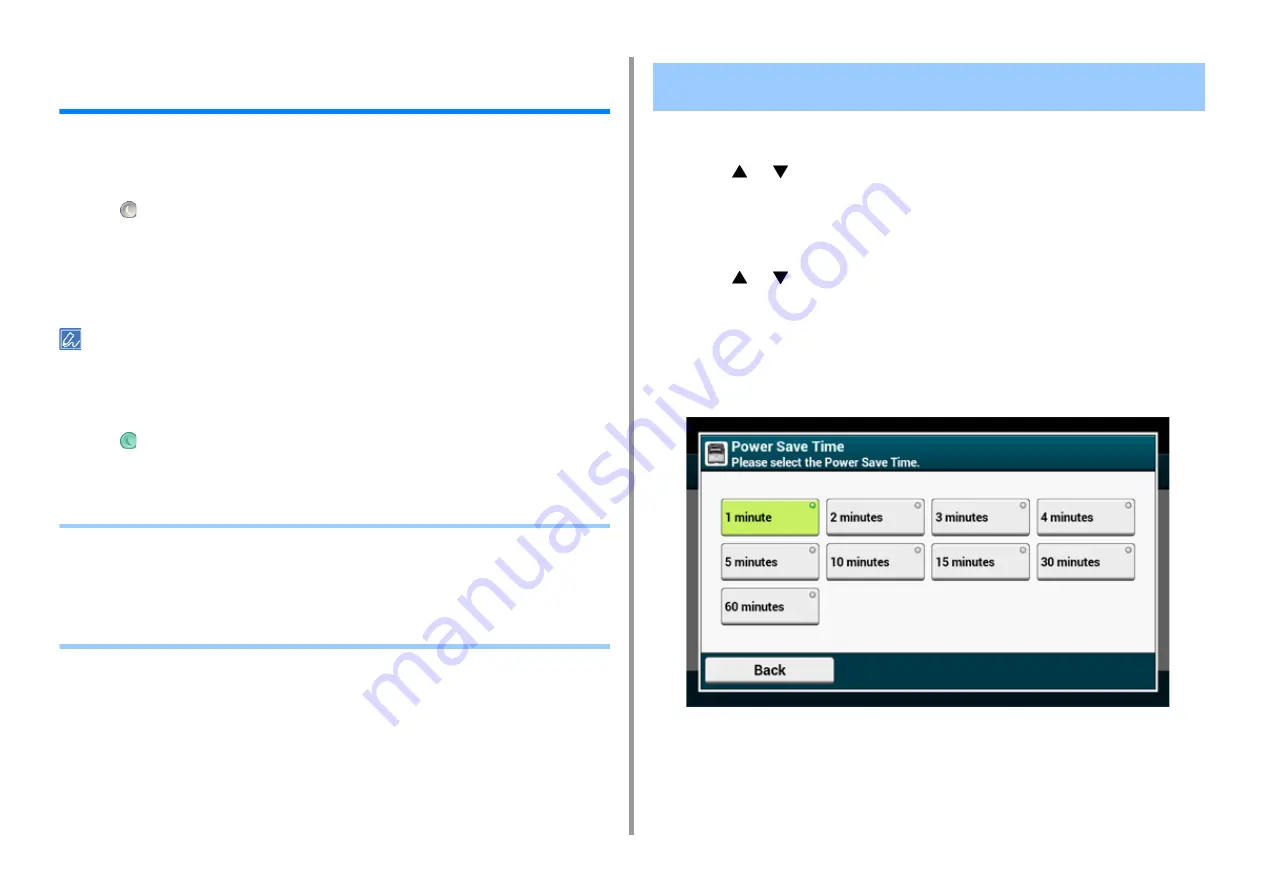
7
Select transition time.
Setting the Length of Idle Time Before Entering Power Save
Mode
Содержание MC573
Страница 1: ...MC573 ES5473 MFP User s Manual...
Страница 17: ...17 2 Setting Up Side view when the additional tray unit is installed...
Страница 22: ...22 2 Setting Up 13 Hold the handle B to close the scanner unit...
Страница 35: ...35 2 Setting Up 1 Plug the power cord into the power connector 2 Plug the power cord into the outlet...
Страница 41: ...41 2 Setting Up 7 Replace the paper cassette into the machine Push the paper cassette until it stops...
Страница 78: ...78 2 Setting Up 10 Click Complete 11 Click Next If the following dialog box is displayed click Yes...
Страница 107: ...4 Copy Copying Cancelling Copying Specifying the Number of Copies Descriptions of Screens for Copy...
Страница 131: ...131 6 Print 5 Change the settings in each tab to suit your needs 6 Click OK 7 Click Print on the Print screen...
Страница 143: ...143 6 Print Supply Levels Panel Item Description 1 Consumables Displays the remaining amount of consumables...
Страница 145: ...7 Fax Basic Operations of Fax Functions Setting for Receptions Names and Functions of Screen Items for Fax...
Страница 148: ...148 7 Fax A fax that is being sent is displayed on the top of the list 5 Press Yes on a confirmation screen...
Страница 225: ...46472402EE Rev3...


