


- 35 -
2. Setting Up
Connecting This Machine to a Computer
Connect the machine to the computer using any of the following four methods.
• Connecting with a LAN Cable
• Connecting over a Wireless LAN Connection (Only When the Wireless LAN Module is
• Connecting with a USB Cable
• Connecting Directly over a Wireless LAN Connection (Only When the Wireless LAN
• Install this machine in a place with a good view and near a wireless access point or wireless device. (We suggest that
the distance between the machine and the wireless device be 30 m or less.)
• "Connecting via a Wireless LAN Access Point" and "Connecting Directly over a Wireless LAN Connection" cannot be
used at the same time.
• If the machine is used in a wireless network environment, the machine does not enter Deep Sleep mode but enters
Sleep mode.
• When communicating with devices out of the segment over a wireless LAN connection, set [Enabling Default
Gateway] to [Wireless].
• Do not place any electric appliances that emit weak radio waves (such as microwaves or digital cordless telephones)
close to the machine.
• If there is metal, aluminum sash, or a reinforced concrete wall between the machine and wireless LAN access points
or wireless devices, connections may be harder to be established.
• The communication speed of a wireless LAN connection may be slower than that of a wired LAN or USB connection
depending on the environment. If you want to print big data such as a photo, it is recommended to connect using a
LAN cable or USB cable.
• Outdoor use of IEEE802.11a (W52/W53) is prohibited by the Radio Law. Use IEEE802.11a (W52/W53) only indoors.
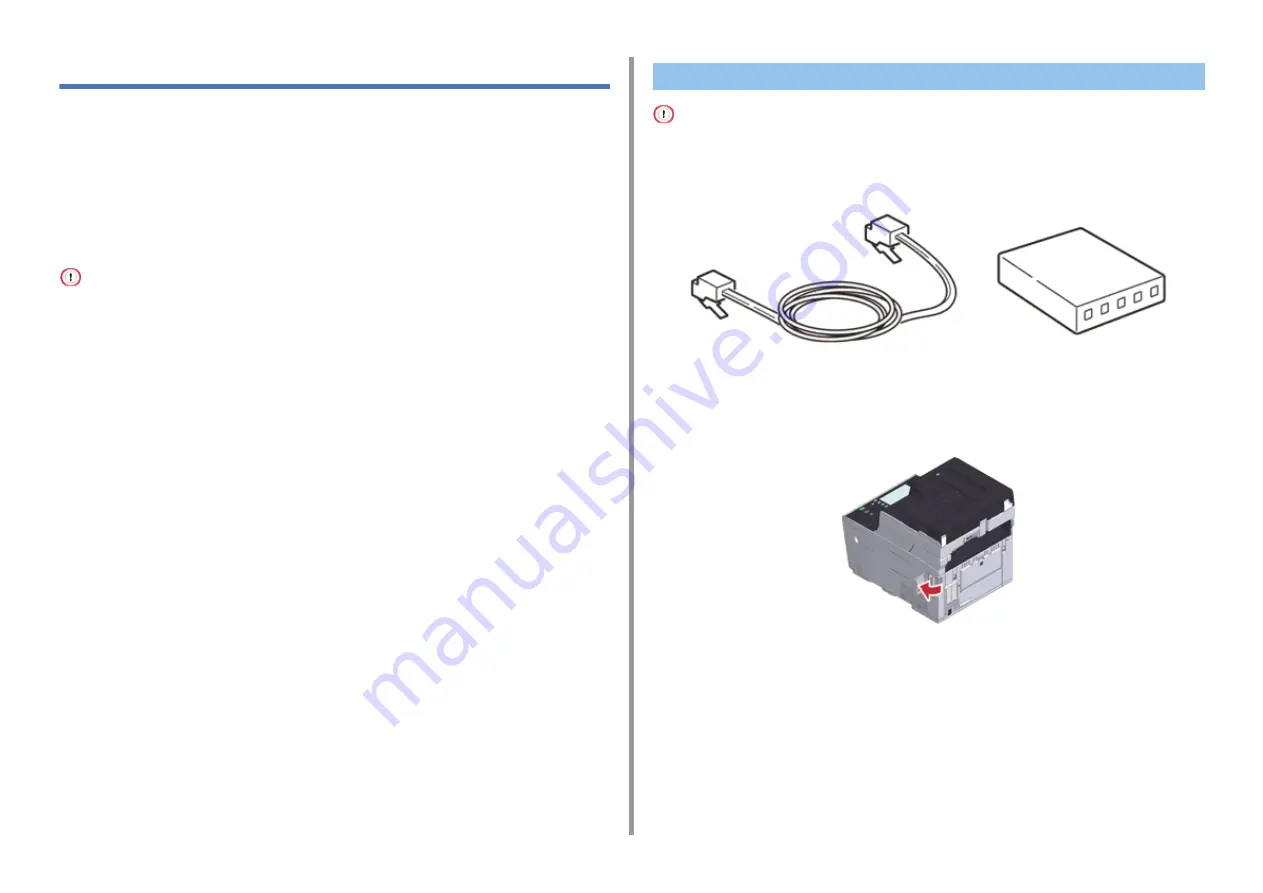
A LAN cable (category 5e or higher, twist pair, straight) is not supplied.
1
Prepare a LAN cable (category 5e or higher, twist pair, straight) and hub.
2
Check that the machine and computer are turned off.
3
Open the interface cover on the back side of the machine pressing the center
part of it.
Connecting with a LAN Cable
Содержание ES5473
Страница 1: ...MC573 ES5473 MFP User s Manual...
Страница 16: ...16 2 Setting Up Side view when the additional tray unit is installed...
Страница 21: ...21 2 Setting Up 13 Hold the handle B to close the scanner unit...
Страница 34: ...34 2 Setting Up 1 Plug the power cord into the power connector 2 Plug the power cord into the outlet...
Страница 41: ...41 2 Setting Up 7 Replace the paper cassette into the machine Push the paper cassette until it stops...
Страница 46: ...46 2 Setting Up 9 Make sure that the software is successfully installed and then click Complete 10 Click Next...
Страница 75: ...4 Copy Copying Cancelling Copying Specifying the Number of Copies Descriptions of Screens for Copy...
Страница 99: ...99 6 Print 5 Change the settings in each tab to suit your needs 6 Click OK 7 Click Print on the Print screen...
Страница 111: ...111 6 Print Supply Levels Panel Item Description 1 Consumables Displays the remaining amount of consumables...
Страница 113: ...7 Fax Basic Operations of Fax Functions Setting for Receptions Names and Functions of Screen Items for Fax...
Страница 116: ...116 7 Fax A fax that is being sent is displayed on the top of the list 5 Press Yes on a confirmation screen...
Страница 194: ...46472402EE Rev1...