1
English
Install the Tray
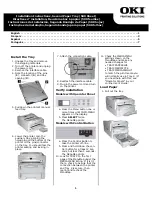
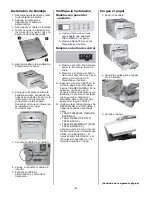
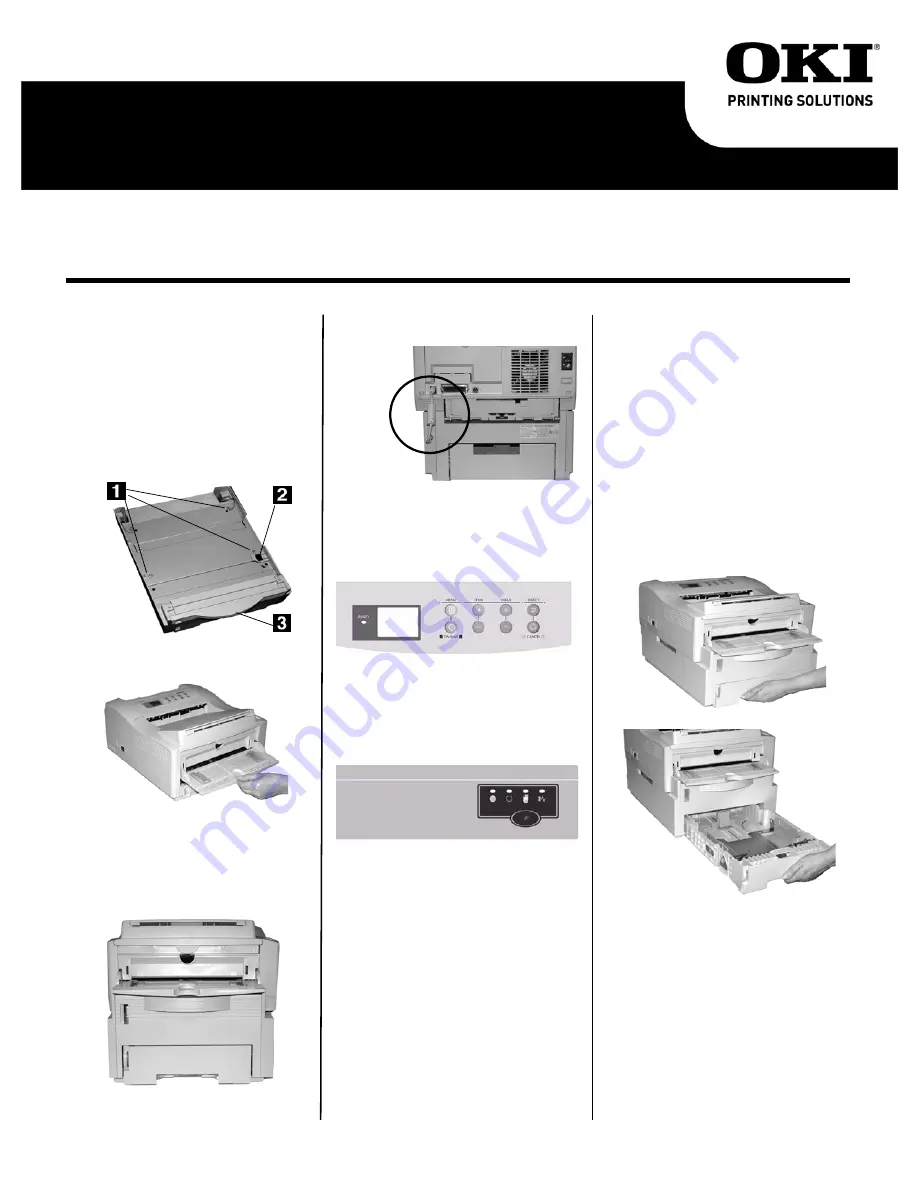
1. Unpack the tray and remove
the shipping materials.
2. Turn off the printer and unplug
the power cord.
3. Remove the interface cable.
4. Note the location of the pins
(
1
), connector (
2
) and tray
opening (
3
).
5. Pull down the printer’s manual
feed tray.
6. Lower the printer onto the
auxiliary tray, aligning the
holes/plug on the bottom of the
printer on the pins/connector
on the tray. You should feel the
printer seating and locking in
place.
7. Attach the connection cable.
8. Reattach the interface cable.
9. Plug in the power cord and turn
on the printer.
Verify installation
Models with Operator Panel
a. Press the Menu button one or
more times until INFO. MENU
appears on the display.
b. Press
SELECT
twice.
The MenuMap prints.
Models with Control Button
a. Press the Control Button to
take the printer off-line.
b. Press and hold down the con-
trol button for at least 2 sec-
onds, but less than 5 seconds.
The MenuMap prints.
10. Look for TRAY2 on the first
page of the MenuMap under the
MEDIA MENU listing. If it isn’t
there, check to be sure that the
connection between the printer
and Tray 2 is secure, then
reprint and recheck the
MenuMap.
11. Check the MEDIA MENU
settings shown on the
MenuMap and make any
needed changes for
• TRAY2 PAPERSIZE
• TRAY2 MEDIATYPE
• TRAY2 MEDIAWEIGHT
to match the print media you
will normally use in Tray 2. (If
you need help with this, see
“Operator Panels” in your
on-line User’s Guide.
Load Paper
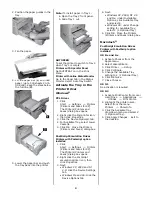
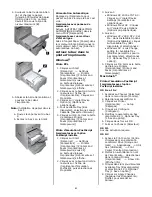
1. Pull out the tray.
English . . . . . . . . . . . . . . . . . . . . . . . . . . . . . . . . . . . . . . . . . . . . . . . . . . . . . . . . . . . . . . . . . . . . . . . . . . . . . . . 1
Français . . . . . . . . . . . . . . . . . . . . . . . . . . . . . . . . . . . . . . . . . . . . . . . . . . . . . . . . . . . . . . . . . . . . . . . . . . . . . . 3
Español . . . . . . . . . . . . . . . . . . . . . . . . . . . . . . . . . . . . . . . . . . . . . . . . . . . . . . . . . . . . . . . . . . . . . . . . . . . . . . . 5
Português . . . . . . . . . . . . . . . . . . . . . . . . . . . . . . . . . . . . . . . . . . . . . . . . . . . . . . . . . . . . . . . . . . . . . . . . . . . . . 7
Installation Instructions, Second Paper Tray (500 Sheet)
Directives d' installation, Deuxième bac à papier (500 feuilles)
Instrucciones de Instalación, Segunda Bandeja de Papel (500 hojas)
Instruções de instalação, Segunda bandeja para papel (500 folhas)

