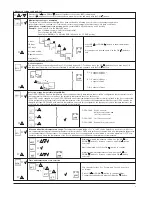
Monitoring of energy consumption
The thermostat calculates average time it has been switched on allowing you to monitor your energy consumption.
In the thermostat you can read out:. Total switch-on time in percentage in the latest 2 days, 30 days or 365 days.
Calculation of operational costs per day: (switch-on time:100) x kW x kWh-price x 24 h per day
Example: Read-out: 30 % in the latest 365 days
Size of heating system: 1,2 kW (ask the installer)
Cost of power: 0,2 EUR / kWh
Calculation: (30:100) x 1,2 kW x 0,2 EUR / kWh x 24 h = 1,7 EUR per day
4. Advanced settings and read-out
4-event sequence
The present event sequence flashes: Days 1-5, followed by days 6-7. To change, press the UP (
) button until you have days 1-6
and then day 7 flashing, or all 7 days are flashing. Select the required sequence with the OK ( ) button.
☞
✚
☞
☞
5-2: 4 events in 5 days +
2 events in 2 days.
6-1: 4 events in 6 days +
2 events in 1 day
7-0: 4 events in 7 days
☞
☞
}
2 days
30 days
365 days
Software version
Regulation sensor
Limit sensor
(visible if configurated as OCD3)
}
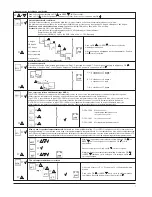
Max and min allowed temperature range. The temperature setting range of +5˚ to +40˚C can be limited to prevent a too high or too
low temperature being selected under manual or comfort mode. For OCD3 with limit sensor the max. and min. temperature range refer
to the temperature of the limit sensor. For example: A wood floor covering should not be allowed to exceed a maximum of 27˚C. Low
limitation is used where the temperature of the floor is required never to fall below the minimum set temperature.
Time and temperature scale selection
☞
☞
☞
☞
Maximum allowed temperature setting. Use the UP (
) or
DOWN ( ) button to increase or reduce, and OK (
) button
to accept.
Next is displayed LoLi. Press OK ( ) button to continue.
Minimum allowed temperature setting. Use the UP ( ) or
DOWN ( ) button to increase or reduce and OK ( ) button
to accept.
You can select either ˚C or ˚F scale, and 12 or 24 hour clock
as follows:
Press UP ( ) or DOWN ( ) button to change settings.
Confirm the required scale with the OK button ( ) button.
☞
☞
}
☞
☞
☞
☞
Press both UP ( ) and DOWN ( ) buttons together for 3 seconds. INFO is displayed.
Press UP( ) button until you reach the desired sub menu. Select the sub menu with the OK (
) button.
Press UP ( ) or DOWN ( ) button to show the different
readouts.
No changes can be made here. Use the OK ( ) button to
end.
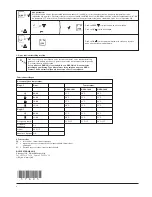
Selection of type (only visible in type OCD3)
Type OCD3-1999 has a built-in temperature sensor and an externally temperature sensor. In this configuration the thermostat controls
the temperature within the room and use the externally temperature sensor as limit sensor
Type OCD3 can be changed into type OCC3-1991 with an external temperature sensor that normally is placed in the floor construction.
In this configuration the thermostat controls the temperature of the floor and not the temperature within the room. OCD3 can also be
changed into type OCC3-1999 with a built-in temperature sensor. In this configuration the thermostat controls the temperature of the
room, and the external temperature sensor should not be installed.
OCD3-1999
With 2 sensors;
built-in room sensor and
incl. floor sensor 3m
OCC3-1991
Incl. floor sensor 3m
OCC3-1999
With built-in room sensor
☞
☞
}
☞
☞
☞
3


