background image

37

IT

KTL 1702 DG

AL PRIMO UTILIZZO

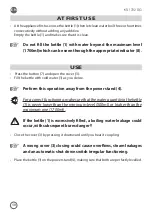
•  Al primo utilizzo dell’apparecchio sciacquare il bollitore (1) quindi far bollire dell’acqua 

pulita per tre quattro volte, consecutivamente senza aggiungere alcun additivo.

  Svuotare il bollitore (1) ed assicurarsi che sia pulito.

  Non riempire il bollitore (1) con acqua oltre il livello massimo 

(1700ml) visualizzabile tramite l’apposito indicatore (8).

UTILIZZO

•   Premere il pulsante (7) e aprire il coperchio (3).

•  Riempire con acqua fredda il bollitore (1) come desiderato.

  Eseguire questa operazione lontano dalla base di alimentazione 

(4).

  Per un corretto funzionamento, assicurarsi che la quantità d’acqua 

presente nel bollitore (1) non risulti mai inferiore al livello minimo 

(500ml) o superiore a quello massimo (1700ml).

  Se il bollitore (1) viene riempito eccessivamente, potrebbe esserci 

fuoriuscita di acqua bollente, con conseguente pericolo di ustioni !!

•  Chiudere il coperchio (3) premendolo verso il basso sino a sentirne l’aggancio.

  Un’errata chiusura del coperchio (3) potrebbe causare tracimazioni, 

fughe di vapore ed un funzionamento irregolare dell’interruttore 

automatico di spegnimento.

•  Posizionare il bollitore (1) sulla base di alimentazione (4), assicurandosi che entrambe 

siano perfettamente in piano.

Содержание KTL 1702 DG

Страница 1: ...tion Gebrauchsanleitung Libretto istruzioni d uso Instruction manual KTL 1702 DG DIGITAL KETTLE Bouilloire num rique Digitaler Wasserkocher Bollitore digitale FR DE IT EN Made in P R C Digital display...

Страница 2: ...F1 7 3 8 2 11a 11 4 1 9 10 4 6 6 1 5 8...

Страница 3: ...ecke auf INDICE Istruzioni per l uso e la manutenzione Istruzioni originali Gentile Cliente Grazie per avere acquistato KTL 1702 DG Si prega di leggere attentamente questo manuale prima di mettere in...

Страница 4: ...confermato dai risultati scientifici attualmente disponibili Questo apparecchio conforme alle direttive 2014 30 UE 2014 35 UE e 2011 65 UE Konformit tserkl rung Der Hersteller erkl rt auf seine Verant...

Страница 5: ...lavertit galement l utilisateur au mode de fonctionnement incorrect Instructions relatifs la s ret indispensable premier de l usage Lire attentivement les avertissements contenus dans le pr sent mode...

Страница 6: ...ence insuffisantes SEULEMENTsouslasurveillanced untiersresponsable de leur s curit ou bien lorsqu ils ont re u des instructions li es l utilisation de l appareil en toute s curit etqu ilsontint gr les...

Страница 7: ...es L emploi de tout appareil lectrique exige le respect de quelques r gles fondamentales En particulier ne pas toucher l appareil avec les mains mouill es ou humides ne pas utiliser l appareil nu pie...

Страница 8: ...er la fiche de la prise de courant lorsque l appareil n est pas utilis Si le c ble d alimentation de l appareil pr sente des signes de d t rioration le faire uniquement remplacer dans un centre de ser...

Страница 9: ...our de l appareil et de 50 cm au dessus Nejamaisimmergernilabouilloire 1 nilabased alimentation 4 dans l eau ou tout autre liquide Placer la bouilloire hors du rayon d action des enfants ou des animau...

Страница 10: ...dvertance et renverser l appareil Risque de br lures Placer l appareil loin des viers et des robinets Lorsdufonctionnement laprisedecourantdoit trefacilement accessible dans le cas o il s av rerait n...

Страница 11: ...age domestique et aux applications similaires comme points reste du personnel dans les magasins bureaux et autres environnements de travail fermes par les clients dans les h tels motels et autres habi...

Страница 12: ...e et consulter un m decin si n cessaire CARACT RISTIQUES Alimentation 220 240V 50 60Hz Puissance 1850 2200W Capacit maximale 1 7 litres Arr t automatique Protection contre la sur chauffe Base interne...

Страница 13: ...tte op ration loin de la base d alimentation 4 Pour un bon fonctionnement s assurer que la quantit d eau dans la bouilloire 1 nesetrouvejamaisen dessousduniveauminimal 500ml ou au dessus du niveau max...

Страница 14: ...la temp rature par d faut de 100 C Une fois la temp rature configur e atteinte l appareil mettra deux bips et le voyant led 11a s allume en vert Pour teindre l appareil appuyer sur le bouton d alluma...

Страница 15: ...nf rieure la temp rature programm e d environ 5 C l appareil chauffe l eau jusqu au moment o l on parvient la temp rature programm e La temp rature de l eau est maintenue pendant 2 heures Si l apparei...

Страница 16: ...gramm e s affiche l cran 40 C 50 C 60 C 70 C 80 C 90 C Pour teindre l appareil appuyer sur le bouton d allumage 11 ou soulever la bouilloire 1 de la base 4 ou d brancher la fiche de la prise de couran...

Страница 17: ...zl int rieurdel appareiletlefiltreavecund tergent vaisselleordinaire rincez abondamment et s chez les avant de les r utiliser Comment retirer les ventuels r sidus de calcaire l usage il pourrait se fo...

Страница 18: ...ment des autres d chets L utilisateur doit donc prendre l quipement ci dessus la fin de la vie dans les centres de collecte diff renci s appropri s pour les d chets lectroniques et lectro technique o...

Страница 19: ...ursachen kann Au erdem weist es den Benutzer auf falsche Betriebsart hin Vor dem Gebrauch unerl ssliche Sicherheitshinweise LesenSiedieHinweiseindiesemHandbuchaufmerksamdurch Es enth ltwichtigeInforma...

Страница 20: ...el an Erfahrung oderWissenbenutztwerden wennsievoneinerPerson dief rihreSicherheitverantwortlichist beaufsichtigt oder von ihr bez glich des sicheren Gebrauchs des Ger tes unterwie sen wurden und sie...

Страница 21: ...eaufdieangegebeneMaximalleistung DerGebrauchjedesElektroger tsbringtdieBeachtungvonGrundregeln mit sich Insbesondere Das Ger t nicht mit nassen oder feuchten H nden anfassen Das Ger t nicht barfuss be...

Страница 22: ...icht gebraucht wird den Stecker aus der Steckdose ziehen Wenn das Stromversorgungskabel dieses Ger ts besch digt ist darf es nur von einer autorisierten Servicestelle des Herstellers ersetzt werden we...

Страница 23: ...ihm mindestens 50 cm Platz lassen TauchenSiedenWasserkocher 1 unddieHeizbasis 4 niein Wasser oder in andere Fl ssigkeiten Den Wasserkocher au erhalb der Reichweite von Kindern oder Tieren aufstellen u...

Страница 24: ...das umkippen kann Verbrennungsgefahr StellenSiedasGer tvonSp lenundWasserh hnenentferntauf W hrend des Betriebs muss die Steckdose m helos erreichbar sein sollteesnotwendigsein dasGer tvonderStromvers...

Страница 25: ...endungen bestimmt wie Rastst tten von Personal in L den B ros und anderen Arbeitsumgebungen Betriebe f r Kunden in Hotels Motels und anderen Wohngebiete Umgebungen wie Bett und Fr hst ck Dieses Ger t...

Страница 26: ...n 1 Wasserkocher 2 Griff 3 Deckel 4 Heizbasis 5 T lle 6 LED Display eingestellte Wassertemperatur 7 Taste zum ffnen des Deckels 8 Standanzeiger 9 Stecker 10 Buchse 11 Einschalttaste Wassertemperatur E...

Страница 27: ...l 1 mit Wasser wie gew nscht DerKocherdarfnichtinderN hederHeizbasis 4 gef lltwerden F reinekorrekteFunktionsweise sichversichern dassdieimKocher 1 vorhandene Wassermenge nie unter dem Mindeststand 50...

Страница 28: ...i Erreichen der eingestellten Temperatur piepst das Ger t zweimal und die LED Leuchte 11a leuchtet gr n Ger t abschalten Einschalttaste 11 dr cken oder den Wasserkocher 1 von der Basis 4 nehmen oder d...

Страница 29: ...die eingestellte Temperatur umca 5 C ist erhitztdasGer tdasWasser bisdieTemperaturerreicht ist Die Wassertemperatur wird 2 Stunden lang aufrechterhalten Wenn das Ger t von der Basis abgehoben wird fun...

Страница 30: ...ur angezeigt 40 C 50 C 60 C 70 C 80 C 90 C Ger t abschalten Einschalttaste 11 dr cken oder den Wasserkocher 1 von der Basis 4 nehmen oder den Stecker an der Steckdose ziehen Nicht den Deckel ffnen um...

Страница 31: ...er mit normalen Geschirrsp lmitteln reinigen reichlich nachsp len und abtrocknen bevor man sie wieder verwendet Wie man eventuelle Kalkr ckst nde entfernt Mit der Zeit k nnen sich auf der Edelstahlpla...

Страница 32: ...m ssen Der Anwender muss daher die obengenanntenGer tezumLebenbeidenentsprechendendifferenziertenSammelstellenf relektronische und elektrotechnische Abfall entsorgen oder es an den H ndler zur ckgeben...

Страница 33: ...utente modalit operative non corrette Avvertenze relative alla sicurezza indispensabili prima dell uso Leggere attentamente le avvertenze contenute nelle presenti istruzioniinquantofornisconoimportant...

Страница 34: ...enza o conoscenza dello stesso SOLO se sorvegliate da una persona responsabiledellalorosicurezzaoseistruiteinmerito all utilizzosicurodell apparecchioeconsapevolidegli eventuali rischi derivanti da un...

Страница 35: ...cchio elettrico comporta l osservanza di alcune regole fondamentali In particolare non toccare l apparecchio con mani bagnate o umide non usare l apparecchio a piedi nudi non tirare il cavo di aliment...

Страница 36: ...ecchio non utilizzato Se il cavo di alimentazione di questo apparecchio danneggiato deve essere sostituito esclusivamente da un centro assistenza tecnica autorizzato dal costruttore poich sono necessa...

Страница 37: ...ecchio e 50 cm sopra Non immergere mai n il bollitore 1 n la base di alimentazione 4 in acqua o in altri liquidi Posizionareilbollitorefuoridalraggiodiazionedibambinio animaliedinmodotalecheilvaporech...

Страница 38: ...Pericolo ustioni Posizionare l apparecchio distante da lavelli e rubinetti Durante il funzionamento la presa di corrente deve essere facilmenteaccessibilenelcasoincuifossenecessarioscollegare l appare...

Страница 39: ...ato per essere utilizzato in altri ambienti quali aree di ristoro del personale in negozi uffici e altri ambienti di lavoro fattorie per clienti di alberghi motel e altri ambienti residenziali ambient...

Страница 40: ...ntelascottatura con acqua fredda e chiamare un medico se necessario CARATTERISTICHE TECNICHE Alimentazione 220 240V 50 60Hz Potenza 1850 2200W Capacit massima 1 7 litri Spegnimento automatico Protezio...

Страница 41: ...sta operazione lontano dalla base di alimentazione 4 Per un corretto funzionamento assicurarsi che la quantit d acqua presente nel bollitore 1 non risulti mai inferiore al livello minimo 500ml o super...

Страница 42: ...temperatura di default di 100 C Al raggiungimento della temperatura impostata l apparecchio emette due beep e la spia led 11a si accende di verde Per spegnere l apparecchio premere il pulsante di acce...

Страница 43: ...a inferiore a quella impostata di circa 5 C l apparecchio riscalda l acqua sino al raggiungimento della temperatura stessa La temperatura dell acqua viene mantenuta per 2 ore Sel apparecchiovienesolle...

Страница 44: ...a temperatura impostata 40 C 50 C 60 C 70 C 80 C 90 C Per spegnere l apparecchio premere il pulsante di accensione 11 oppure sollevare il bollitore 1 dalla base 4 oppure scollegare la spina dalla pres...

Страница 45: ...n normali detergenti per stoviglie risciacquando abbondantemente ed asciugandoli prima di riutilizzarli Come disincrostare eventuali residui di calcare Con l utilizzo sulla piastra in acciaio inox int...

Страница 46: ...tririfiuti L utente dovr pertanto conferirel apparecchiaturagiuntaafinevitaagliidoneicentridiraccoltadifferenziata dei rifiuti elettronici ed elettrotecnici oppure riconsegnarla al rivenditore al mome...

Страница 47: ...nt information about safe installation use and maintenance Keep this booklet with care for future reference Before using the appliance make sure that it is in perfect working order from a mechanical s...

Страница 48: ...ed on the bottom of the appliance For your safety we recommend to power the appliance by means of a differential circuit breaker RCD with an operating current of no more than 30 mA Should the wall out...

Страница 49: ...r socket Also make sure that all parts of the appliance liable to constitute a danger are made harmless particularly for children who could decide to use an old appliance as a toy The installation mus...

Страница 50: ...supplythroughexternaltimersorremote control systems Keep the power cord away from the appliance hot parts Do not leave the appliance unattended while it s working Do not place the working appliance ag...

Страница 51: ...Makesurethatthepowercordisnotinthewaywhenmovingaroundthe appliance in order to prevent that someone could even inadvertently pull it toppling the appliance Burns danger Place the appliance far from si...

Страница 52: ...ded for domestic use only It has been designed for use in environments like personnel service areas in shops offices and in other work environments farmhouses for hotels motels and other residential e...

Страница 53: ...se of an incident immediately wash the burn with cold water and call a medic if necessary TECHNICAL DATA Power supply 220 240V 50 60Hz Power 1850 2200W Max capacity 1 7 litres Automatic switch off Ove...

Страница 54: ...h cold water 1 as you desire Perform this operation away from the power stand 4 Foracorrectfunctioning makesurethatthewaterquantityinthekettle 1 is never lower than the minimum level 500ml or higher t...

Страница 55: ...ce starts itself at the default temperature of 100 C When it reaches the set temperature the appliance emits two beeps and the led indicator 11a lights up green To turn off the appliance press the pow...

Страница 56: ...C If the water temperature is lower than the set temperature by about 5 C the appliance heats the water until the temperature is reached The water temperature is maintained for 2 hours If the applianc...

Страница 57: ...11 The display shows the set temperature 40 C 50 C 60 C 70 C 80 C 90 C To turn off the appliance press the power button 11 or lift the kettle 1 from the stand 4 or disconnect the plug from the power s...

Страница 58: ...part and the filters with normal dishes detergents rinsing abundantly and drying them before using them again HOW TO DESCALE POSSIBLE LIMESTONE RESIDUES With use on the stainless steel plate inside th...

Страница 59: ...tteriesattheendoftheirusefullifemustbecollectedseparatelyfromotherwaste The usershouldtherefore taketheproducttoanappropriaterecyclingcentreforelectricalandelectronic waste or hand it to the dealer wh...

Страница 60: ...Ed 06 2020 OHMEX SA Route de Lully 5C 1131 Tolochenaz Switzerland www ohmex ch OHMEX SA Route de Lully 5C 1131 Tolochenaz Switzerland www ohmex ch...

Отзывы: