


ODYS - MDV 30
5
EN
1 Camera
Functions
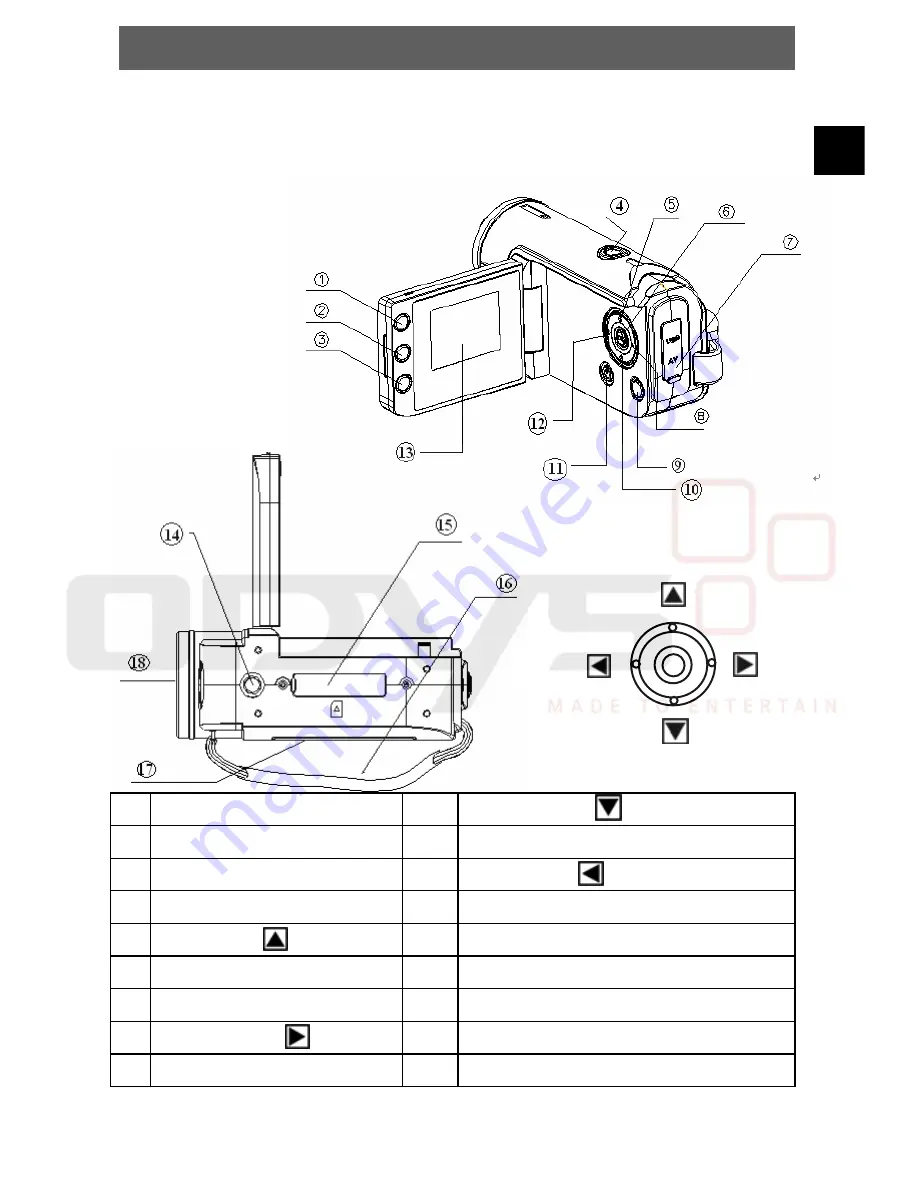
1.1 Overview
1
Display Button
10
Down button
2
LED On & Off Button
11
On & Off Button
3
Mode Button (DV/ DSC)
12
Left Button
4
Shutter Button
13
LCD Display
5 Up
Button 14
Tripod
Socket
6
OK Button
15
SD Card Slot
7
AV / USB Jacks
16
Wrist Strap
8 Right
Button 17
Battery
Cover
9 MENU
Button
18 Lens
OK
Up
Down
Left
Right


