OCZ Neutrino Скачать руководство пользователя страница 2

Neutrino Installation Guide

01

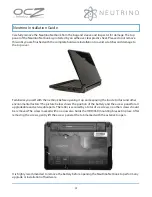
Carefully remove the Neutrino Netbook from the bag and sleeve and inspect it for damage. The top 
panel of the Neutrino Netbook is protected by an adhesive clear plastic sheet. Please do not remove 
this until you are finished with the complete hardware installation to avoid scratches and damage to 
the top cover. 

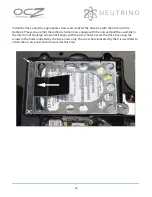
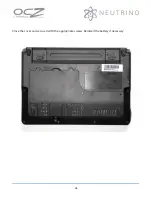
Familiarize yourself with the netbook before opening it up and exposing the inside to dust and other 
environmental factors! The picture below shows the position of the battery and the access panel for all 
upgradeable and serviceable parts. The latter is secured by a total of six screws, no other screws should 
be removed. The screw marked with an arrow also holds the HDD/SSD mounting bracket in place. After 
removing the screws, gently lift the access panel at the tab marked with the asterisk to open.

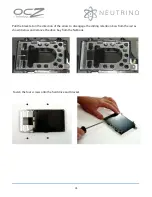
It is highly recommended to remove the battery before opening the Neutrino Netbook to perform any 
upgrade or installation of hardware. 

Содержание Neutrino

Страница 1: ...OCZNBIA10A INSTALLATION GUIDE...

Страница 2: ...opening it up and exposing the inside to dust and other environmental factors The picture below shows the position of the battery and the access panel for all upgradeable and serviceable parts The lat...

Страница 3: ...HDD SSD selected for this system needs to comply with the SATA standard The HDD drive bay is located underneath the access panel Carefully remove the two remaining screws marked by the short arrows a...

Страница 4: ...the black tab in the direction of the arrow to disengage the sliding retention bars from the rail as shown below and remove the drive bay from the Netbook Fasten the four screws onto the harddrive and...

Страница 5: ...he sliding retention bars engage with the rails and pull the assembly in the direction of the large arrow until it aligns with the screw holes Secure the drive bay using the screws in the holes indica...

Страница 6: ...the memory module in the slot and slightly tap it to ensure full insertion Then gently press the module down until it lies flat and engages with the retention clips as shown in the picture below Insta...

Страница 7: ...06 Close the cover and secure it with the appropriate screws Reinstall the battery if necessary...

Страница 8: ...port and technical information about your DIY Notebook visit www ocztechnology com All OCZ PRODUCTS include free technical support for direct expert advice Contact OCZ Technical support at 800 459 181...

Отзывы: