3.2.2 Starting the production,
1.
First choose the desired hardness level of the product by adjust the value
shown in the hardness indicator window.
NOTE: if you are unsure what value on the hardness is best for your mixture, start with a
hardness level of 4 since this is a middle value.
2.
Place a container under one of the drawn valves.
Lower the distribution handle slowly until ice cream
mixture comes out from the design cap and when it
occurs replace the handle to its original position
(This is to remove the air that still may be present in
the cooling cylinder).
Repeat the process for all draw valves and handles.
3.
Push the AUTO button; to start the
cooling process of the ice cream, when the resistance in the cooling cylinder is
according to the hardness value, then the machine will stop automatically.
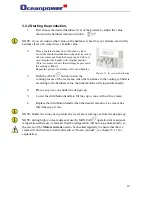
Picture 15: Ice cream distribution
4.
Place a cup or a cone under the design cap.
5.
Lower the distribution handle to fill the cup or cone with soft ice cream.
6.
Replace the distribution handle when the desired amount of ice cream has
filled the cup or cone.
NOTE: Rotate the cone our cup while the ice cream is coming out from the design cap
NOTE: during high ice cream demand, use the MANUAL operation for maximum
refrigeration efficiency, remember that the refrigeration will not stop automatically, so
the screen of the
Motors current
need to be checked regularly to ensure that the ice
cream will not become to hard and result in “frozen cylinder”, see chapter 5.1.1 for
explanation.
18
Содержание OPF130
Страница 5: ...Chapter 1 General information 5...
Страница 11: ...Chapter 2 INSTALLATION 11...
Страница 15: ...Chapter 3 OPERATING INSTRUKTION 15...
Страница 19: ...Chapter 4 CLEANING AND SANITIZING 19...
Страница 24: ...Chapter 5 TROUBLESHOOTING GUIDE 24...
Страница 28: ...2 Follow the mixing rate according to the manufacturer 3 Try to always use fresh mix 28...
Страница 29: ...Appendix A Electric connection chart 29...


