INSTALLATION (QUICK START GUIDE):
SUSTAINABILITY
OceanLED is committed to a sustainable future. Through constant product and design innovation, establishing better
working practices, and evaluating our supply chains, we are able to take measurable steps to creating true sustainability
in our business.
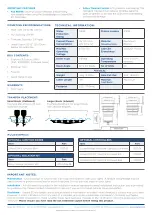
1.
Test light(s) before fitting.
2.
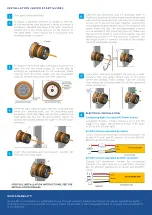
(1) Apply a generous amount of sealant to the rear
of the mounting tube assembly’s bezel to ensure a
complete unbroken seal around the light. Make sure
sealant fills in the recess groove on the reverse of
the light bezel. There should be a continuous and
unbroken bead of sealant.
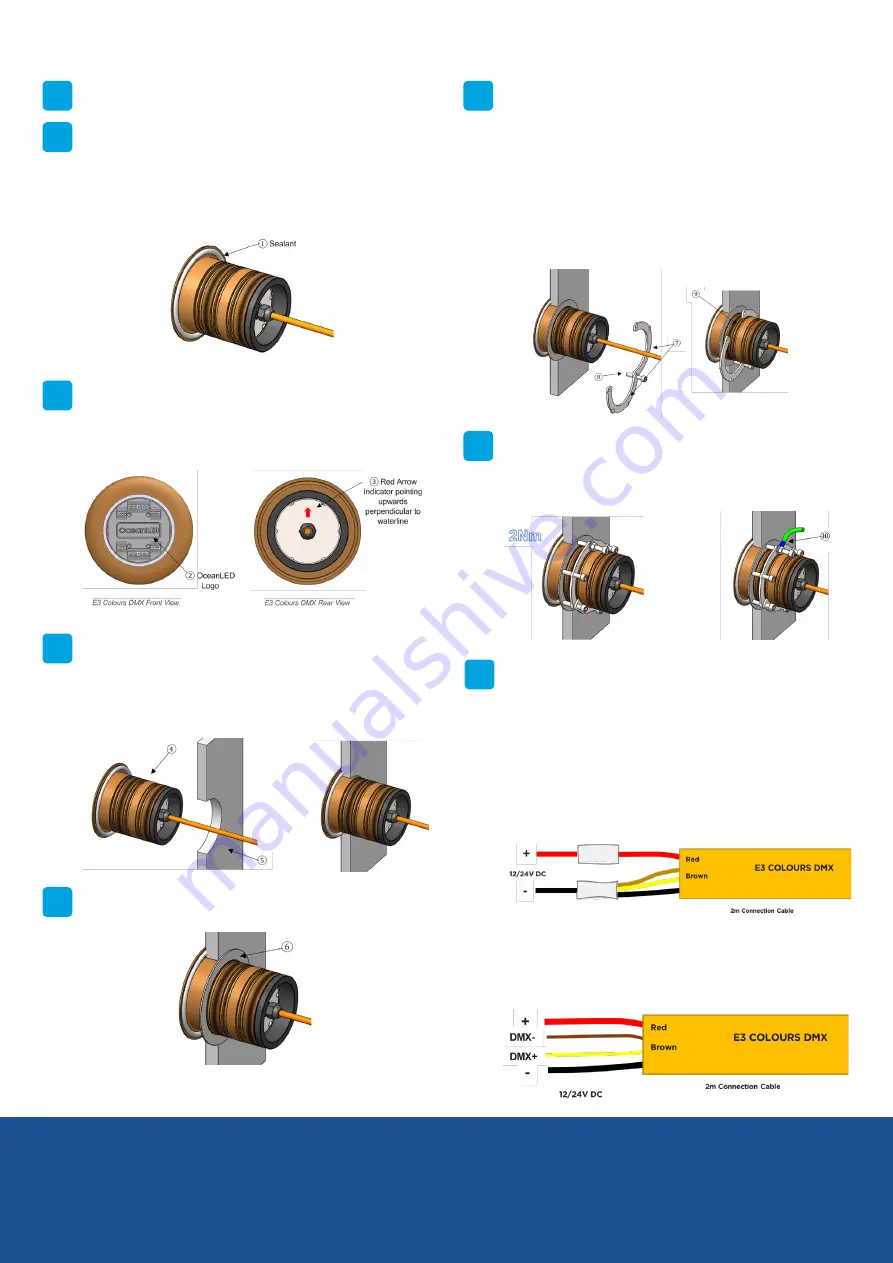
3.
To ensure the correct light orientation, position the
light with the red arrow sticker (3) on the rear lid
pointing up, perpendicular to the waterline. When
viewing from the front, make sure the OceanLED
logo (2) remains horizontal with the waterline.
4.
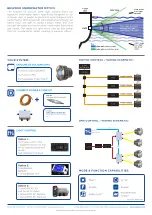
ELECTRICAL INSTALLATION:
Connecting light/s to your DC Power Source
OceanLED Explore models require a 12 or 24V DC
supply. This supply should be a minimum of 6A @12V
or 3A @ 24V DC per light.
E3 DMX Colours operated by switch
To use in DC switched mode; connect DC power +Ve
to the RED wire, and DC power -Ve to the BLACK,
BROWN & YELLOW wires
FOR FULL INSTALLATION INSTRUCTIONS, SEE THE
INSTALLATION MANUAL.
5.
Insert the stainless-steel compression washer (6)
over the mounting tube.
8.
E3 DMX Colours operated by DMX controller
Consult full installation manual for connection
method. This light requires a 2-way DMX Junction
Box for efficient distribution of power and the DMX
signal.
Feed the light cable through the hole in the hull and
insert the complete light unit (4) (mounting tube
as light cartridge) into the hull, pressing the
light hard into the hull (5) and twisting slightly to
spread the sealant behind the light to ensure good
adhesion.
6.
Take the two Clamping Clips (7) and align them to
form a circle, ensuring that you pair one threaded hole
with one non-threaded hole. Use one of the provided
screws (8) to secure the clips together, positioning
them approximately halfway down the length of the
screw. Insert the clips into the appropriate grooves
on the outside of the mounting tube (9). Make sure
the end of the screw is close to the washer. Use the
remaining screws to fix the two clips together. Use
the longer screw to connect the light to the vessel’s
cathodic protection system.
7.
Use a 5mm Allen key to tighten the locking screws,
ensuring that you apply thread lock at the point
where the threads make contact with the locking
ring. Attach the bonding cable (10) to the remaining
screw and secure