background image

85

Solutions:

Solutions:

positioning

Solutions:

positioning

 Note: To properly watch CANAL + using this product, carry out DVB-T channel search

when CANAL + is unsarambled.
     Form 12:30 p.m. to 1:30 p.m.
     From 7:00 p.m.to 8:30 p.m.

Solutions:

5 seconds

Solutions:

ASPECT

SLEEP

REC

EXIT

MENU

-/--

CH

REC MENU

TEXT

INDEX

SUBPAGE

HOLD

SIZE

REVEAL

REPEAT

MEDIA

SUBTITLE

TV/RADIO

AUDIO

/

I

II

INFO

RECALL

X - Troubleshooting

For any other problem that may occur on your device, please contact Customer Service.

Содержание OCEALEDCC195W2

Страница 1: ...OCEALEDCC195W2 COMBO TV LED 19 5 MPEG4 Guide d utilisation COMBO 19 5 MPEG4 LED TV User guide ...

Страница 2: ...éviter une accumulation de chaleur interne Laissez au moins un espace de 10cm à l arrière et au dessus de l appareil ainsi qu un espace de 5cm sur les côtés afin d éviter toute surchauffe Ne pas obstruer les ouvertures de ventilation par des objets tels que des journaux nappes rideau etc Pour empêcher les risques de feu ou de choc électrique n exposez pas l appareil à la pluie ou à l humidité Afin...

Страница 3: ...tilisé sous un climat tropical Si le cordon d alimentation est endommagé celui ci doit être remplacé par le fabricant son service après vente ou des personnes qualification similaire afin d éviter un danger Cet appareil doit être relié à un réseau électrique 230V 50Hz La prise d alimentation réseau est utilisée comme dispositif de déconnection ainsi la prise d alimentation doit demeurer aisément a...

Страница 4: ...ve mise à votre disposition www quefairedemesdechets fr Pour en savoir plus Mise en veille automatique La consommation en énergie de cet appareil en mode de fonctionnement et en mode de veille a été réduite Par ailleurs si aucune action n est enregistrée au bout de quatre heures l appareil entrera automatiquement en mode veille Il vous suffit d appuyer sur la touche Standby de la télécommande pour...

Страница 5: ...4 Sécurité ...

Страница 6: ...5 ...

Страница 7: ...ecteur multimédia I DVD IX Remarque importante X Dépannage XI Garantie Ce guide d utilisation est disponible dans les langues suivantes FR version originale EN translated from the original Toute autre traduction serait une traduction de la version originale Ce guide d utilisation ses modifications éventuelles ou toute nouvelle version est disponible sur notre site web Table des matières Page 1 Pag...

Страница 8: ...tre main voir figure 2 1 Le logement du pied se trouve au milieu du socle voir figure 1 2 Insérez l écran dans le logement du socle voir figure 2 3 Fixez l écran avec les quatre vis voir figure 3 4 Soulevez le téléviseur après le montage voir figure 4 Démontage du socle Montage du socle 2 1 2 4 3 2 3 I Montage du socle ou démontage du socle ...

Страница 9: ...agerait le support de fixation du téléviseur et serait exclu de la garantie de ce produit Faites appel à un technicien qualifié pour fixer ce téléviseur à un support mural Le téléviseur doit être débranché pendant l installation Referez vous aux instructions de montage fournies avec le support de fixation Vue arrière du téléviseur ...

Страница 10: ...9 9 Pour lancer nterrompre la lecture Les touches de commande se trouvent à l arrière du téléviseur 8 STANDBY Pour insérer ou éjecter un disque 8 9 STANDBY 4 5 3 III Panneau de commandes ...

Страница 11: ...mérique 8 YPbPr IN Terminal d entrée composant et vidéo gauche droit 9 USB Il prend également en charge les fichiers au format jpg bmp mp3 ainsi que les fichiers dat vob ts et les fichiers vidéo aux formats mpg avi mkv et mp4 10 EARPHONE OUT 11 CI SLOT Entrée pour les cartes CI Common Interface 12 AV IN Connexion possible au raccordement vidéo ou RCA gauche droit de n importe quelle ressource vidé...

Страница 12: ...TEP PROG ZOOM TITLE DVD SETUP A B LANGUAGE DVD MENU REPEAT EXIT Quitter le menu RECALL CH LIST Affiche la liste des chaînes ASPECT AUDIO Mode Nicam DISPLAY INFO INDEX REVEAL Pour lancer la lecture Pour interrompre la lecture Ces touches sont utilisées pour la configuration DVD Référez vous à la page 38 REC Pour démarrer un enregistrement immédiat de la chaine TNT en cours sur le support USB REC LI...

Страница 13: ...12 Remarque les piles ne sont pas fournies Insertion des piles ...

Страница 14: ...13 antenne VI Raccorder le téléviseur à l antenne ...

Страница 15: ...14 STANDBY Entrée TNT ANALOGIQUE AV PERITEL YPBPR HDMI VGA USA DVD VII Visionnage des chaînes TV ...

Страница 16: ...15 RECALL RECALL DISPLAY DISPLAY ...

Страница 17: ...ard en retournant dans le menu paramètres du téléviseur Appuyez sur OK ou la touche verte pour continuer Deuxième étape Sélectionnez le pays de réception Appuyez sur la touche rouge pour retourner à l étape précédente Appuyez sur OK ou la touche Verte pour continuer Appuyez ensuite sur la touche Verte pour lancer la recherche automatique des chaînes Troisième étape Sélectionnez la langue de l appa...

Страница 18: ...oux ou défini par l utilisateur Luminosité Réglez la luminosité de l écran entre 0 et 100 Contraste Ajustez le niveau de contraste entre 0 et 100 Netteté Ajustez la netteté de l image entre 0 et 100 REMARQUE Vous pouvez accéder aux réglages de luminosité contraste couleur et netteté uniquement en mode image personnalisé Couleur Réglez la saturation des couleurs entre 0 et 100 Teinte Cette option v...

Страница 19: ... musique dialogues défini par i utilisateur Graves Cette option vous permet de régler le niveau des sons graves entre 0 et 100 Aigus Cette option vous permet de régler le niveau des sons aigus entre 0 et 100 REMARQUE Vous pouvez accéder aux réglages des graves et des aigus uniquement en mode sonore personnalisé Balance Cette option vous permet de régler l équilibrage de la sortie audio entre les h...

Страница 20: ...an Message Voulez vous supprimer la sélection OK Annuler Image Son Chaîne Fonction Configuration Chaîne Gestion des chaînes Pays Recherche automatique Recherche manuelle TNT Recherche manuelle analogi Select France Select Select Select Déplacer Renommer OK Chaînes Gestion des chaînes Non Nom Chaîne X 0001 0002 0003 0004 0005 0006 0007 0008 0009 C02 C04 S05 S06 C09 C11 C12 S13 S30 Supp Saut Permute...

Страница 21: ...ues appuyez sur la touche EXIT QUITTER pour quitter cette fonction Mode numérique Sélectionner TNT pour rechercher toutes les chaînes numériques TNT du pays sélectionné Vous pouvez arrêter la recherche en appuyant sur la touche EXIT QUITTER Mode analogique Sélectionnez Analogique pour rechercher toutes les chaînes analogiques du pays sélectionné Vous pouvez arrêter la recherche en appuyant sur la ...

Страница 22: ...afficher le menu suivant Chaîne actuelle Choisissez la chaîne souhaitée à l aide des touches Balayage Cette option vous permet d effectuer un balayage des fréquences Sélectionnez cette option puis appuyez sur OK ou Le menu suivant apparaît à l écran Appuyez de façon prolongée sur les touches pour lancer le balayage Pour retourner au menu précédent appuyez sur la touche MENU Système de couleurs Cet...

Страница 23: ...régler les paramètres des fonctions utilisez les touches p q pour déplacer la barre de sélection puis utilisez les touches u pour régler la valeur de l élément sélectionné 3 Appuyez sur la touche MENU pour retourner au menu précédent Modif Mot de passe Modif Mot de passe Dans le menu Préférences sélectionnez l option puis appuyez sur la touche OK ou pour afficher le menu ci dessous Saisissez le mo...

Страница 24: ... le télétexte Analogique Arrêt Progammation Sélectionner cette option dans le menu puis appuyez sur la touche ou OK pour accéder aux réglages Appuyez sur les touches pour ou OK choisir dans combien de temps vous souhaiter arrêter l appareil Mise en veille auto La consommation en énergie de cet appareil en mode de fonctionnement et en mode de veille a été réduite Par ailleurs si aucune action n est...

Страница 25: ...ètres des configuration utilisez les touches p q pour déplacer la barre de sélection puis utilisez les touches u pour régler la valeur de l élément sélectionné 3 Appuyez sur la touche MENU pour retourner au menu précédent Durée Menu Cette option vous permet de régler la durée d affichage des menus Mode péritel automatique Cette option vous permet de passer automatiquement en mode péritel lorsque l...

Страница 26: ...a chaîne visionnée 1 Numéro et nom de la chaîne 2 Indicateur télétexte 3 Indicateur sous titres 4 Heure actuelle 5 Indicateur télévision radio Remarques Les menus Image Son et Configuration du mode TNT sont similaires aux menus du mode analogique Veuillez consulter les chapitres correspondants pour plus de détails F TNT ...

Страница 27: ...z sur la touche MENU pour retourner au menu précédent Chaînes Recherche manuelle TNT Dans le menu Chaînes sélectionnez l option Recherche manuelle TNT puis appuyez sur la touche OK ou pour afficher le menu ci dessous Chaîne Choisissez la chaîne souhaitée à l aide des touches Ensuite déplacez le curseur sur Lancer et appuyez sur la touche OK pour démarrer la détection et l installation des chaînes ...

Страница 28: ...ètres des fonctions utilisez les touches p q pour déplacer la barre de sélection puis utilisez les touches u pour régler la valeur de l élément sélectionné 3 Appuyez sur la touche MENU pour retourner au menu précédent Fonction Info CI Interface commune Sélectionnez une carte CI puis appuyez sur la touche OK pour afficher le menu de la carte Vous pouvez alors consulter et modifier la configuration ...

Страница 29: ...nu OSD puis utilisez les touches p q pour sélectionner le menu Fonction 2 Appuyez sur la touche u pour accéder au menu Fonction et régler les paramètres des fonctions utilisez les touches p q pour sélection le menu REC Timeshift 3 Sélectionnez sélection de partition La liste des partitions vous permet d effectuer le formatage et de définir l emplacement de sauvegarde pour les enregistrements Dépla...

Страница 30: ...ation de l enregistreur Message Message Supprimer la programmation OK Annuler Sélectionnez OK pour annuler l enregistrement Vous pouvez alors choisir un support USB plus rapide Si vous souhaitez procéder à l enregistrement sélectionnez Annuler Le message ci dessous s affiche Sélectionnez maintenant OK pour confirmer ou Annuler pour continuer l enregistrement Programmateur Dans le menu sélectionnez...

Страница 31: ...missions enregistrées 1 Appuyez sur la touche MENU de la télécommande pour accéder au menu OSD puis utilisez les touches p q pour sélectionner le menu Fonction 2 Appuyez sur la touche u pour accéder au menu Fonction et régler les paramètres des fonctions utilisez les touches p q pour sélection le menu REC Timeshift 3 Sélectionnez liste des enregistrements La liste des enregistrements vous permet d...

Страница 32: ...re un peu plus tard En fait cette fonction réalise un enregistrement sur un support de stockage numérique par exemple une clé USB ou un disque dur externe non fournis lorsque vous arrêtez le visionnage Vous pouvez alors continuer à regarder l émission avec un décalage Vous souhaitez mettre la télévision en pause pendant votre coup de téléphone ou votre pause café C est maintenant possible avec la ...

Страница 33: ...uyez sur la touche AUDIO pour afficher le menu mode audio Liste des chaînes Appuyez sur la touche CH LIST de la télécommande pour afficher la liste des chaînes Sous titres Sous titres TNT ENG Déplacer Liste des chînes Déplac Select OK Multi Audio Stéréo English Dutch AD Déplacer Sélectionnez une chaîne puis appuyez sur la touche OK pour la visionner Sous titres Appuyez sur la touche SUBTITLE de la...

Страница 34: ...puis appuyez sur la touche pour afficher le menu suivant Ajustement automatique Dans le menu Configuration sélectionnez cette option puis appuyez sur la touche Pendant l ajustement de l affichage le message suivant apparaît à l écran Position horizontale L option Position H vous permet de régler la position horizontale de l affichage Position verticale L option Position V vous permet de régler la ...

Страница 35: ...auto alimentés Dans ce dernier cas il faut que votre disque dur soit simultanément branché à une alimentation secteur ou batterie et à l appareil via l USB Veuillez vous référer à la notice d utilisation de votre disque dur Veillez également à ce que le système de fichier de votre disque dur soit formaté en FAT 32 Le système NTFS n étant pas pris en charge par ce lecteur le formattage de votre dis...

Страница 36: ...tionnaire de musique Sélectionnez l option Musique dans le menu principal à l aide des touches et Puis appuyez sur la touche OK pour accéder au mode Musique comme illustré ci dessous Fonctionnement des touches 1 ROUGE supprimer le fichier ou dossier sélectionné 2 VERT ajouter supprimer tous les fichiers musique à de la liste de lecture 3 OK ajouter supprimer les fichiers musique sélectionnés à de ...

Страница 37: ...E pour interrompre la lecture 3 ARRET pour mettre fin à la lecture et revenir au navigateur des fichiers 4 RETOUR AVANCE pour faire un retour ou avance rapide à la vitesse x2 x4 x8 ou x16 5 pour mettre la lecture au ralenti à la vitesse x1 2 x1 4 x1 8 ou x1 16 6 pour passer en mode lecture fragmentée 7 pour utiliser la fonction répétition A B Appuyez une première fois pour fixer le point de départ...

Страница 38: ...ter supprimer les fichiers sélectionnés à de la liste de lecture 4 CH aller vers le haut ou vers le bas e Book Appuyez sur PLAY LECTURE pour débuter la lecture 1 ROUGE pour ajouter ou supprimer un signet 2 VERT pour saisir le numéro de page afin d y accéder directement 3 JAUNE pour accéder à la liste des signets 4 BLEU pour accéder à la liste de lecture 5 pour aller vers le haut ou vers le bas de ...

Страница 39: ... pour accéder à la piste ou au chapitre suivant RETOUR RAPIDE pour faire un retour rapide AVANCE RAPIDE pour faire une avance rapide 3 Utilisez les touches de la télécommande pour effectuer les opérations suivantes 1 Passer en mode DVD Appuyez sur la touche SOURCE de la télécommande ou du panneau de commandes de l appareil pour accéder à la liste SOURCE Utilisez les touches et pour sélectionner l ...

Страница 40: ...t appuyez sur la touche pour accéder aux réglages de l option sélectionnée Après avoir terminé les réglages appuyez sur la touche OK pour confirmer les modifications effectuées Appuyez sur la touche pour retourner au menu précédent Configuration générale Langue des menus cette option vous permet de choisir la langue des menus et messages Ecran de veille pour activer ou désactiver cette fonction De...

Страница 41: ... des sous titres Menu disque pour sélectionner la langue du menu disque Contrôle parental cette option vous donne la possibilité de restreindre l accès de certains disques aux enfants Remarque le mot de passe par défaut est 0000 Mot de passe permet de changer de mot de passe Par défaut permet de rétablir les paramètres et réglages par défaut Config Dolby Digital Aller aux réglages Dolby Digital Gé...

Страница 42: ...é comme normal Fiche Technique Fiche technique du téléviseur selon la directive européenne 1062 2010 Marque Modèle Classe d efficacité énergétique Zone d affichage diagonale Consommation d énergie en marche Consommation d énergie annuelle Consommation d énergie en mode éteint Consommation d énergie en mode veille Résolution de l écran pixels OCEANIC A 50cm 19 5pouces 19 W 28kWh par an 0 W 0 43 W 1...

Страница 43: ...CANAL est en clair De 12h30 a 13h30 De 19h00 a 20h30 AS PE CT SL EE P RE C EX IT ME NU CH RE C ME NU TE XT IN DE X SU BP AG E HO LD SIZ E RE VE AL RE PE AT ME DI A SU BT ITL E TV RA DIO AU DI O I II IN FO RE CA LL Pour tout autre problème survenant à votre appareil contacter le Service Après Vente X Dépannage ...

Страница 44: ...ons dus au contact du produit avec des aliments ou des liquides et dus à la corrosion provoquée par la rouille 3 tout incident abus utilisation impropre modification démontage ou réparation non autorisés 4 toute opération impropre d entretien utilisation non conforme aux instructions concernant le produit ou branchement à une tension incorrecte 5 toute utilisation d accessoires non fournis ou appr...

Страница 45: ...be properly disposed In order to protect the environment please dispose the batteries properly in accordance with local laws information is available at your reseller Remote control batteries not included shall not be exposed to excessive heat e g from sun or fire To reduce the risk of fire or electric shock do not expose this product to water rain or moisture To prevent the risk of electric shock...

Страница 46: ...f the supply cable is damaged it must be replaced by the manufacturer or qualified after sales personnel to avoid any danger This product must be connected to an electrical supply 230V 50Hz The mains plug is used as the disconnect device so the disconnect device shall remain readily operable Only use this product with the AC adaptor provided Car Adapter A car adapter is provided for use inside a c...

Страница 47: ...ther non recycled waste As the end user your role is of prime importance in the cycles of re using recycling and other forms of valorization of this electrical and electronic equipment Local authorities and resellers have set special procedures for the purpose of collecting and recycling this product You have the obligation to use the selective waste collection systems put in place by your local a...

Страница 48: ...47 TV Safety ...

Страница 49: ...48 ...

Страница 50: ...ctions Page 52 IV Connecting Cables Page 53 V Remote Control Page 54 VI Antenna Connections Page 56 VII Watching Television Programs Page 57 VIII First Time Installation Page 59 A Picture Page 60 B Sound Page 61 C Channel Page 62 D Feature Page 65 E Setup Page 67 F DVB T Page 68 G PC Page 76 H Media Player Page 77 I DVD Page 81 IX Important Notice Page 84 X Troubleshooting Page 85 XI Warranty Page...

Страница 51: ...nd adjust OSD options increasing STANDBY The command buttons are at the back of the TV Introduction for Each Key Enter exit the main menu Channel downwards short cut key skip to previous channel no and select the previous option in the menu Channel upwards short cut key skip to next channel no and select the next option in the menu 8 9 OPEN CLOSE Insert or eject the disc Play Pause the disc 8 9 ST...

Страница 52: ...nd hold the base then remove the stand as shown figure 2 1 Please put the base on the desk as shown figure 1 the stand approximately 180 degrees from horizontal 2 Put the hole of the base upright into shaft of unit as shown figure 2 3 Fix the stand and the screen with 4 screws figure 3 4 The rendering after installed as shown figure 4 2 1 2 4 3 2 3 II Base Installation Guide ...

Страница 53: ...l damage the wall mounting support and will be outside the scope of product guarantee Contact a professional technician for assistance when wall mounting your TV Do not wall mount the TV while TV is turned on Refer to the instruction of your wall mounting bracket Back of your TV III Wall Mounting instructions ...

Страница 54: ...l TV sound output 8 Y Pb Pr IN component input terminal 9 USB User can access multi media files stored in the USB device The supported format includes dat vob ts mpg and avi mkv mp4 video formats Besides jpg bmp and mp3 10 EARPHONE OUT 11 CI SLOT Insert a CI card 12 AV IN This can be connected to the left right RCA video out connection of any vide resource 13 DVD AV OUT Composite Video Output PC A...

Страница 55: ...O SU BT ITL E IND EX RE VE AL FR EE ZE DIS PL AY I II TE XT SIZ E SU BP AG E HO LD RE PE AT DVD SE TUP DVD ME NU TIT LE ZOO M PRO G A B STE P INF O LAN GU AG E SO UR CE PO WE R MU TE RE CA LL PIC M OD E S M OD E CH VO L O K EX IT ME NU PR LI ST TIMESHIFT TV RADIO Switch between DVB T and RADIO Digital radio is not available in countries such as France Sleep time setting Select the aspect format AS...

Страница 56: ... take out the batteries and place in a shady cool and dry place if you will not use the remote control for long time Please treat damaged or leaking batteries with care Please wash your hands with soap after contact with battery chemicals Do not randomly dispose of used batteries Please refer to local authorities for recycling or waste treatment systems Note The batteries are not provided Battery ...

Страница 57: ...ate the television will enter into lower power sleep state standby state to conduct power saving and protection after several minutes with no signal inputs Power saving protection mode antenna antenna VI Antenna Connections ...

Страница 58: ...select channel 12 Channel select 1 Use the buttons on the television panel to conduct channel selection First press CH buttons on the front panel to enter into channel selection mode state then press CH buttons on front panel to select channel 2 CH buttons of the remote control may also be applied to conduct channel selection CH SOURCE STANDBY Input DTV ATV AV SCART YPBPR HDMI PC Media DVD VII Wat...

Страница 59: ...58 INFO INFO ...

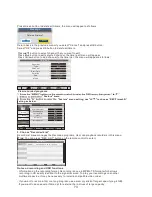
Страница 60: ...amic Standard Mild Setup 1 Move Enter OK Exit Exit Message Are you sure OK Cancel The first time you switch on the TV you will be prompted to search channels OK First you will be prompted to choose the type of screen brightness You may choose the Home Mode option for default setting You may change the brightness value later on inside the settings menu p q OK return to setup 1 menu p q OK 3 4 langu...

Страница 61: ...ble only in User picture mode Colour The colour saturation value of picture can be adjusted from 0 100 Tint This item is used to adjust the tone of color in NTSC system from 0 100 Colour Temperature This item is used to adjust the optimum colour temperature for suitable viewing Available options Standard Cold Warm Aspect Ratio This option allows to select the display mode among Panorama 16 9 4 3 J...

Страница 62: ...ble is adjustable only in User sound mode Balance This item is used to adjust the audio output between left and right speaker from 50 to 50 Surround Press the p q button to select the Surround item and then use button to turn the surround sound function on off AVL An automatic volume control AVL automatically adjusts the volume or loudness set it ON for an ambient volume to make the audio signal b...

Страница 63: ...e selected items OK Cancel Picture Sound Channel Feature Setup Channel Move Enter OK Return Menu Exit Exit Channel Management Country Auto Search DTV Manual Search ATV Manual Search Enter France Enter Enter Enter Move Exit Exit Channel Channel Manager No Channel Name X 0001 0002 0003 0004 0005 0006 0007 0008 0009 C02 C04 S05 S06 C09 C11 C12 S13 S30 Del Skip Swap MENU Return CH Page OK OK C Channel...

Страница 64: ... in selected country automatically User can skip digital search to analog search directly by pressing EXIT key and can also stop auto scanning directly by pressing EXIT during analog scanning Digital Mode Select DTV item to search all digital channels in selected country carried by current signal mode User can stop searching directly by pressing EXIT key Analog Mode Select ATV item to search all A...

Страница 65: ...z Enter Enter SECAM L Current Channel Current Channel Save Fine Tune Press u to fine tuning when the signal of the current channel is weak Fine Tune Adjust Return Auto search mode for all channels displays as following Move Enter OK Return Menu Exit Exit I Picture Sound Channel Feature Setup Channel Tuning ATV channels found 5 DTV channels found 6 Radio channels found 0 28 Quit Exit 306 98MHz Skip...

Страница 66: ... item and then use OK button or u button to enter Default password is 0000 Password Change Pin Code Hotel Mode Feature Child Lock Picture Sound Channel Feature Setup Enter Enter Move Enter OK Return Menu Exit Exit Change Pin Code Old Password New Password Confirm New Password Feature Change Pin Code Picture Sound Channel Feature Setup Press the p q button to select the Change Pin Code item and the...

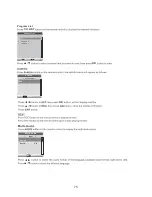
Страница 67: ...anguage Sleep Timer Press the p q button to select the Sleep Timer item and then use u button to select sleep Time 10min 20min 30min 60min 90min 120min 180min 240min or off Auto Power Off In order to save energy the electricity consumption of this product has been reduced in both operation mode and standby mode Furthermore if no operation is carried out for four consecutive hours the unit will aut...

Страница 68: ...OFF The screen background will turn blue at very weak or no signal condition if Blue is ON Colour Mode This item allows you to change the screen brightness effect Reset TV Setting This item is used to reset the unit to factory default settings 15 Seconds On Enter Off Home mode Enter Enter Move Enter OK Return Menu Exit Exit Cancel OK Software Upgrade Update the software via the USB port Making an ...

Страница 69: ...68 INFO 0015 NT1 576i TTX Subtitle 07 28 F DVB T ...

Страница 70: ...art p q u OK t u OK Picture Sound Channel Feature Setup Channel Move Enter OK Return Menu Exit Exit Channel Management Country Auto Search DTV Manual Search ATV Manual Search Enter France Enter Enter Enter Move Enter OK Return Menu Exit Exit 70 70 DTV DTV Channel Channel Channel Channel menu Channel menu setting use to move the menu ...

Страница 71: ...rograms with the gestures and symbols on the screen while the signal is available CI Info Ensure a CI card is inserted in the slot provided Press button to select CI Info then press OK button or button to enter Common Interface Viaccess Access Common Interface Consultation Settings Update Viaccess Conditional Access Main menu Press OK to comfirm Press EXIT to quit Press OK button or button to ente...

Страница 72: ...ve your USB stick Immediate Recording Insert a compatible USB device which has been previously formatted by the TV please refer to previous section Wait for about 5 seconds until the device is recognized Simply press the REC button on the remote control in order to start immediate recording Please note this function allows recording of DVB T channels only other sources such as analog TV will not b...

Страница 73: ...time and duration You can also program one or more weekly recordings Press button to select Timer then press OK button or button to enter Tips You can press TIMER button on the remote control to enter If your device speed is not enough there will be a dialog as follows You d better change a high speed device or select OK to continue Select OK to start recording You ll see the dialog Message Device...

Страница 74: ...ng in HD quality identical to the signal received To play your recordings on another multimedia device it may be necessary to install a compatible video codec If you want to record a film or a long program use a memory stick of larger capacity eg 4GB If you want to save several films opt for external hard drives of large capacity Press button to select channel that you want to edit Press Blue butt...

Страница 75: ...ectory Subdirectory Sub subdirectory and store files in a single simple directory USB Device Recognition Problems After connecting your USB device to the unit you may need to turn the device on before it can be detected This unit does not support direct USB connection with computer It is necessary for you to transfer your data files on a USB stick or MP3 player If you are using an external hard dr...

Страница 76: ...75 Program List CH LIST p q OK Subtitle DTV Subtitle ENG Move Channel List Move Enter OK t u p q OK OK Multi Audio Right English Dutch AD Move p q t u 1 TF1 2 FRANCE 2 3 FRANCE 3 ...

Страница 77: ...annel Feature Setup 0 0 0 0 p q u OK Adjusting Please wait H Position This item is used to adjust the horizontal position of PC VGA picture Available range 16 to 16 V Position This item is used to adjust the vertical position of PC VGA picture Available range 16 to 16 Phase This item is used to adjust the picture applying to the TV Available range 0 to 100 Clock This item is used to adjust the sig...

Страница 78: ...oaded Check that the files system of your USB device is formatted into the FAT 32 format USB device formatted into NTFS are not compatible with this unit Caution if you attempt to modify your file system formatting your device will erase all data Please refer to your USB device s in struction manual first Warning Connect your USB device directly to the USB port of the device Using an extension cab...

Страница 79: ...t playback Music Manager Highlight the Music item in multimedia main menu by press t u key then press OK key enter music page as follow Key Operation 1 RED Delete the focused folder file 2 GREEN Add Del all music files to play list 3 OK Add Del highlight files to play list 4 CH Page up Page down Music 1 Same as PLAY key on remote to start playing file or resume the paused file 2 Same as PAUSE key ...

Страница 80: ...e playing file and return to the file browser interface 4 Same as key on remote to play fast backward or forward The speed can switch to twice four times eight times and sixteen times and displayed with X2 X4 X8 X16 on screen 5 To enter slow mode The speed can switch to 1 2 1 4 1 8 1 16 and displayed with X1 2 X1 4 X1 8 X1 16 on screen 6 To enter step mode 7 To set AB repeat the first press sets A...

Страница 81: ...el all e Book files to play list 3 OK Add Del highlight files to play list 4 CH Page up Page down e Book Press PLAY key to start playback 1 RED To add del bookmark 2 GREEN To input the page number directly 3 YELLOW To enter the Bookmark list page 4 BLUE To enter the Play list page 5 To page down page up 6 EXIT To close the file and return to the file browser 7 Only txt format eBook is supported ...

Страница 82: ...STOP Stop the disc PREVIOUS Skip to previous track or chapter NEXT Skip to next track or chapter FR Fast reverse FF Fast forward 1 Enter into DVD mode Press the SOURCE button on remote control or SOURCE button on front panel to open the source list use the to select DVD item then press to enter into DVD mode 2 Put the disc into TV Insert the disc into TV gentlely the disc will be inbreathed and re...

Страница 83: ...82 ENG On Off General Audio DOLBY Video Preference OSD Language Screen Saver Last Memory GENERAL SETUP PAGE General Audio DOLBY Video Preference SPEAKER SETUP PAGE Go to Speaker Setup Page 4 5 NEXT NEXT ...

Страница 84: ...ideo Preference VIDEO SETUP PAGE Sharpness Brightness Contrast High 00 00 Preference General Audio DOLBY Video PREFERENCE PAGE TV Type Audio Subtitle Disc Menu Parental Password Default NTSC FRE FRE FRE Auto 0000 Ste This product incorporates copyright protection technology that is protected by U S patents and other intellectual property rights Use of this copyright protection technology must be a...

Страница 85: ...esolution No of Bright or Dark Sub Pixels No of Bright or Dark Pixels White or Black Continuous Line Color Pixels 19 5 Technical Data Sheet Sheet of houeshold television according to EU directive 1062 2010 Trade mark Model no Energy efficency Class Visible Screen Diagonal On mode Power consumption Annual energy consumption Power consumption in off mode Standby power consumption Screen Resolution p...

Страница 86: ...arambled Form 12 30 p m to 1 30 p m From 7 00 p m to 8 30 p m Solutions 5 seconds Solutions AS PE CT SL EE P RE C EX IT ME NU CH RE C ME NU TE XT IN DE X SU BP AG E HO LD SIZ E RE VE AL RE PE AT ME DI A SU BT ITL E TV RA DIO AU DI O I II IN FO RE CA LL X Troubleshooting For any other problem that may occur on your device please contact Customer Service ...

Страница 87: ...tion due to normal wear and tear of the product 2 Defects or deterioration due to contact with food or liquids and corrosion caused by rust 3 Any incident relating to abuse misuse alteration or unauthorized disassembly or repair 4 Improper maintenance improper use of the product or incorrect voltage connection 5 Any use of accessories that are not supplied or approved by the manufacturer The warra...

Страница 88: ...2017_OCEALEDCC195W2_V1 ...

Отзывы: