background image

10

Replacing toner cartridges and staples and emptying waste containers

10-26

CS191 (Phase3)

10.5

Replacing the waste toner box

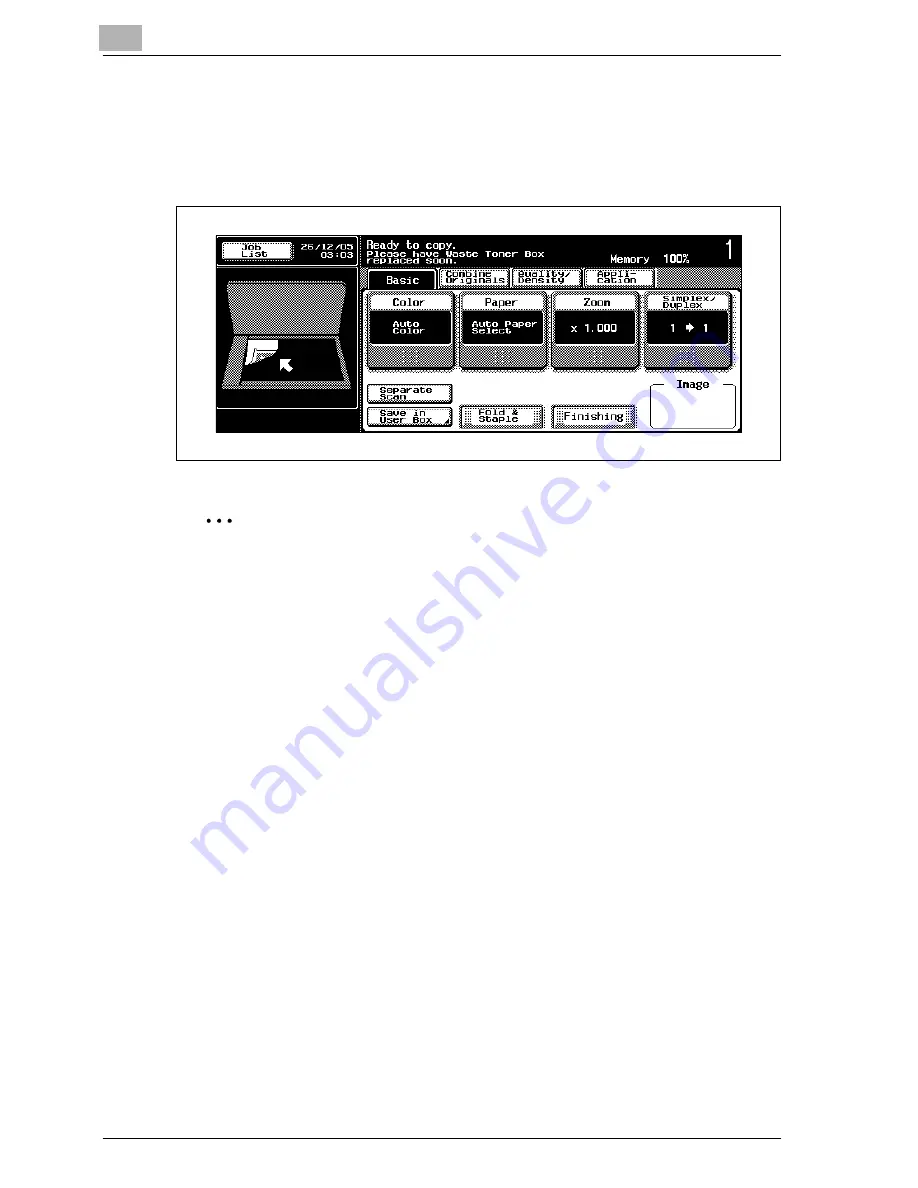
When it is almost time to replace the waste toner box (and if it is replaceable 
by the user), the message shown in the following illustration appears, 
warning about the replacement period.

2

Reminder 

When the message appears, replace the specified consumables or part 
according to your maintenance agreement.

!

Detail 

The number of copies that can be made from the time that the message 
"Please have Waste Toner Box replaced soon." appears until the time 
that the message "Waste Toner Box needs replacing. Follow the 
Replacing Instruction." appears differs depending on the specified copy 
settings and the part/consumables.

Содержание CS191 Phase 3

Страница 1: ...Oc CS191 Phase 3 User Manual Copy Operations...

Страница 2: ...B V makes no representation or warranties with respect to the contents hereof and specifically disclaims any implied warranties of merchantability or fitness for any particular purpose Further Oc Tech...

Страница 3: ...mage quality of the original 1 11 Inserting paper between copies of OHP 1 11 Adding a cover page 1 12 Inserting different paper into copies 1 12 Inserting pages from a different original at specified...

Страница 4: ...alance parameter CMYK color adjustment 1 26 1 10 Brightness parameter 1 28 1 11 Contrast parameter 1 29 1 12 Saturation parameter 1 30 1 13 Sharpness parameter 1 31 1 14 Hue parameter 1 32 1 15 Copy D...

Страница 5: ...Power plug 2 7 Grounding 2 7 Installation 2 8 Ventilation 2 9 Actions in response to troubles 2 9 Consumables 2 10 When moving the machine 2 11 Before successive holidays 2 11 2 2 Regulation notices...

Страница 6: ...st the angle of the control panel 3 24 3 3 Turning on the main power and the sub power 3 26 To turn on the machine 3 26 To scan during warm up 3 28 To turn off the machine 3 30 Automatically canceling...

Страница 7: ...Separate Scan setting 4 13 Scanning a multi page original from the original glass 4 18 4 4 Specifying original settings 4 24 Copying originals of mixed sizes Mixed Original setting 4 24 Positioning fo...

Страница 8: ...e original 4 66 Loading originals with small print or photos Original Type settings 4 66 To specify an original type setting 4 68 4 10 Specifying the density settings 4 71 Adjusting the print density...

Страница 9: ...ams Mode Memory 5 12 To store a copy program 5 12 To delete a copy program 5 15 5 5 Copying with programmed copy settings Mode Memory 5 16 To recall a stored job 5 16 5 6 Displaying function descripti...

Страница 10: ...sfeed 6 25 To clear a paper misfeed in the ADF feed section 6 30 To clear a paper misfeed in the ADF transport section 6 33 To clear a paper misfeed in the ADF scanning section 6 36 To clear a paper m...

Страница 11: ...witch feature 8 9 Order for selecting the paper trays 8 9 8 2 Selecting the paper settings 8 10 To automatically detect the paper size Auto Paper Select setting 8 10 To specify a paper size Set Size s...

Страница 12: ...sing the Program Job function 9 26 9 7 Producing separate copies of each page in a page spread Book Copy function 9 30 To copy using the Book Copy function 9 31 9 8 Copying pamphlets Booklet Original...

Страница 13: ...tamp functions 9 80 To copy using the Date Time function 9 81 To copy using the Page function 9 84 To copy using the Set Numbering function 9 88 Printing copy protection text Copy Protect function 9 9...

Страница 14: ...overage rate 11 10 11 3 When the message Preventive maintenance time appears 11 11 12 Managing jobs Job List 12 1 Overview of the Job List screen 12 3 Jobs 12 3 Multi Job feature 12 4 Job List screens...

Страница 15: ...gistration 13 49 User authentication account track 13 50 Network setting 13 53 Copier setting 13 54 Printer setting 13 54 Fax setting 13 55 System connection 13 55 Security setting 13 56 Displaying th...

Страница 16: ...nistrative setting user name list 13 99 Default function permission 13 101 To specify the default function permissions 13 101 Authenticating public users 13 103 User registration 13 104 User counter 1...

Страница 17: ...1 Introduction...

Страница 18: ......

Страница 19: ...der so that it can easily be referred to when questions or problems arise during operation The illustrations used in this manual may appear slightly different from views of the actual equipment Energy...

Страница 20: ...ed in part on the work of the Independent JPEG Group Compact VJE Copyright 1986 2003 VACS Corp RC4 is a registered trademark or trademark of RSA Security Inc in the United States and or other countrie...

Страница 21: ...ssl org 5 Products derived from this software may not be called OpenSSL nor may OpenSSL appear in their names without prior written permission of the OpenSSL Project 6 Redistributions of any form what...

Страница 22: ...de must retain the copyright notice this list of conditions and the following disclaimer 2 Redistributions in binary form must reproduce the above copyright notice this list of conditions and the foll...

Страница 23: ...OF SUCH DAMAGE The licence and distribution terms for any publically available version or derivative of this code cannot be changed i e this code cannot simply be copied and put under another distrib...

Страница 24: ...For details refer to Automatically selecting the paper size Auto Paper Select setting on page 4 44 Adjusting copies to the size of the paper The most appropriate zoom ratio can automatically be select...

Страница 25: ...opied together as a single job For details refer to Scanning the original in separate batches Separate Scan setting on page 4 13 and Scanning a multi page original from the original glass on page 4 18...

Страница 26: ...Punching holes in copies Holes for filing can be punched in the copies For details refer to Punching holes in copies Punch settings on page 4 93 Copying multiple original pages onto a single page Mult...

Страница 27: ...the original The copies can be adjusted according to the image quality of the original For details refer to Loading originals with small print or photos Original Type settings on page 4 66 or Adjustin...

Страница 28: ...copies Different paper such as colored paper can be inserted for specified pages in the copies For details refer to Inserting different paper into copies Insert Sheet function on page 9 11 Inserting p...

Страница 29: ...with the light and dark colored areas of the original image inversed With Color setting Full Color copies are printed with the hues and brightness inversed With Color setting Black or Single Color co...

Страница 30: ...lity for the desired image For details refer to Adjusting the copy color quality Adjust Color parameters on page 9 64 Separately copying a page spread A page spread such as in an open book or catalog...

Страница 31: ...d image on multiple pages A single original page can be automatically split into parts with each part printed enlarged For details refer to Copying an enlarged image on multiple pages Poster Mode func...

Страница 32: ...ing sections of copies Areas such as the shadows of punched holes and transmission information in received faxes can be erased in copies For details refer to Erasing specified areas of copies Erase fu...

Страница 33: ...ed to be used with other copy jobs For details refer to Registering copy programs Mode Memory on page 5 12 Checking the copy settings Screens showing the current copy settings can be displayed From th...

Страница 34: ...a different copy job to be printed For details refer to Interrupting a copy job Interrupt mode on page 5 10 Printing a sample copy Before printing a large number of copies a single sample copy can be...

Страница 35: ...rma tion on the adjust ment of the vividness p 1 30 Green Parameter Provides informa tion on the adjust ment of the green hues p 1 24 Sharpness Parameter Provides informa tion on the adjust ment of th...

Страница 36: ...one selected color p 1 35 Neg Pos Reverse Function Provides informa tion on copying an original with the light and dark colored areas of the image inversed p 1 37 Background Color Function Provides in...

Страница 37: ...it is obvious that the yellow of the lemon is brighter But what about when comparing the yellow of a lemon and the red of a bean Obviously the yellow of the lemon is brighter Brightness is the this d...

Страница 38: ...outer edge is the hue the vertical axis is the brightness and the horizontal axis from the center is the saturation Assigning colors to the solid object representing the three attributes of color sho...

Страница 39: ...Introduction 1 CS191 Phase3 1 23 1 6 Red parameter This parameter can be used to adjust the degree of red in the image to one of 19 levels For details on the setting procedure refer to page 9 64...

Страница 40: ...1 Introduction 1 24 CS191 Phase3 1 7 Green parameter This parameter can be used to adjust the degree of green in the image to one of 19 levels For details on the setting procedure refer to page 9 64...

Страница 41: ...Introduction 1 CS191 Phase3 1 25 1 8 Blue parameter This parameter can be used to adjust the degree of blue in the image to one of 19 levels For details on the setting procedure refer to page 9 64...

Страница 42: ...in a full color copy the colors of the original can be reproduced Changing the amount of each color of toner enables the tints in the copy to be finely adjusted Each color can be adjusted to any of 1...

Страница 43: ...Introduction 1 CS191 Phase3 1 27 Y G B R M C...

Страница 44: ...ntroduction 1 28 CS191 Phase3 1 10 Brightness parameter This parameter can be used to finely adjust the brightness of the image to one of 19 levels For details on the setting procedure refer to page 9...

Страница 45: ...tion 1 CS191 Phase3 1 29 1 11 Contrast parameter This parameter can be used to finely adjust the image to one of 19 levels between soft smooth and crisp For details on the setting procedure refer to p...

Страница 46: ...ntroduction 1 30 CS191 Phase3 1 12 Saturation parameter This parameter can be used to finely adjust the vividness of the image to one of 19 levels For details on the setting procedure refer to page 9...

Страница 47: ...uction 1 CS191 Phase3 1 31 1 13 Sharpness parameter This parameter can be used to adjust the amount of contours in text and images to one of 7 levels For details on the setting procedure refer to page...

Страница 48: ...1 Introduction 1 32 CS191 Phase3 1 14 Hue parameter This parameter can be used to finely adjust the hue of the image to one of 19 levels For details on the setting procedure refer to page 9 64...

Страница 49: ...tion 1 CS191 Phase3 1 33 1 15 Copy Density parameter This parameter can be used to finely adjust the light and shading of the image to one of 19 levels For details on the setting procedure refer to pa...

Страница 50: ...s you to copy an original using only one of the 21 colors available For details on the setting procedure refer to page 4 40 Yellow Magenta Cyan Red Green Orange Pumpkin Yellow Green Teal Blue Aquamari...

Страница 51: ...in black and the color areas of the original printed in one of the six colors available For details on the setting procedure refer to page 4 40 Yellow Magenta Cyan Red Green Blue H A P P Y BIRT H D A...

Страница 52: ...ou to copy an original using one of the 18 colors available as the color of the background blank areas For details on the setting procedure refer to page 9 61 Yellow Magenta Cyan Red Green Orange Pump...

Страница 53: ...al with the light colored areas and the dark colored areas of the image inversed For details on the setting procedure refer to page 9 54 Monotone copy Yellow Magenta Cyan Red Green Orange Pumpkin Yell...

Страница 54: ...1 Introduction 1 38 CS191 Phase3 Full color copy and Background Color function...

Страница 55: ...Introduction 1 CS191 Phase3 1 39 1 20 Mirror Image function This function allows you to copy a mirror image of the original For details on the setting procedure refer to page 9 57...

Страница 56: ...r to prevent injuries and to ensure safe use of the machine 7 CAUTION Failure to observe instructions highlighted in this manner may result in slight injuries or property damage Observe all cautions i...

Страница 57: ...machine 2 Reminder Text highlighted in this manner contains information that should be reminded Detail Text highlighted in this manner contains references for more detailed information Special text m...

Страница 58: ...nual the first value always refers to the width of the paper shown as Y in the illustration and the second to the length shown as X Paper Orientation Lengthwise w If the width Y of the paper is shorte...

Страница 59: ...E Mail Scan to FTP and Scan to SMB User manual Box Operations This manual contains details on operating procedures for using the boxes Refer to this user manual for details on operating procedures for...

Страница 60: ...hase3 User manual Print Operations This manual contains details on operating procedures using the standard built in printer controller For details on the printing functions refer to user manual PDF fi...

Страница 61: ...t agencies Internal revenue stamps canceled or uncanceled Passports Immigration papers Motor vehicle licenses and titles House and property titles and deeds General Identification cards badges or insi...

Страница 62: ...1 Introduction 1 46 CS191 Phase3...

Страница 63: ...2 Installation and operation precautions...

Страница 64: ......

Страница 65: ...user safety and preventing equipment problems Please keep this manual in a handy place near the machine Make sure you observe all of the precautions appear in each section of this manual KM_Ver 01E_C...

Страница 66: ...l line indicates a pro hibited course of action This symbol warns against dis mantling the device A black circle indicates an im perative course of action This symbol indicates you must unplug the dev...

Страница 67: ...in a fire or electrical shock Use the power cord supplied in the package only for this ma chine and NEVER use it for any other product Failure to ob serve this precaution could result in a fire or el...

Страница 68: ...uct connecting to inadequate power supply voltage current capacity grounding and may result in fire or shock If proper wall outlet is not available the customer shall ask qualified electrician for the...

Страница 69: ...plug and plug in the power cord with a wet hand as an electrical shock could result Plug the power cord all the way into the power outlet Failure to do this could result in a fire or electrical shock...

Страница 70: ...iately turn OFF the pow er switch unplug the power cord from the power outlet and then call your authorized service representative Caution Symbol After installing this product mount it on a secure bas...

Страница 71: ...re your health Ventilate the room at regular intervals Warning Symbol Do not keep using this product if this product becomes inor dinately hot or emits smoke or unusual odor or noise Imme diately turn...

Страница 72: ...emper ature which may cause burns When checking the inside of the unit for malfunctions such as a paper misfeed do not touch the locations around the fus ing unit etc which are indicated by a Caution...

Страница 73: ...perty Do not ignore this safety advices Caution Symbol Whenever moving this product be sure to disconnect the power cord and other cables Failure to do this could damage the cord or cable resulting in...

Страница 74: ...onable protection against harmful interference when the equipment is operated in a commercial environment This equipment generates uses and can radiate radio frequency energy and if not installed and...

Страница 75: ...not subject to Class B regulations 7 WARNING Interference with radio communications This is a Class A product In a domestic environment this product may cause radio interference in which case the use...

Страница 76: ...g any phase of user operation This machine is certified as a Class 1 laser product This means the machine does not produce hazardous laser radiation Internal laser radiation 7 WARNING This product emp...

Страница 77: ...nistration of the U S Department of Health and Human Services DHHS This means that the device does not produce hazardous laser radiation The label shown on page 2 18 indicates compliance with the CDRH...

Страница 78: ...ude af funktion Usynlig laserstr ling ved bning n r sikkerhedsafbrydere er ude af funktion Undg uds ttelse for str ling Klasse 1 laser produkt der opfylder IEC60825 sikkerheds kravene Dette er en halv...

Страница 79: ...gden r 775 800 nm 7 VAROITUS Avattaessa ja suojalukitus ohitettaessa olet alttiina n kym tt m lle lasers teilylle l katso s teeseen 7 VARNING Osynlig laserstr lning n r denna del r ppnad och sp rren r...

Страница 80: ...2 Installation and operation precautions 2 18 CS191 Phase3 Laser safety label A laser safety label is attached to the outside of the machine as shown below...

Страница 81: ...t is recommended that the room well ventilated 7 ATTENTION Une quantit d ozone n gligable est d gag e pendant le fonctionnement de l appareil quand celui ci est utilis normalement Cependant une odeur...

Страница 82: ...on and operation precautions 2 20 CS191 Phase3 2 5 Acoustic noise For European users only Maschinenl rminformations Verordnung 3 GPSGV Der h chste Schalldruckpegel betr gt 70 dB A oder weniger gem ss...

Страница 83: ...usehold waste Please refer to the information of your local community or contact our dealers regrading the proper handling of end of life electric and electronic equipments Recycling of this product w...

Страница 84: ...its Toner expelled from the fire is dangerous Do not alter or remove any covers or panels attached to this machine otherwise you may be exposed to laser radiation It is illegal to copy certain types o...

Страница 85: ...d regular maintenance can easily be performed adhere to the recommended space requirements detailed below 2 Reminder Be sure to allow a clearance of 100 mm 4 in or more at the back of this machine for...

Страница 86: ...ents for correct operation of the machine are as follows Temperature 10 C 50 F to 30 C 86 F with fluctuations of no more than 10 C 18 F within an hour Humidity 15 to 85 with fluctuations of no more th...

Страница 87: ...3 Before making copies...

Страница 88: ......

Страница 89: ...re making copies 3 1 Part names and their functions Options 2 Reminder In order to maintain the functionality and quality of the machine be sure to use the paper feed cabinet when installing the machi...

Страница 90: ...net PC 203 Both the top and bottom trays can each be loaded with up to 500 sheets of paper Referred to as the double paper feed cabinet throughout the manual 8 Paper Feed Cabinet PC 403 Can be loaded...

Страница 91: ...chine and the computer 18 Scan Accelerator Kit SA 501 Creates images at high speed when sending scans and allows scan jobs saved in boxes to be printed 19 Video Interface Kit VI 503 Used for connectin...

Страница 92: ...3 Before making copies 3 6 CS191 Phase3 Outside of machine The illustration above shows the main unit with the optional original cover and LCT installed 1 2 3 4 5 6 7 8 9...

Страница 93: ...10 envelopes Referred to as the bypass tray throughout the manual See p 3 53 4 LCT Can be loaded with up to 2 500 sheets of normal paper 5 Tray release button Pressed in order to pull out the paper t...

Страница 94: ...3 Before making copies 3 8 CS191 Phase3 The illustration above shows the main unit with the optional ADF and double paper feed cabinet installed 23 24 25 10 11 12 13 14 15 16 17 18 19 20 21 22...

Страница 95: ...pened when clearing paper misfeeds from the tray 2 17 Center right side door release le ver Used to open the center right side door 18 Lower right side door Opened when clearing paper misfeeds from th...

Страница 96: ...re making copies 3 10 CS191 Phase3 The illustration above shows the main unit with the optional ADF LCT fax multi line and dehumidifier heater installed 30 29 28 26 27 39 38 37 36 31 32 33 34 35 40 41...

Страница 97: ...Used for connecting the general subscriber line Used when the optional fax multi line mount kit is in stalled 34 TEL PORT1 jack Used for connecting the cord from the telephone 35 LINE PORT1 jack Used...

Страница 98: ...3 Before making copies 3 12 CS191 Phase3 Inside of machine 1 2 3 4 5 6 7 8 9 10 11 12 13 16 17 18 14 15...

Страница 99: ...Print head glass cleaning tool Used to clean the surface of the print head glass for example when replacing the imaging unit 10 Waste toner box Collects used waste toner 11 Waste toner box release lev...

Страница 100: ...501 No Part name Description 1 Copy output tray Collects copies 2 Misfeed clearing door Opened when clearing paper misfeeds within the finisher No Part name Description 3 Mailbins Collects printed pag...

Страница 101: ...Before making copies 3 CS191 Phase3 3 15 Finisher FS 514 output tray OT 601 punch kit PK 510 1 13 2 3 4 5 6 7 8 9 10 11 12...

Страница 102: ...er 6 Dial FN2 Turned when clearing paper misfeeds within the finisher 7 Lever FN1 Raised when clearing paper misfeeds within the finisher 8 Hole punch waste container Removed when emptying hole punch...

Страница 103: ...n in the illustration Precautions for using the finisher Do not place objects on top of the saddle stitcher or mailbin kit Do not place objects below the output trays of the finisher No Part name Desc...

Страница 104: ...applied press this key after entering the user name and password for user authentication or the account name and password for account track in order to use this machine 4 Box key Press to enter Box m...

Страница 105: ...restart a stopped job For details on jobs refer to Managing jobs Job List on page 12 3 13 Main Power indicator Lights up in green when the machine is turned on with the main power switch 14 Data indi...

Страница 106: ...cratched or damaged Never push down on the touch panel with force and never use a hard or pointed object to make a selection in the touch panel 24 Help key Press to display the Main Help Menu screen w...

Страница 107: ...en When the machine is ready to begin making copies after being turned on the Basic screen appears To activate a function or to select a setting lightly touch the desired button in the touch panel TYP...

Страница 108: ...ing jobs are available See p 12 3 3 Message display area The status of the machine and details on operations that must be performed are displayed here 4 Functions settings display Tabs and buttons for...

Страница 109: ...mode Indicates that an error occurred during an image stabilization operation a print operation or a scan operation Touch this icon to view a screen containing a warning code If the warning screen was...

Страница 110: ...d to any of three angles Adjust the control panel to the angle that allows for easy operation To adjust the angle of the control panel 1 Pull the control panel release lever toward you and then push d...

Страница 111: ...trol panel to an even steeper angle pull the control panel release lever toward you and then push down on the control panel The control panel stops at the lower position 3 To return the control panel...

Страница 112: ...f all functions of the machine Normally the main power switch is turned on The sub power switch turns on off machine operations for example for copying printing or scanning When the sub power switch i...

Страница 113: ...rol panel or touch panel and those that are selected when the Reset key is pressed to cancel all settings specified from the control panel or touch panel The default settings can be changed For detail...

Страница 114: ...sage Now warming up Ready to scan appears on the touch panel 3 Position the original to be copied For details on positioning the original to be copied refer to Feeding the original on page 4 9 4 Speci...

Страница 115: ...y For details refer to Stopping scanning printing on page 4 102 Detail While the machine is warming up to begin printing after it is turned on using the sub power switch copy settings can be specified...

Страница 116: ...n turning the main power switch off then on again the machine may not function properly Do not turn off the machine with the main power switch or the sub power switch while it is making copies or prin...

Страница 117: ...automatic panel reset operation is performed and whether or not it is performed can be set from the Utility mode For details refer to System setting on page 13 27 Whether or not the automatic panel r...

Страница 118: ...ceive jobs while it is warming up The touch panel comes on again and after the machine has finished warming up it is ready to begin printing within 30 seconds at normal room temperature 23 C 2 Note As...

Страница 119: ...Sleep mode after 30 minutes To recover from Sleep mode 1 Press the Power Save key 2 The machine can receive jobs while it is warming up The touch panel comes on again and after the machine has finish...

Страница 120: ...nservation mode Press the Power Save key or press the sub power switch As the factory default the machine enters Low Power mode Detail Whether the machine enters Low Power mode or Sleep mode when the...

Страница 121: ...Follow the procedure described below to use the machine while the weekly timer is being used 1 Press the Power Save key For details on setting the weekly timer refer to System setting on page 13 39 2...

Страница 122: ...the factory default the weekly timer is not set If the message Access restricted due to weekly timer Input amount of time prior to entering Sleep Mode or Access restricted due to weekly timer Input p...

Страница 123: ...k administrator for a user name and password and for the domain name 0 A total of 1000 users and accounts can be registered 1 Touch User Name If a list of user names can be displayed the desired user...

Страница 124: ...y was selected for external server authentication Domain Name appears with the name of the default server Touch Domain Name to display the names of servers registered with Active Directory and then se...

Страница 125: ...Before making copies 3 CS191 Phase3 3 39 2 Type in the user name and then touch OK 3 Touch Password 4 Type in the password and then touch OK...

Страница 126: ...set to Synchronize the account track screen does not appear if the users and accounts are synchronized 6 Make copies using the desired copy settings 7 When you are finished printing press the Access k...

Страница 127: ...e User Authentication Account Track parameter is set to Synchronize complete user authentication and then log on by using the account track input screen User authentication settings can be specified u...

Страница 128: ...mber of prints produced with each account can be controlled This is account track 0 When account track has been set only users that enter passwords for specified accounts can use this machine 0 Contac...

Страница 129: ...Before making copies 3 CS191 Phase3 3 43 2 Type in the account name and then touch OK 3 Touch Password 4 Type in the password and then touch OK...

Страница 130: ...t Method on the Authentication Method screen of Administrator mode was set to Password Only log on is possible by only entering the password For details refer to User authentication account track on p...

Страница 131: ...1 2 Press down on the paper lifting plate until it locks into place 3 Slide the lateral guides to fit the size of paper to be loaded How is non standard sized paper loaded First load the paper and th...

Страница 132: ...up Load letterhead paper so that the side to be printed on faces down How is curled paper loaded Flatten the paper before loading it How many sheets of paper and other media can be loaded No more tha...

Страница 133: ...ace of the paper feed roller with your hands If the lateral guides are not positioned correctly for the loaded paper the paper size will not be correctly detected Be sure to adjust the lateral guides...

Страница 134: ...ientation as shown in the illustration Do not load OHP in the w orientation When loading postcards load them in the w orientation as shown in the illustration Do not load postcards in the v orientatio...

Страница 135: ...ll out the paper tray 2 Slide the lateral guides to fit the size of paper to be loaded 3 Load the paper into the tray so that the side of the paper to be printed on the side facing up when the package...

Страница 136: ...paper that the top of the stack is higher than the mark 4 Close the paper tray 2 Reminder If the lateral guides are not positioned correctly for the loaded paper the paper size will not be correctly...

Страница 137: ...out even after the tray release button is pressed Be sure that the machine is turned on with the sub power switch 1 Press the tray release button 2 Pull out the LCT 3 Load the paper into the right si...

Страница 138: ...aces down 5 Close the LCT 2 Reminder Be careful not to touch the film Do not load so many sheets of paper that the top of the stack is higher than the mark For details on the paper that can be loaded...

Страница 139: ...if you wish to copy onto thick paper postcards envelopes OHP or labels To load paper bypass tray 1 Open the bypass tray When loading large sized paper pull out the tray extension 2 With the side to b...

Страница 140: ...ls on selecting a setting for non standard size paper refer to To specify a non standard paper size Custom Size settings on page 8 14 For details on selecting a setting for wide paper refer to To spec...

Страница 141: ...dges of the paper When loading postcards load them in the w orientation as shown in the illustration Do not load postcards in the v orientation A maximum of 20 postcards can be loaded into the bypass...

Страница 142: ...rmly pressed otherwise the envelopes may become wrinkled or a paper misfeed may occur When loading envelopes load them with the flap side up as shown in the illustration If the envelopes are loaded wi...

Страница 143: ...ls load them in the w orientation as shown in the illustration Do not load labels in the v orientation A maximum of 20 labels can be loaded into the bypass tray Be sure to load letterhead paper so tha...

Страница 144: ...the surface of the paper facing down when the paper is loaded into the bypass tray Detail For details on specifying the paper size for the bypass tray refer to To specify a paper size Set Size setting...

Страница 145: ...4 Basic copy operations...

Страница 146: ......

Страница 147: ...o copy a single sided original using basic copy operations 2 Note Some settings cannot be used together For details on the settings that cannot be combined refer to Operations that cannot be combined...

Страница 148: ...om setting on page 4 46 For details on specifying a Simplex Duplex setting refer to Selecting the original and copy type settings Simplex Duplex settings on page 4 60 For details on selecting the qual...

Страница 149: ...pecify the correct number of copies 5 Press the Start key To stop the copy operation being performed press the Stop key For details refer to Stopping scanning printing on page 4 102 The next copy oper...

Страница 150: ...he following occurring The setting specified last is given priority The setting specified first is canceled The setting specified first is given priority A warning message appears Operations where the...

Страница 151: ...ase3 4 7 2 Set the Booklet function The 2 Position Staple setting is automatically cancelled and the Booklet function is set To select the 2 Position Staple setting cancel the Booklet function and the...

Страница 152: ...e 2 Position Staple setting after setting the Booklet function is described below 1 Set the Booklet function 2 Select the 2 Position Staple setting The message This mode is not available with Booklet...

Страница 153: ...or machine may occur However an original that exceeds 100 pages can be scanned in separate batches For details refer to Scanning the original in separate batches Separate Scan setting on page 4 13 0...

Страница 154: ...size of the original For details on loading originals of mixed sizes refer to Copying originals of mixed sizes Mixed Original setting on page 4 24 For details on selecting the original orientation ref...

Страница 155: ...ly hard on a book spread placed on the original glass otherwise the original glass may be damaged 0 For thick books or large objects make the copy without closing the original cover or ADF if it is in...

Страница 156: ...Selecting the position of the binding margin Margin settings on page 4 32 For transparent or translucent originals place a blank sheet of paper of the same size as the original over the original For...

Страница 157: ...he ADF during the scanning operation 0 The loading capacity of the ADF is 100 sheets of normal paper 80 g m2 or 38 sheets of thick paper 210 g m2 0 Either Auto Print or Batch Print can be selected as...

Страница 158: ...o continue to step 5 4 Load the next batch of the original and then press the Start key Repeat this step until all pages of the original have been scanned If the original cannot be loaded into the ADF...

Страница 159: ...be changed Simplex Duplex Bind Zoom Frame Erase Center Erase Original Size The amount of memory available can be checked beside Memory in the upper right corner of the Basic screen To delete the image...

Страница 160: ...to Batch Print touch Yes in the screen that appears requesting confirmation that scanning of the original is finished Otherwise touch No is touched to return to step 3 6 Press the Start key If the Pr...

Страница 161: ...ng for Separate Scan parameter is set to Batch Print the copy settings can be changed To change the copy settings touch Change Setting and then touch OK after changing the settings as desired Otherwis...

Страница 162: ...as the print setting when scanning with the Separate Scan setting The default setting is Auto Print For details on selecting the print setting for scanning with the Separate Scan setting refer to Cop...

Страница 163: ...Basic copy operations 4 CS191 Phase3 4 19 4 In the Basic screen touch Simplex Duplex The Simplex Duplex screen appears 5 Touch 1 2...

Страница 164: ...ng the binding position refer to To select double sided copies on page 4 63 7 Touch Original Direction select the orientation of the loaded original and then touch OK For details on specifying the ori...

Страница 165: ...settings touch Change Setting For details on changing the scanning settings refer to To change scan settings for each original on page 4 37 The buttons that appear in the Change Setting screen differ...

Страница 166: ...to Batch Print touch Yes in the screen that appears requesting confirmation that scanning of the original is finished Otherwise touch No is touched to return to step 9 12 Press the Start key If the P...

Страница 167: ...ng for Separate Scan parameter is set to Batch Print the copy settings can be changed To change the copy settings touch Change Setting and then touch OK after changing the settings as desired Otherwis...

Страница 168: ...the stack is higher than the mark otherwise an original misfeed or damage to the original or machine may occur However an original that exceeds 100 pages can be scanned in separate batches For detail...

Страница 169: ...original Load the original pages into the ADF so that the top of the pages is toward the back or the left side of the machine 4 In the Basic screen touch Combine Originals The Combine Originals and Or...

Страница 170: ...t page of the original is detected and all pages of the original are scanned at that size 1 Position the original to be copied Unfold folded originals before loading them into the ADF If the original...

Страница 171: ...Basic copy operations 4 CS191 Phase3 4 27 3 Touch Z Folded Original To cancel the Z Folded Original setting touch Z Folded Original again to deselect it...

Страница 172: ...ng with the top of the original at the top toward the back of the machine Original loading orientation Using the ADF Using the original glass Icon Description Select this setting for an original loade...

Страница 173: ...l loaded into the ADF with the top of the original toward the right side of this machine Select this setting for an original placed on the original glass with the top of the original toward the left s...

Страница 174: ...osition the original to be copied For details on positioning the original refer to Feeding the original on page 4 9 2 In the Basic screen touch Combine Originals The Combine Originals and Original set...

Страница 175: ...Basic copy operations 4 CS191 Phase3 4 31 4 Touch the button for the orientation of the loaded original and then touch OK To cancel changes to the settings touch Cancel...

Страница 176: ...iginal by specifying the binding margin position for the original 2 Note The default setting is Auto Original binding margin position Margin setting Icon Description Select this setting if the origina...

Страница 177: ...the original length is 297 mm or less a binding position along the long side of the paper is selected If the original length is more than 297 mm a binding position along the short side of the paper i...

Страница 178: ...iginal with a binding margin position the top of the original toward the back of the machine For details on positioning the original refer to Feeding the original on page 4 9 2 In the Basic screen tou...

Страница 179: ...Basic copy operations 4 CS191 Phase3 4 35 4 Touch the button for the desired margin position and then touch OK To cancel changes to the settings touch Cancel...

Страница 180: ...are removed when scanning of an original loaded into the ADF begins 1 Load the original into the ADF For details on positioning the original refer to To load the original into the ADF on page 4 9 2 I...

Страница 181: ...re scanned from the original glass the scan settings can be changed for each original The following procedure describes how to change the settings when the Separate Scan setting is used 1 Position the...

Страница 182: ...en touch OK The buttons that appear in the Change Setting screen differ depending on the specified settings Settings for the following can be changed Simplex Duplex Bind Zoom Frame Erase Center Erase...

Страница 183: ...ls on specifying the Zoom setting refer to Specifying a zoom setting on page 4 46 For details on specifying a zoom ratio refer to Erasing specified areas of copies Erase function on page 9 73 6 Touch...

Страница 184: ...or or in black and white Single Color Select this setting to print copies in the specified color re gardless of whether the scanned original is in color or in black and white The color used for printi...

Страница 185: ...s 4 CS191 Phase3 4 41 To select a color setting The following procedure describes how to select a Color setting 1 In the Basic screen touch Color The Color screen appears 2 Touch the button for the de...

Страница 186: ...h the button for the second color If the Single Color setting was selected touch the button for the desired color and then touch OK Touch Back or Fwd and then select the desired color If desired touch...

Страница 187: ...er Select setting However a paper drawer set to Single Sided Only is given priority to be selected with single sided printing This setting is useful for paper drawers loaded with special paper For det...

Страница 188: ...using paper of the same size If the e1 0 Zoom setting was specified paper of the same size as the original is selected If the zoom ratio was increased or decreased a paper size that corresponds to the...

Страница 189: ...s selected based on the size of the loaded original and the specified paper size For details on the Auto Zoom setting refer to Automatically selecting the paper size Auto Paper Select setting on page...

Страница 190: ...ate zoom ratio is automatically selected based on the size of the loaded original and the specified paper size 0 The default setting is e1 0 0 The Auto Zoom and Auto Paper Select settings cannot be se...

Страница 191: ...Basic copy operations 4 CS191 Phase3 4 47 2 Touch Auto Zoom 3 Touch OK The Basic screen appears again...

Страница 192: ...ng A copy that is the same size as the original e1 000 is produced 0 The default setting is e1 0 0 Touch to enlarge the zoom ratio and touch to reduce the zoom ratio in e0 001 intervals 1 In the Basic...

Страница 193: ...ault setting is e1 0 0 Touch to enlarge the zoom ratio and touch to reduce the zoom ratio in e 0 001 increments 0 The zoom ratio of the Minimal setting can be changed between e0 900 and e0 999 For det...

Страница 194: ...4 Basic copy operations 4 50 CS191 Phase3 3 Touch OK The Basic screen appears again...

Страница 195: ...ard original size to a standard paper size 0 The default setting is e1 0 0 Touch to enlarge the zoom ratio and touch to reduce the zoom ratio in e0 001 increments 1 In the Basic screen touch Zoom The...

Страница 196: ...e of the allowable range is specified the message Input Error appears Type in a value within the allowable range If the value was incorrectly entered press the C clear key to erase the value and then...

Страница 197: ...1 Phase3 4 53 3 Use the keypad to type in the desired zoom ratio between 0 250 and 4 000 To cancel changes to the settings touch Cancel 4 Touch OK and then touch OK in the next screen that appears The...

Страница 198: ...between e0 250 and e4 000 By combining different horizontal and vertical zoom ratios the copy image can be adjusted as shown in the following illustration 0 If a value outside of the allowable range...

Страница 199: ...Basic copy operations 4 CS191 Phase3 4 55 2 Touch XY Zoom 3 Touch X under Set Individual Zoom and then use the keypad to type in the desired zoom ratio between e0 250 and e4 000 for the X direction...

Страница 200: ...t Individual Zoom and then use the keypad to type in the desired zoom ratio between e0 250 and e4 000 for the Y direction To cancel changes to the settings touch Cancel 5 Touch OK and then touch OK in...

Страница 201: ...setting is e1 0 0 Touch to enlarge the zoom ratio and touch to reduce the zoom ratio in e 0 001 increments 0 Stored zoom ratios can be changed to desired zoom ratios For details on storing zoom ratio...

Страница 202: ...value within the allowable range If the value was incorrectly entered press the C clear key to erase the value and then specify the correct value 0 The default zoom ratios e4 000 e2 000 and e0 500 are...

Страница 203: ...0 To cancel changes to the settings touch Cancel 4 Touch Set Zoom 5 Touch the button or Minimal where the new zoom ratio is to be stored To cancel changes to the settings touch Cancel The specified zo...

Страница 204: ...procedures describe how to select a Simplex Duplex setting Simplex Duplex Description 1 1 Select this setting to produce single sided copies from single sided originals 1 2 Select this setting to pro...

Страница 205: ...is selected specify the binding direction and the original direction otherwise the copies will not be printed as desired If the binding position for the original is set to Auto the position of the bin...

Страница 206: ...g position for the original and then touch OK 3 Touch Binding Direction select the binding position for the copies and then touch OK For details on specifying the original orientation refer to Selecti...

Страница 207: ...2 Specify the binding direction and the original direction otherwise the copies will not be printed as desired If the binding position for the original is set to Auto the position of the binding marg...

Страница 208: ...ong side of the paper is selected If the original length is more than 297 mm a binding position along the short side of the paper is selected If the binding position for the copy is set to Auto the bi...

Страница 209: ...nal Direction select the orientation of the loaded original and then touch OK For details on specifying the original orientation refer to Selecting the original orientation Original Direction settings...

Страница 210: ...etting when copying photos from originals con taining both text and images onto photographic paper A smooth copy image is produced Printed Photo Select this setting when copying printed originals cont...

Страница 211: ...containing pencil markings or fine colored lines A sharp copy image is produced Dot Matrix Original Select this setting when copying originals consisting only of text that appears faint such as that...

Страница 212: ...be copied For details on positioning the original refer to Feeding the original on page 4 9 2 In the Basic screen touch Quality Density The Quality Density screen appears 3 Touch the button for the qu...

Страница 213: ...Text Photo to display the Photo Type screen Touch the button for the appropriate setting and then touch OK For an original that contains photos touch Photo to display the Photo Type screen Touch the b...

Страница 214: ...0 CS191 Phase3 For an original that contains maps or faint text touch Special Quality to display the Special Quality screen Touch the button for the appropriate setting and then touch OK The Quality D...

Страница 215: ...ime Light or Dark is touched the background density is lightened or darkened by one level Touch Std to select the seventh setting from the Light end Touch Auto to automatically adjust the level of the...

Страница 216: ...y operations 4 72 CS191 Phase3 Adjusting the print density Density settings 1 In the Basic screen touch Quality Density The Quality Density screen appears 2 Touch Change under Density The Density scre...

Страница 217: ...73 3 Select the desired Density setting Each time Light or Dark is touched the density is lightened or darkened by one level To select the center setting default setting touch Std To cancel changes t...

Страница 218: ...S191 Phase3 Adjusting the background density Background Removal settings 1 In the Basic screen touch Quality Density The Quality Density screen appears 2 Touch Change under Background Removal The Back...

Страница 219: ...or Dark is touched the density is lightened or darkened by one level To select the third setting from the right default setting touch Std Touch Auto to automatically adjust the level of the background...

Страница 220: ...s 4 76 CS191 Phase3 Printing with a glossy finish Glossy setting 1 In the Basic screen touch Quality Density The Quality Density screen appears 2 Touch Glossy To cancel the Glossy setting touch Glossy...

Страница 221: ...191 Phase3 4 77 Adjusting the reproduction quality of text 0 The default setting is 0 1 In the Basic screen touch Quality Density The Quality Density screen appears 2 Touch Text Enhancement The Text E...

Страница 222: ...the desired text density setting Each time Lighter Text or Darker Text is touched the density is lightened or darkened by one level Touch Std to select the middle setting 0 of the nine levels To canc...

Страница 223: ...the auto display zoom ratio is selected and the original image is copied at a reduced size The auto display zoom ratios for each setting are listed below 2 in 1 e0 707 4 in 1 e0 500 8 in 1 e0 353 2 No...

Страница 224: ...setting Description 2 in 1 Select this setting to print two original pages on one page 4 in 1 Select this setting to print four original pages on one page The page arrangement Numbering Direction sett...

Страница 225: ...gin Margin settings on page 4 32 For details on specifying the original orientation refer to Selecting the original orientation Original Direction settings on page 4 28 1 In the Basic screen touch Com...

Страница 226: ...4 Basic copy operations 4 82 CS191 Phase3 If 4 in 1 or 8 in 1 was selected touch Horizontal or Vertical to specify the page arrangement To cancel the setting touch the button again to deselect it...

Страница 227: ...aper is used Paper of the same size and type is loaded with the w orientation in one paper tray and with the v orientation in another tray The Auto Paper Select setting is selected The Auto Paper Sele...

Страница 228: ...ge original collated Group Select this setting to separate the copies of each page in a multi page original uncollated Offset If no finisher is installed If the sorting conditions are met printed copi...

Страница 229: ...ble only if the optional finisher is installed The Punch settings are available only if the optional finisher and punch kit are installed Staple Select one of these settings to bind the copies with a...

Страница 230: ...size paper is used 0 Paper of the same size and type is loaded with the w orientation in one paper tray and with the v orientation in another tray 0 The Auto Paper Select setting is selected 0 The Aut...

Страница 231: ...perations 4 CS191 Phase3 4 87 2 Touch Sort To separate each set of copies touch Offset To specify the output tray touch the button for the desired tray under Output Tray 3 Touch OK The Basic screen ap...

Страница 232: ...e paper is used 0 Paper of the same size and type is loaded with the w orientation in one paper tray and with the v orientation in another tray 0 The Auto Paper Select setting is selected 0 The Auto P...

Страница 233: ...perations 4 CS191 Phase3 4 89 2 Touch Group To separate each set of pages touch Offset To specify the output tray touch the button for the desired tray under Output Tray 3 Touch OK The Basic screen ap...

Страница 234: ...e stapled as desired For details on specifying the original orientation refer to Selecting the original orientation Original Direction settings on page 4 28 Copies can be fed out stapled either in the...

Страница 235: ...s with staples 1 In the Basic screen touch Finishing The Finishing screen appears 2 Under Staple touch either Corner or 2 Position To cancel the Staple settings touch Corner or 2 Position again to des...

Страница 236: ...iginal If the original length is 297 mm or less the long side of the paper is stapled If the original length is more than 297 mm the short side of the paper is stapled If Auto is selected the stapling...

Страница 237: ...a Punch setting is to be selected select the orientation in which the original is positioned If an Original Direction setting is not selected holes may not be punched in the copies as desired For deta...

Страница 238: ...CS191 Phase3 To punch holes in copies 1 In the Basic screen touch Finishing The Finishing screen appears 2 Touch 4holes To cancel the Punch setting touch 4holes again to deselect it To cancel changes...

Страница 239: ...riginal length is 297 mm or less the holes are punched along the long side of the paper If the original length is more than 297 mm the holes are punched along the short side of the paper If Auto is se...

Страница 240: ...ut can be folded in half and stapled at two places along the vertical center Center Staple Fold settings folded in half and stapled at the center in two places Center Staple setting stapled at the cen...

Страница 241: ...between 257 mm and 431 8 mm Number of bound pages Examples of the possible number of bound pages are listed below 2 to 15 sheets of 90 g m2 paper maximum of 60 pages 1 sheet of 50 to 209 g m2 paper 14...

Страница 242: ...etting is selected 0 707 1 In the Basic screen touch Fold Staple The Center Erase screen appears 2 Specify the desired center binding and folding settings To staple copies at the center in two places...

Страница 243: ...Basic copy operations 4 CS191 Phase3 4 99 3 Touch OK The Basic screen appears again...

Страница 244: ...of the loaded original is finished A copy job cannot be reserved while an original is being scanned 0 If Utility Setting parameter Copy Operating Screen is set to ON Program Next Job appears Touch Pro...

Страница 245: ...pt another job appears an original can be loaded and copy settings can be specified for the next copy job For details on positioning the original refer to Feeding the original on page 4 9 3 Press the...

Страница 246: ...stop scanning printing 0 If an original is being scanned for a job pressing the Stop key stops scanning 0 For details on deleting a stopped job refer to Deleting a stopped job on page 4 103 1 Press th...

Страница 247: ...job being printed refer to Stopping scanning printing on page 4 102 0 Select only one job at a time to be deleted 0 To continue the stopped job press the Start key 1 Press the Stop key while an origi...

Страница 248: ...4 Basic copy operations 4 104 CS191 Phase3...

Страница 249: ...5 Additional copy operations...

Страница 250: ......

Страница 251: ...CS191 Phase3 5 3 5 Additional copy operations 5 1 Checking the copy settings Mode Check From the Mode Check screens the current copy settings can be checked and changed if desired To check the setting...

Страница 252: ...5 Additional copy operations 5 4 CS191 Phase3 The Mode Check screen appears...

Страница 253: ...sic screen appears again Detail There are four Mode Check screens The number of the currently displayed screen appears to the right of the screen title To display the previous screen touch Back To dis...

Страница 254: ...1 Press the Mode Check key 2 Touch Back or Fwd until the button for the function to be changed is displayed 3 Touch the button for the setting that you wish to change The screen for specifying the set...

Страница 255: ...the screen that appeared when the sample copy is printed To stop copying while the proof copy screen is displayed press the Reset key Otherwise select the proof copy job to be stopped from the list of...

Страница 256: ...To stop copying while the Change Setting screen is displayed select the proof copy job to be stopped from the list of jobs on the left side of the touch panel and then touch Delete In the screen that...

Страница 257: ...not be changed stop printing the proof copy Then press the Reset key to cancel the copy settings and then specify the desired settings 7 Press the Proof Copy key to print another sample copy To stop t...

Страница 258: ...ssage Job is stopping appears The indicator on the Interrupt key lights up in green and printing of the current job stops What settings are selected when the Interrupt key is pressed When the Interrup...

Страница 259: ...Additional copy operations 5 CS191 Phase3 5 11 2 Note If the interrupting job is cancelled printing for the interrupted job automatically restarts...

Страница 260: ...in the copy program For details refer to Checking the copy settings Mode Check on page 5 3 Can the current settings be checked To check the currently specified copy settings press the Mode Check key...

Страница 261: ...he name touch OK The copy program can be given the same name as a copy program that has already been registered The Recall Copy Program screen appears again The copy program is registered and a button...

Страница 262: ...at appears requesting confirmation to delete the copy program touch Yes to delete the selected copy program 6 Touch OK or Cancel The Basic screen can be displayed again if the Mode Memory key is press...

Страница 263: ...e Recall Copy Program screen touch the button for the copy program to be deleted 2 Touch Del A message appears requesting confirmation to delete the copy program 3 Touch Yes The Recall Copy Program sc...

Страница 264: ...can be recalled to be used again for copying 1 Position the original to be copied For details refer to page 4 9 2 Press the Mode Memory key The Recall Copy Program screen appears 3 Touch the button f...

Страница 265: ...d screen appears to the right of the screen title The buttons for functions where the setting has been changed from the default appear selected 5 Check the copy settings registered with the selected c...

Страница 266: ...screen appears again without a copy program recalled 8 Touch OK The programmed copy settings are recalled and the Basic screen appears again 9 Press the Start key Copying begins with the recalled cop...

Страница 267: ...than the Basic screen Overview of Help Screens The Help feature provides of the following menus Main Help Menu screen 1st level Item Description Copy Scan Fax Box Job List Banner Printing Displays th...

Страница 268: ...uit the Help mode and return to the screen that was displayed before the Help key was pressed The items displayed in the Help menu for the name and function of each part differ depending on the option...

Страница 269: ...screen title 1 4 in the previous screen indicate the number of the currently displayed screen total number of Help screens for the displayed item To display the previous screen touch Back To display t...

Страница 270: ...view Detail There are seven Function Map screens for Copy mode The top number indicates the number of the seven screens that is currently displayed To display the previous screen touch To display the...

Страница 271: ...roof copy during Enlarge Display mode during Accessibility mode 0 While the Help screens are displayed the following keys are not available Start Stop C clear Interrupt Proof Copy Access Mode Memory E...

Страница 272: ...tton for the desired information or press the key in the keypad for the number to the left of the desired information to display the corresponding Help screen 4 After checking the Help information tou...

Страница 273: ...s Why is there no Help information for some functions in the Help Menu screen Depending on the displayed screen there may be no Help information for some functions Is there more information about the...

Страница 274: ...tails on the procedures for specifying control panel settings and adjusting the touch panel Displaying the Accessibility Setting Screen Press the Accessibility key The Accessibility Setting screen app...

Страница 275: ...n be specified The factory default setting for Time To Start is 0 8 second and the factory default setting for Interval is 0 3 second 0 The settings specified for the Key Repeat Start Interval Time fu...

Страница 276: ...ettings touch Cancel 4 Touch OK The Accessibility Setting screen appears again 5 Touch Close or press the Accessibility key The Basic screen appears again 2 Note The Enlarge Display mode is compatible...

Страница 277: ...on to cancel Enlarge Display mode can be displayed In addition it is possible to specify the length of time that the message requesting confirmation to cancel Enlarge Display mode is displayed The fac...

Страница 278: ...or 120 sec for the length of time that the message is to be displayed To cancel changes to the settings touch Cancel 4 Touch OK The Accessibility Setting screen appears again 5 Touch Close or press t...

Страница 279: ...time for displaying warning messages which appear for example when an incorrect operation is performed The factory default setting is 3 sec 1 Display the Accessibility Setting screen To display the s...

Страница 280: ...of time that messages are displayed Select whether messages are displayed for 3 seconds or for 5 seconds To cancel changes to the settings touch Cancel 4 Touch OK The Accessibility Setting screen app...

Страница 281: ...you can set whether or not a sound is produced when a control panel key is pressed or a touch panel button is touched The factory default setting for Accept Sound Setting is ON 1 Display the Accessib...

Страница 282: ...Sound Key Refuse Sound or press the 1 key in the keypad The Key Accept Sound Key Refuse Sound screen appears 4 Specify the setting for Accept Sound Setting To produce a sound touch ON To not produce...

Страница 283: ...perations 5 CS191 Phase3 5 35 5 Touch OK The Sound Setting screen appears again 6 Touch Close The Accessibility Setting screen appears again 7 Touch Close or press the Accessibility key The Basic scre...

Страница 284: ...d with the position of the actual touch sensor and may need to be adjusted 1 Display the Accessibility Setting screen To display the screen refer to page 5 26 2 Touch Touch Panel Adj or press the 5 ke...

Страница 285: ...points If the check points have been touched correctly the indicator on the Start key lights up in green 4 Press the Start key The touch panel is adjusted and the Accessibility Setting screen appears...

Страница 286: ...confirmation to reset the settings in Enlarge Display mode In addition it is possible to specify when the message is displayed requesting confirmation to reset the settings in Enlarge Display mode Th...

Страница 287: ...Enlarge Display mode touch OFF To display the message requesting confirmation to reset the settings in Enlarge Display mode touch the button 30 sec 60 sec 90 sec or 120 sec for the length of time tha...

Страница 288: ...be seen more easily For details on the Enlarge Display mode refer to the Enlarge Display Operations of the user manual If the time setting is the same for the automatic panel reset operation and the...

Страница 289: ...play of the screen a message can be displayed requesting confirmation to reset the settings to their defaults The factory default setting is No 1 Display the Accessibility Setting screen To display th...

Страница 290: ...Basic screen appears again 2 Note The Enlarge Display mode is compatible with basic copy scanning and fax functions With the Enlarge Display mode text and illustrations are displayed at a larger size...

Страница 291: ...6 Troubleshooting...

Страница 292: ......

Страница 293: ...cted by the user occurred the message Malfunction detected Please call your Technical Representative appears call technical representative screen The phone number and fax number for the usual technica...

Страница 294: ...6 Troubleshooting 6 4 CS191 Phase3 Touch to display the message shown in the following illustration...

Страница 295: ...ub power switch to turn off the control panel 3 Use the main power switch to turn off the machine 4 Unplug the machine 5 Contact the technical representative and inform them of the malfunction code 2...

Страница 296: ...quately cleared Location of paper misfeed A flashing o indicates the location of the paper misfeed In addition a lit o indicates areas where paper may have been misfed and that should be checked Examp...

Страница 297: ...Troubleshooting 6 CS191 Phase3 6 7 Display in Enlarge Display mode If a paper misfeed occurs the screen shown below appears Touch to display the message shown in the following illustration...

Страница 298: ...6 Troubleshooting 6 8 CS191 Phase3 Paper misfeed indications 6 7 8 9 11 12 13 14 16 15 10 1 2 3 4 5...

Страница 299: ...DF turnover section p 6 43 6 A paper misfeed in the fusing unit p 6 21 7 A paper misfeed in the main unit p 6 18 8 A paper misfeed in the bypass tray p 6 10 9 A paper misfeed in the LCT p 6 17 10 A pa...

Страница 300: ...ear a paper misfeed in the bypass tray 1 Remove all paper from the bypass tray 2 If the misfed paper could not be removed open the upper right side door 3 Open inside cover M1 4 Slowly pull out the pa...

Страница 301: ...water and then seek professional medical attention 2 Reminder Decreased copy print image quality may result if the surface of the image transfer belt or image transfer roller is touched Be careful no...

Страница 302: ...91 Phase3 To clear a paper misfeed in the ADU 1 Open the ADU door 2 Carefully pull out any misfed paper 3 Close the ADU door Detail For details on the positions of paper misfeeds refer to Paper misfee...

Страница 303: ...the tray 1 1 Pull up the upper right side door release lever and then open the upper right side door 2 Open inside cover M1 3 Slowly pull out the paper 4 Close the upper right side door 5 Pull out th...

Страница 304: ...cal attention 2 Reminder Be careful not to touch the surface of the paper feed roller with your hands Decreased copy print image quality may result if the surface of the image transfer belt or image t...

Страница 305: ...e center right side door release lever and then open the center right side door 2 Carefully pull out any misfed paper 3 Close the center right side door 4 Pull out the tray 2 and then remove any misfe...

Страница 306: ...and then open the lower right side door 2 Carefully pull out any misfed paper 3 Close the lower right side door 4 Pull out the paper tray and then remove any misfed paper 5 Close the paper tray 2 Remi...

Страница 307: ...e lower right side door 2 Carefully pull out any misfed paper 3 Close the lower right side door 4 Press the tray release button pull out the LCT and then remove any misfed paper 5 Close the LCT 2 Remi...

Страница 308: ...1 Pull up the upper right side door release lever and then open the upper right side door 2 Slowly pull out the paper 3 If the end of the paper is caught in the timing roller section open inside cover...

Страница 309: ...paper into the paper tray again and then close the tray 7 CAUTION The area around the fusing unit is extremely hot Touching anything other than the indicated levers and dials may result in burns If y...

Страница 310: ...ce of the paper feed roller in the tray 1 or the film in the tray 2 3 and 4 and in the LCT with your hands Decreased copy print image quality may result if the surface of the image transfer belt or im...

Страница 311: ...n the fusing unit 1 Pull up the upper right side door release lever and then open the upper right side door 2 Push up the fusing unit cover and then slowly pull out any misfed paper 3 Press fusing uni...

Страница 312: ...6 Troubleshooting 6 22 CS191 Phase3 4 Slowly pull out any misfed paper 5 Raise the fusing unit cover lever M3 and then close the fusing unit cover 6 Close the fusing unit cover...

Страница 313: ...e door 7 CAUTION The area around the fusing unit is extremely hot Touching anything other than the indicated levers and dials may result in burns If you get burnt immediately cool the skin under cold...

Страница 314: ...ller in the fusing unit The paper that was removed tore and partly remains in the fusing unit Decreased copy quality may result if the surface of the image transfer belt or the transfer roller is touc...

Страница 315: ...upper right side door release lever and then open the upper right side door If the end of the paper cannot be seen or cannot be grabbed pull out the paper in the direction of the arrow 2 Open inside c...

Страница 316: ...ss fusing unit cover release button M2 and then open the fusing unit cover Do not manually return the M2 release levers to their original positions They will return to their original positions when th...

Страница 317: ...Troubleshooting 6 CS191 Phase3 6 27 8 Raise fusing unit cover lever M3 and then close the fusing unit cover 9 Close the fusing unit cover 10 Close the upper right side door...

Страница 318: ...The area around the fusing unit is extremely hot Touching anything other than the indicated levers and dials may result in burns If you get burnt immediately cool the skin under cold water and then se...

Страница 319: ...wrapped around the timing roller The paper is folded or shredded by the timing roller 2 Reminder Decreased copy quality may result if the surface of the image transfer belt or the image transfer rolle...

Страница 320: ...shooting 6 30 CS191 Phase3 To clear a paper misfeed in the ADF feed section 1 Remove all original pages from the original feed tray 2 Open the left side cover 3 Raise the original feed tray as far as...

Страница 321: ...misfed original pages Since the original pages may be damaged lift up the original feed tray before pulling out any misfed pages When pulling out misfed paper be sure to pull it in the feed direction...

Страница 322: ...3 6 Close the left side cover 7 Load the original into the original feed tray according to the instructions that appear on the screen Detail For details on the positions of paper misfeeds refer to Pap...

Страница 323: ...ting 6 CS191 Phase3 6 33 To clear a paper misfeed in the ADF transport section 1 Remove all original pages from the original feed tray 2 Open the left side cover 3 Raise the original feed tray as far...

Страница 324: ...damaged lift up the original feed tray before pulling out any misfed pages If the misfeed occurred with the second side of a double sided original open the transparent guide in the left side cover an...

Страница 325: ...tray to its original position 6 Close the left side cover 7 Load the original into the original feed tray according to the instructions that appear on the screen Detail For details on the positions of...

Страница 326: ...ooting 6 36 CS191 Phase3 To clear a paper misfeed in the ADF scanning section 1 Remove all original pages from the original feed tray 2 Open the left side cover 3 Raise the original feed tray as far a...

Страница 327: ...e direction of the arrow to feed out the original page If the edge of the paper is not visible in the original exit tray open the guide and pull out the edge of the paper and then turn misfeed clearin...

Страница 328: ...38 CS191 Phase3 6 Close the ADF 7 Return the original feed tray to its original position 8 Close the left side cover 9 Load the original into the original feed tray according to the instructions that...

Страница 329: ...Troubleshooting 6 CS191 Phase3 6 39 Detail For details on the positions of paper misfeeds refer to Paper misfeed indications on page 6 8...

Страница 330: ...CS191 Phase3 To clear a paper misfeed in the ADF output section 1 Remove all original pages from the original feed tray 2 Lift the original feed tray up as much as possible and then slowly pull out an...

Страница 331: ...Phase3 6 41 3 If the misfed paper could not be removed open the ADF 4 Turn misfeed clearing dial 1 in the direction of the arrow to feed the original page into the original exit tray 5 Close the ADF...

Страница 332: ...original feed tray to its original position 7 Load the original into the original feed tray according to the instructions that appear on the screen Detail For details on the positions of paper misfeed...

Страница 333: ...6 43 To clear a paper misfeed in the ADF turnover section 1 Remove all original pages from the original feed tray 2 Raise the original feed tray up as far as possible and then remove all original pag...

Страница 334: ...ginal pages Lift the original feed tray up as much as possible and then lift the original exit tray as much as possible Do not lift the original feed tray with the original exit tray Turn misfeed clea...

Страница 335: ...iginal position 5 Return the original feed tray to its original position 6 Load the original into the original feed tray according to the instructions that appear on the screen Detail For details on t...

Страница 336: ...lease lever 1 to unlock the finisher 2 Grab the finisher at 2 and then slide the finisher away from the main unit To move the finisher away from the main unit be sure to grab it at 2 Do not grab the m...

Страница 337: ...t any paper If the punch kit is installed pull out the hole punch waste container FN3 1 6 Return guide FN3 to its original position If the punch kit is installed insert the hole punch waste container...

Страница 338: ...Return the finisher to its original position When returning the finisher to its original position do not grab the handle on the front door the control panel the mailbins or the saddle stitcher Detail...

Страница 339: ...se3 6 49 To clear a paper misfeed in the mailbin 1 Open the front door 2 Turn dial FN5 or dial FN6 to feed out the paper 3 While pressing down lever FN7 pull out any paper 4 Pull handle FN8 to open th...

Страница 340: ...ng 6 50 CS191 Phase3 5 Pull out any paper in the mailbin 6 Close the misfeed clearing door 7 Close the front door Detail For details on the positions of paper misfeeds refer to Paper misfeed indicatio...

Страница 341: ...6 51 To clear a paper misfeed in the saddle stitcher 1 Open the front door 2 Turn dial FN5 or dial FN6 to feed out the paper 3 Remove all paper from the finishing tray 4 Open the misfeed clearing doo...

Страница 342: ...6 Troubleshooting 6 52 CS191 Phase3 5 Close the misfeed clearing door 6 Close the front door Detail For details on the positions of paper misfeeds refer to Paper misfeed indications on page 6 8...

Страница 343: ...r appears To replenish paper Check which paper tray appears highlighted in the touch panel and then load it with paper Detail For details on loading paper into the paper trays refer to Loading paper i...

Страница 344: ...ugh remaining memory to continue the job or The job has been deleted Not enough remaining memory appears Continue the operation according to the corresponding instructions Memory becomes full while sc...

Страница 345: ...This message appears when the memory becomes full and the scanned job was deleted while scanning an original for a job to be queued Check the number of pages counted for the original and then adjust...

Страница 346: ...ail When the message appears replace the specified consumables or part according to your maintenance agreement After the message Please replace following unit s the message Need to replace XXXX appear...

Страница 347: ...is time to replace supplies or a part within this machine a message similar to the one shown below appears indicating that the part or supplies should be replaced and the machine stops operating Disp...

Страница 348: ...When the message appears replace the specified consumables or part according to your maintenance agreement 2 Reminder Do not throw away used consumables or parts Instead keep them in their boxes to be...

Страница 349: ...tput is too light Is the copy density set too light Touch Dark in the Density screen to copy at the desired copy density See p 4 72 Is the paper damp Replace the paper with new paper See p 3 45 p 3 49...

Страница 350: ...e the charger cleaning tool to clean the electrostatic charger See p 11 6 The image is not aligned properly on the paper Is the original incorrectly po sitioned Correctly position the original against...

Страница 351: ...er with a reduced zoom ratio specified Select a zoom ratio that adjusts the original size to the selected paper size See p 4 46 Otherwise select the Auto Zoom setting to reduce the copy to the se lect...

Страница 352: ...that the cord is correctly in serted into the connector The pages cannot be stapled Have the staples run out Replace the staple cartridge See p 10 9 The staple is incorrectly positioned by 90 Are the...

Страница 353: ...ut Tray has reached its capacity Please remove all pages from section tray Since the maximum amount of copies for the indicated fin ishing tray has been exceed ed the machine is unable to make copies...

Страница 354: ...empty Replace Staple Cartridge or can cel Staple mode The staples have run out Replace the staple cartridge See Replacing the staples on page 10 9 Misfeed detected Since a paper misfeed oc curred the...

Страница 355: ...The Administrator Pass word is not valid due to unauthorized access The administrator password has become invalid since the authentication attempts have failed the specified number of times Turn the...

Страница 356: ...6 Troubleshooting 6 66 CS191 Phase3...

Страница 357: ...7 Specifications...

Страница 358: ......

Страница 359: ...g m2 thick paper 3 210 to 256 g m2 OHP letterheads colored paper envelopes labels banner paper 127 to 160 g m2 Can only be fed through the tray 1 or the bypass tray Can only be fed through the bypass...

Страница 360: ...First copy Full color 8 5 seconds or less Black 6 5 seconds or less when printing on A4 v size paper Copy speed Full color black 35 ppm single sided 32 sides min double sided With special paper or wi...

Страница 361: ...irements Supplied from main unit Power consumption Less than 17 W Dimensions 110 mm W e 440 mm D e 345 mm H Weight Approx 3 kg Specifications Original feed methods Normal paper Single sided and double...

Страница 362: ...ssible combinations for mixed original sizes o Possible Not possible Maximum Original Width Original Size A3 w A4 v B4 w B5 v A4 w A5 v B5 w A5 w A3 w o o A4 v o o B4 w o o o o B5 v o o o o A4 w o o o...

Страница 363: ...r tray Specifications Paper types Normal paper 60 to 90 g m2 Paper sizes A3 w to A5 w 11 e 17 w to 8 1 2 e 11 w v Tray paper capacity Upper tray tray 3 500 sheets 80 g m2 Lower tray tray 4 500 sheets...

Страница 364: ...g m2 OHP postcards enve lopes or label sheets letterheads 20 sheets Output tray 2 Normal paper 50 to 90 g m2 1 000 sheets of A4 w or smaller or 500 sheets of B4 w or larger Thick paper 91 to 256 g m2...

Страница 365: ...76 mm W e 281 mm D Weight 7 4 kg Consumables MS 2C cartridge for 2 000 e 1 Power requirements Supplied from finisher Specifications Number of bins 1 bin Paper capacity Normal paper 50 to 90 g m2 Maxim...

Страница 366: ...7 Specifications 7 10 CS191 Phase3...

Страница 367: ...8 Copy paper originals...

Страница 368: ......

Страница 369: ...es Non standard sized paper Banner paper Paper width 210 mm to 297 mm Paper length 457 3 mm to 1200 mm Paper source Paper width Paper length Bypass tray 90 0 mm to 311 1 mm 139 7 mm to 1200 mm Tray 1...

Страница 370: ...e 17 w to 5 1 2 e 8 1 2 w v 8 e 13 w 1 Tray 2 A3 w to A5 w 11 e 17 w to 8 1 2 e 11 w v 8 e 13 w 1 Single Double paper feed cabinets LCT A4 v Double sided copies A3 w to A5 w v A3 Wide 12 e 18 w 11 e 1...

Страница 371: ...ay 1 250 sheets 20 sheets or less 20 sheets or less 20 sheets or less Tray 2 500 sheets Single Double paper feed cabi nets 500 sheets 1 000 sheets LCT 2 500 sheets Double sided copies o o o o Paper ty...

Страница 372: ...ady printed with a company name or preset text is loaded as normal pa per with a weight of 60 g m2 to 90 g m2 A paper tray with this setting is not automatically se lected when the Auto Paper Select s...

Страница 373: ...lly Envelope Select this setting when envelopes are loaded A paper tray with this setting is not automatically se lected when the Auto Paper Select setting is spec ified or when the paper trays are sw...

Страница 374: ...gh paper or paper with an uneven surface Paper that has been treated such as carbon backed heat sensitive or pressure sensitive paper Paper that has been decorated with foil or embossing Paper of a no...

Страница 375: ...the Utility mode is set to Allow Operating Conditions The paper is the same size The paper is positioned in the same orientation The paper is the same type Paper trays that are selected when the pape...

Страница 376: ...he tray 1 on page 3 45 For details on loading the paper into the bypass tray refer to Loading paper into the bypass tray on page 3 53 To automatically detect the paper size Auto Paper Select setting T...

Страница 377: ...ay 1 To specify automatic detection for the bypass tray touch the button for the bypass tray 3 Touch Change Tray Settings 4 Touch Auto Detect As a default Auto Detect is selected 5 Touch OK and then t...

Страница 378: ...ul for example when the size of the paper that is loaded cannot be automatically detected such as with postcards or paper in inch sizes The following procedure describes how to specify the postcard se...

Страница 379: ...elected If paper other than postcards is loaded change the paper type setting For details on the paper type settings refer to To specify a setting for special paper on page 8 24 6 Touch OK and then to...

Страница 380: ...standard sized paper is loaded it will be necessary to enter the paper size The following procedure describes how to specify the size of non standard paper loaded into the tray 1 1 In the Basic screen...

Страница 381: ...in the length of side X 139 7 mm to 457 2 mm Touch Y to select it and then use the keypad to type in the length of side Y 90 0 mm to 311 1 mm If a value outside of the allowable range is specified th...

Страница 382: ...ey The names memory1 through memory5 can be changed For details on changing the names refer to To store a non standard paper size Custom Size settings on page 8 17 For details on storing paper sizes r...

Страница 383: ...ws the paper size to be quickly selected without having to re enter the setting The following procedure describes how to store a non standard paper size for the tray 1 1 In the Basic screen touch Pape...

Страница 384: ...m to 457 2 mm Touch Y to select it and then use the keypad to type in the length of side Y 90 0 mm to 311 1 mm Check the illustration in the screen for the sides that are considered X and Y If a value...

Страница 385: ...aper size is to be stored To change the name of a memory key touch Custom Name and then touch the key to be renamed Using the keyboard that appears type in the name of the key touch OK and then touch...

Страница 386: ...8 Copy paper originals 8 20 CS191 Phase3 7 Touch OK and then touch OK in the next four screens that appear The Basic screen appears again...

Страница 387: ...For example if A3 Wide paper is used an area up to 311 1 mm e 457 mm can be printed allowing the entire area of an A3 size original to be printed If oversized paper is loaded it will be necessary to...

Страница 388: ...per The Oversized Paper screen appears 5 Select the size of the paper to be loaded To select a paper size in inches touch Inches The list of paper sizes in inches appears 6 To change the size touch Ch...

Страница 389: ...he message Input Error appears Type a value within the allowable range The allowable range differs depending on the paper sizes If the value was incorrectly entered press the C clear key in the keypad...

Страница 390: ...the ATS feature However a paper tray set to Single Side Only is given priority when the Auto Paper Select setting is specified or when the paper trays are switched automatically The following procedur...

Страница 391: ...on the types of paper that can be loaded in a paper tray For details on the type of paper that can loaded refer to Specifications on page 7 3 Paper feed cabinet PC 103 on page 7 7 If postcards were lo...

Страница 392: ...nt double sided copies The following procedure describes how to specify the setting for paper already printed on one side and loaded into the tray 1 1 In the Basic screen touch Paper The Paper screen...

Страница 393: ...riginals 8 CS191 Phase3 8 27 4 Touch Duplex 2nd Side 5 Select the setting for the type of used paper that is loaded 6 Touch OK and then touch OK in the next two screens that appear The Basic screen ap...

Страница 394: ...izes For Z folded originals There are limits on the types of originals that can be loaded with each method Normal method For originals of mixed sizes Single sided originals Double sided originals Orig...

Страница 395: ...le Not possible Detail 1Indicates the width of the widest original size of the mixed originals width of the lateral guides of the ADF 2Indicates original sizes that can be specified together with the...

Страница 396: ...paper Originals printed on paper thicker than 211 g m2 Originals printed on paper thicker than 111 g m2 during double sided copying Originals that are bound for example with staples or paper clips Or...

Страница 397: ...1 There are five Foolscap sizes 220 mm e 330 mm w 8 1 2 e 13 w 8 1 4 e 13 w 8 1 8 e 13 1 4 w and 8 e 13 w Any one of these sizes can be selected For details contact the technical representative Origin...

Страница 398: ...is loaded the Auto Paper Select and Auto Zoom settings cannot be used since the original size cannot be detected automatically If an original of non standard paper size is loaded select the size of th...

Страница 399: ...9 Application functions...

Страница 400: ......

Страница 401: ...n In order to prevent copies printed onto OHP from sticking together as a result of the heat that is produced during copying paper interleaf can be inserted between the transparencies Detail For detai...

Страница 402: ...details on positioning the original refer to Feeding the original on page 4 9 2 Load OHP into the bypass tray or the tray 1 Load the interleaf paper into the desired paper tray Use interleaf paper wi...

Страница 403: ...3 9 5 4 Touch Application and then touch Sheet Cover Chapter Insert To cancel all settings for the Application functions touch Reset The Sheet Cover Chapter Insert screen appears 5 Touch OHP Interleav...

Страница 404: ...ase3 6 Select the paper tray loaded with the interleaf paper To cancel changes to the settings touch Cancel To cancel the OHP Interleave function touch OFF 7 Touch OK 8 If necessary specify any other...

Страница 405: ...heet With double sided copying the second page of the original is copied onto the back of the front cover sheet Front Blank Paper for the front cover sheet is added as the first page of the copy The s...

Страница 406: ...r pages and the paper for the main body of the original into separate paper trays Use paper with the same size for the cover pages and for the main body of the original and load them in the same orien...

Страница 407: ...or the paper tray loaded with cover pages can be specified from the Utility mode For details refer to Copier setting on page 13 33 To cancel changes to the copy settings touch Cancel To cancel the Cov...

Страница 408: ...ct the paper tray loaded with the paper for the cover pages 8 Touch OK and then touch OK in the next screen that appears 9 If necessary specify any other copy settings 10 Using the keypad type in the...

Страница 409: ...is specified If Blank was set the specified paper is inserted after the specified page When page 5 is specified Finishing Description Single sided copies The specified paper is inserted for the 6th p...

Страница 410: ...Phase3 Detail The specified paper can be inserted at a maximum of 15 locations within an original of up to 999 pages In double sided originals one double sided page is considered to be two pages one...

Страница 411: ...er to be inserted and the paper for the main body of the copy into separate paper trays Make sure that the paper loaded for the insertion and for the copy have the same size and orientation 3 Touch Ap...

Страница 412: ...owest number To remove a page number that has been specified touch Edit touch the button for the page to be removed and then press the C clear key If the same page number is entered twice the same pag...

Страница 413: ...Copy or Blank under Insert Type If Copy is set the original is copied with the specified paper inserted for the specified page If Blank is set the specified paper is inserted after the specified page...

Страница 414: ...inal glass can be inserted at the specified location in an original first scanned with the ADF The inserted original is added after the specified pages Detail A separate original can be inserted at a...

Страница 415: ...e original on page 4 9 For an original that exceeds 100 pages refer to Scanning the original in separate batches Separate Scan setting on page 4 13 2 Touch Application and then touch Sheet Cover Chapt...

Страница 416: ...ge number that has been specified touch Edit touch the button for the page to be removed and then press the C clear key If the total number of pages in the original to be inserted is greater than the...

Страница 417: ...e is added at the end of the original copy 5 Touch OK 6 If necessary specify any other copy settings 7 Using the keypad type in the desired number of copies 8 Press the Start key Scanning begins 9 Pla...

Страница 418: ...unctions 9 20 CS191 Phase3 11 Touch Finish To insert a multi page original repeat steps 9 and 10 until all pages of the insertion original are scanned in the order that they are to be inserted 12 Pres...

Страница 419: ...o that the specified page would be printed on the back side of a page the page is left blank and the specified page is printed on the front side of the next page In addition the specified page can be...

Страница 420: ...For details on positioning the original refer to Feeding the original on page 4 9 For an original that exceeds 100 pages refer to Scanning the original in separate batches Separate Scan setting on pag...

Страница 421: ...button for the page to be removed and then press the C clear key Set Simplex Duplex to 1 2 If the same page number is entered twice the same page number is specified and there is no change to the pri...

Страница 422: ...ected Chapter Paper appears Touch Chapter Paper select the paper to be used for the first page of the chapter and then touch OK 6 Touch OK 7 If necessary specify any other copy settings 8 Using the ke...

Страница 423: ...their copies can be printed together Different zoom or paper settings can be specified for a part of the original or Finishing settings or the Set Numbering function can be set after the entire origi...

Страница 424: ...fer to Feeding the original on page 4 9 When saving scanned data in a box some scanned data may be lost if more than 9 000 pages are saved in the box 2 Touch Application and then touch Sheet Cover Cha...

Страница 425: ...roof Copy key Scanning begins 5 Select Fix and then touch OK To change the copy settings select Retry and then touch Change Setting If the original is placed on the original glass touch Finish in the...

Страница 426: ...e checked beside Number of Sep Scans If not enough space is available in the memory a message appears Select whether to delete the last part of the data and scan it again delete the last part of the d...

Страница 427: ...Touch Print and then specify the printing method for the entire scanned original Is there more information about the settings Refer to the appropriate section 11 Using the keypad type in the desired n...

Страница 428: ...ption Book Spread Copies of the left and right pages of the page spread are printed on the same page without being separated Separation Separate copies of each page in the page spreads are printed in...

Страница 429: ...inal refer to Feeding the original on page 4 9 To add copies of the covers load them first How are the front and back covers copied Scan the front cover then the back cover and then scan the remainder...

Страница 430: ...ront and Back Cover is selected Position appears Select the binding position of the original If necessary touch Erase or Center Erase under Book Erase Select the desired area to be erased touch and to...

Страница 431: ...an be used together How are settings specified for the Erase function Refer to Erasing specified areas of copies Erase function on page 9 73 In addition if the Erase function in the Application screen...

Страница 432: ...10 Press the Start key For details on scanning the original refer to Scanning a multi page original from the original glass on page 4 18 Scanning begins If Book Spread or Separation was selected the c...

Страница 433: ...ve been scanned touch Finish If Front and Back Cover was selected the back cover is scanned after the front cover and then all page spreads are scanned in order If Front Cover was selected all page sp...

Страница 434: ...etails on stapling refer to To bind copies at the center Fold Staple on page 4 98 The number of sheets that can be stapled together is no more than 15 and differs depending on the paper type For detai...

Страница 435: ...copied Load a booklet with the staples removed For details on positioning the original refer to Feeding the original on page 4 9 When using the original glass position the pages in order starting with...

Страница 436: ...CS191 Phase3 2 Touch Application and then touch Book Copy Repeat To cancel all settings for the Application functions touch Reset The Book Copy Repeat screen appears 3 Touch Booklet Original The Book...

Страница 437: ...uch OK 6 If necessary specify any other copy settings 7 Using the keypad type in the desired number of copies 8 Press the Start key If the original is placed on the original glass scanning begins Touc...

Страница 438: ...o the original and paper sizes and the zoom ratio The following repeating formats and settings are available Setting Description With Margin Multiple copies are printed of the entire image within the...

Страница 439: ...ding the original on page 4 9 2 Load the paper to be used into the desired paper tray 3 Touch Application and then touch Book Copy Repeat To cancel all settings for the Application functions touch Res...

Страница 440: ...ze under Scan Range touch OK and then touch OK in the next screen that appears If the original size does not appear under Scan Range or to specify the scanning area touch Set Range and then specify th...

Страница 441: ...Application functions 9 CS191 Phase3 9 43 To cancel the Image Repeat function touch OFF Standard Size screen Custom Size screen Photo Size screen...

Страница 442: ...pad to specify the correct value To enter a value press the C clear key and then use the keypad to type in the new value What happens when a value outside of the allowable range is specified The messa...

Страница 443: ...rged The finished size can be specified by the image size zoom ratio or paper size To copy using the Poster Mode function 1 Position the original to be copied For details on positioning the original r...

Страница 444: ...oes not appear if optional saddle stitcher is not installed 4 Touch Image Size Zoom or Paper Size under Finished Size The factory default setting for the finished size is A2 Touch Image Size select th...

Страница 445: ...tom Size screen appears Touch X or Y to select the dimension and then use the keypad to specify the desired value To enter a value press the C clear key and then use the keypad to type in the new valu...

Страница 446: ...elect the finished paper size and then touch OK 5 Check the original size under Original Size and then touch OK If the original size does not appear or to specify the original size touch Standard Size...

Страница 447: ...rd sized original is loaded the original size is automatically detected after the Start key is pressed If a non standard sized original is loaded the original size is not detected Therefore specify th...

Страница 448: ...to select the dimension and then use the keypad to specify the correct value To enter a value press the C clear key and then use the keypad to type in the new value What happens when a value outside...

Страница 449: ...is installed Detail Generally a multiple of 4 original pages is required with a single sided original and a multiple of 2 original pages is required with a double sided original If there are not enou...

Страница 450: ...iginal on page 4 9 2 Touch Application and then touch Booklet To cancel all settings for the Application functions touch Reset 3 Touch either Left Bind or Right Bind If the original contains only page...

Страница 451: ...Application functions 9 CS191 Phase3 9 53 4 Touch OK 5 If necessary specify any other copy settings 6 Using the keypad type in the desired number of copies 7 Press the Start key...

Страница 452: ...An original can be copied with the light and dark colored areas or the colors gradations of the image inversed Detail If the Single Color function is set the colors are inversed with the selected col...

Страница 453: ...ied For details on positioning the original refer to Feeding the original on page 4 9 2 Touch Application and then touch Edit Color To cancel all settings for the Application functions touch Reset The...

Страница 454: ...9 Application functions 9 56 CS191 Phase3 4 If necessary specify any other copy settings 5 Using the keypad type in the desired number of copies 6 Press the Start key...

Страница 455: ...rror image of the original To copy using the Mirror Image function 1 Position the original to be copied For details on positioning the original refer to Feeding the original on page 4 9 2 Touch Applic...

Страница 456: ...the original size does not appear or to specify the original size touch Standard Size and then specify the original size from any of the screens If a non standard sized original is loaded the origina...

Страница 457: ...function touch OFF Can sizes in inches be displayed Touch or to display a different list of sizes If Custom Size is touched the Custom Size screen appears If Photo Size is touched the Photo Size scre...

Страница 458: ...specify the correct value What happens when a value outside of the allowable range is specified The message Input Error appears If Input Error appears or if the value was incorrectly entered press the...

Страница 459: ...blank areas Detail For sample images of the Background Color function refer to Background Color function on page 1 36 To copy using the Background Color function 1 Position the original to be copied F...

Страница 460: ...The Background Color screen appears 4 Select the desired background color To cancel changes to the settings touch Cancel To cancel the Background Color function touch OFF Can other background colors...

Страница 461: ...Application functions 9 CS191 Phase3 9 63 5 Touch OK 6 If necessary specify any other copy settings 7 Using the keypad type in the desired number of copies 8 Press the Start key...

Страница 462: ...an be used to adjust the level of green in the image Blue This parameter can be used to adjust the level of blue in the image Hue The hue is divided into red blue and yellow By adjusting the hue the i...

Страница 463: ...or adjusting the Brightness parameter is described below 1 Touch Application and then touch Edit Color To cancel all settings for the Application functions touch Reset The Edit Color screen appears 2...

Страница 464: ...cel the Brightness parameter touch OFF The Sharpness parameter can only be specified in single increments In the Color Balance screen touch the button for a color and then specify the adjustment setti...

Страница 465: ...Application functions 9 CS191 Phase3 9 67 2 Note Even though the setting can be specified in increments of 1 3 the setting will appear at the nearest full increment in the Adjust Color screen...

Страница 466: ...ow Detail For details on displaying the screen for each Adjust Color parameter refer to Adjusting the copy color quality Adjust Color parameters on page 9 64 2 Note Sample Copy does not appear in the...

Страница 467: ...ple Copy screen appears 2 Load paper of a size listed under Paper that can be used into the paper tray 3 Place the original within the sample area of the original glass 4 Press the Start key 2 Note Af...

Страница 468: ...filing margin Detail If the positions of the staples or punched holes are different from the binding position the positions of the staples or punched holes are given priority 4 4 ABC DEF GHI 4 4 ABC...

Страница 469: ...the original on page 4 9 2 Touch Application and then touch Page Margin To cancel all settings for the Application functions touch Reset The Page Margin screen appears 3 Specify the position of the fi...

Страница 470: ...fy the margin width If None is selected the margin width is set to 0 mm When making double sided copies the image orientation can adjusted without creating a filing margin What happens when a value ou...

Страница 471: ...h frame erasing the same width can be erased along all four sides of the original or a different width can be erased along each side of the original To copy using the Erase function 1 Position the ori...

Страница 472: ...the width to be erased To specify a different width to be erased depending on the position specify different settings for Top Left Right and Bottom When using the keypad to specify the settings press...

Страница 473: ...d in any of the following ways Setting Description Full Size The area that contains the entire image is centered and en larged to the size of the paper Centering is also selected automatically Center...

Страница 474: ...et position the original on the original glass 2 Touch Application and then touch Image Adjustment To cancel all settings for the Application functions touch Reset The Image Adjustment screen appears...

Страница 475: ...91 Phase3 9 77 4 Check the original size under Original Size and then touch OK If the original size does not appear or to specify the original size touch Standard Size and then specify the original si...

Страница 476: ...Phase3 If a non standard sized original is loaded the original size is not detected Therefore specify the original size in the Custom Size screen and then press the Start key Standard Size screen Cus...

Страница 477: ...to select the dimension and then use the keypad to specify the correct value To enter a value press the C clear key and then use the keypad to type in the new value What happens when a value outside o...

Страница 478: ...e available and can be combined Setting Description Reference Date Time Select a format and print the date or time on the specified pages Refer to p 9 81 Page Select a format and print page numbers st...

Страница 479: ...n the original to be copied For details on positioning the original refer to Feeding the original on page 4 9 2 Touch Application and then touch Stamp To cancel all settings for the Application functi...

Страница 480: ...uch Cancel To cancel the Date Time function touch OFF To print the stamp only on the front cover page touch Cover Only The stamp will not be printed on blank pages inserted using the Cover Mode Insert...

Страница 481: ...ly adjusted in 0 1 mm increments Can no adjustments be made To make no left right or up down adjustments touch No Adj What happens when a value outside of the allowable range is specified The message...

Страница 482: ...tion the original to be copied For details on positioning the original refer to Feeding the original on page 4 9 2 Touch Application and then touch Stamp To cancel all settings for the Application fun...

Страница 483: ...er between 100 and 100 When specifying a starting number switch the number between positive and negative by pressing the key If a negative value is specified the numbers are not printed until the numb...

Страница 484: ...ing and then select the settings for the pages to be printed Blank pages inserted using the Cover Mode Insert Sheet and Chapters functions are only counted but page numbers are not printed on them If...

Страница 485: ...n a value outside of the allowable range is specified The message Input Error appears If Input Error appears or if the adjustment value was incorrectly entered touch No Adj or press the C clear key an...

Страница 486: ...the original to be copied For details on positioning the original refer to Feeding the original on page 4 9 2 Touch Application and then touch Stamp To cancel all settings for the Application function...

Страница 487: ...and Chapters functions To cancel changes to the settings touch Cancel To cancel the Set Numbering function touch OFF 5 Touch a button under Text Color and under Pages to specify the desired settings...

Страница 488: ...den text appears clearly repeated in the copies so that the reader knows that it is a copy The copy protection text is printed on all pages Specific pages cannot be specified To copy using the Copy Pr...

Страница 489: ...tings in that screen The selected copy protection text formats appear in a column at the center of the screen Up to eight text lines can be combined If more than eight text lines are selected the new...

Страница 490: ...y protection date and time that is printed is the date and time when the original is scanned If Serial Number key is touched the serial number for this machine is printed For details on specifying the...

Страница 491: ...ion functions 9 CS191 Phase3 9 93 The factory default settings are listed below Color Black Density Standard Pattern Embossed Pattern Contrast 0 Size Normal Pattern Overwrite Front Density screen Colo...

Страница 492: ...tion functions 9 94 CS191 Phase3 The settings under Pattern Contrast in the Pattern screen can only be specified in single increments between 2 and 2 Pattern screen Pattern Size screen Pattern Overwri...

Страница 493: ...f necessary touch Change Position Delete in the Position screen and then change the arrangement of the text in the Position Change Delete screen If there are no more than four lines in the selected co...

Страница 494: ...hat appeared beside the specified formats for the copy protection text and then touch Insert To delete the copy protection text touch Delete and then touch the button for the copy protection text to b...

Страница 495: ...olor and Magenta or Cyan was selected as the color for the copy protection text the copies will be counted as having two colors in the Total counter The same will occur if the original is a single col...

Страница 496: ...9 Application functions 9 98 CS191 Phase3...

Страница 497: ...10 Replacing toner cartridges and staples and emptying waste containers...

Страница 498: ......

Страница 499: ...dge When the toner is about to run out an advanced warning message similar to the one shown below appears Detail About 1000 A4 pages can be printed after the message Toner Cartridge X needs to be repl...

Страница 500: ...that the toner cartridge should be replaced and copies can no longer be made 2 Note When the message appears replace the toner cartridge according to your maintenance agreement Detail For details on...

Страница 501: ...or toner spills Be careful not to spill toner inside the machine or get toner on your clothes or hands If your hands become soiled with toner immediately wash them with soap and water If toner gets in...

Страница 502: ...e package with the black toner cartridge 0 When replacing the toner cartridge be sure to clean the electrostatic charger wire For details on cleaning the electrostatic charger wire refer to Electrosta...

Страница 503: ...machine may be damaged 4 Remove the new toner cartridge from its packaging and then shake the cartridge up and down 5 to 10 times The toner within the toner cartridge may have become compacted If it...

Страница 504: ...the one to be replaced has been prepared 2 Reminder Be careful about the installation location of the toner cartridges since it is different for other colors The shape of the black toner cartridge is...

Страница 505: ...hase3 10 9 10 2 Replacing the staples When there are no more staples the message Stapler empty appears Replace the staple cartridge Display in Enlarge Display Mode Detail Be sure to replace the staple...

Страница 506: ...staple cartridge holder Pull the staple cartridge holder toward you to remove it Only touch the blue parts of the staple cartridge 3 Remove the empty cartridge from the staple cartridge holder 4 Load...

Страница 507: ...making sure the tabs on the holder slide along the rails in the compartment Check that the staple cartridge holder is securely installed 6 Close the front door 2 Reminder Replace the staple cartridge...

Страница 508: ...hase3 To replace the staple cartridge in saddle stitcher 1 Raise the copy output tray and then push down the staple cartridge holder and remove it 2 Press in the area marked PUSH to unlock the staple...

Страница 509: ...10 13 4 Load the new staple cartridge into the staple cartridge holder 5 Slowly pull off the seal 6 Insert the staple cartridge holder and then push it up until it locks into place When inserting the...

Страница 510: ...g toner cartridges and staples and emptying waste containers 10 14 CS191 Phase3 7 Return the copy output tray to its original position 8 Pull the handle of the misfeed clearing door to open it and the...

Страница 511: ...g a staple jam If a staple jam occurs in the finisher the message shown below appears 2 Reminder Be careful when clearing jammed staples since injuries may result If the staples become jammed follow t...

Страница 512: ...ptying waste containers 10 16 CS191 Phase3 To clear jammed staples in the finisher 1 Remove all paper from the finisher 2 Open the front door 3 Raise lever FN1 turn lever FN2 and then pull out any pap...

Страница 513: ...hole punch waste container FN3 1 5 Return guide FN3 to its original position If the punch kit is installed insert the hole punch waste container FN3 1 into its original position 6 Turn dial FN4 to fe...

Страница 514: ...r toward the front 9 Remove the staple cartridge holder Pull the staple cartridge holder toward you to remove it Only touch the blue parts of the staple cartridge 10 Swing open the shutter of the stap...

Страница 515: ...ple cartridge holder making sure the tabs on the holder slide along the rails in the compartment Check that the staple cartridge holder is securely installed 13 Close the front door 2 Reminder If stap...

Страница 516: ...20 CS191 Phase3 To clear jammed staples in the saddle stitcher 1 Open the front door 2 Raise lever FN1 turn lever FN2 and then pull out any paper 3 Lower guide FN3 and then pull out any paper If the...

Страница 517: ...he punch kit is installed insert the hole punch waste container FN3 1 into its original position 5 Turn dial FN4 to feed the paper open the transport unit cover and then pull out any paper 6 Turn dial...

Страница 518: ...holder and remove it 10 Swing open the shutter of the staple cartridge holder and then pull out one sheet of staples 11 Return the shutter of the staple cartridge holder to its original position 12 In...

Страница 519: ...nisher becomes full the message shown below appears if it can be emptied by the user 2 Note The setting for emptying the hole punch waste container should be specified by the technical representative...

Страница 520: ...is paused To continue the job without canceling the Punch setting empty the hole punch waste container To cancel the Punch setting and continue the job touch Cancel Punch When performed by technical r...

Страница 521: ...ole punch waste container Follow the procedure described below to empty the hole punch waste container 1 Open the front door 2 Pull out the hole punch waste container FN3 1 3 Empty the hole punch wast...

Страница 522: ...ppears warning about the replacement period 2 Reminder When the message appears replace the specified consumables or part according to your maintenance agreement Detail The number of copies that can b...

Страница 523: ...he waste toner box and if it is replaceable by the user the message Waste Toner Box needs replacing Follow the Replacing Instruction appears and the machine stops operating Display in Enlarge Display...

Страница 524: ...containers 10 28 CS191 Phase3 To replace the waste toner box Follow the procedure described below to replace the waste toner box 1 Open the machine s front door 2 Pull the waste toner release lever 3...

Страница 525: ...s Do not throw toner or the waste toner box into a fire Toner expelled from the fire may cause burns 7 CAUTION Precautions for toner spills Be careful not to spill toner inside the machine or get tone...

Страница 526: ...g waste containers 10 30 CS191 Phase3 2 Reminder Do not tilt the removed waste toner box otherwise waste toner may spill Do not throw away used waste toner boxes or filter 1 Instead keep them in their...

Страница 527: ...11 Care of the machine...

Страница 528: ......

Страница 529: ...it with a soft cloth dampened with a mild household detergent 2 Reminder Be sure to turn off the machine set the power switch to o before cleaning it Never use solvents such as benzene or thinner to c...

Страница 530: ...ition glass cleaner Control panel Clean the control panel by wiping it with a soft dry cloth 2 Reminder Pressing too hard on the control panel or the touch panel may damage them In addition never use...

Страница 531: ...ft cloth dampened with a mild household detergent 2 Reminder Never use solvents such as benzene or thinner to clean the original cover pad Paper feed roller Clean the paper feed rollers by wiping them...

Страница 532: ...is occurs follow the procedure described below to clean the electrostatic charger wire 1 Open the machine s front door 2 Slowly pull out the charger cleaning tool as far as possible Next slowly push i...

Страница 533: ...y result If this occurs clean the print head according to the following procedure 1 Open the machine s front door 2 Remove the cleaning tool from the machine s front door 3 Insert the cleaning tool in...

Страница 534: ...hat the total number of prints since counting started can be viewed In addition the list of counters can be printed To view the counters 1 Press the Utility Counter key 2 Touch Details in the sub disp...

Страница 535: ...hine 11 CS191 Phase3 11 9 3 Touch Close and then touch Close in the next screen that appears The Basic screen appears again 2 Note The list of counters can be displayed even while the machine is copyi...

Страница 536: ...used can be viewed in the Toner Coverage screen To view the coverage rate 1 Press the Utility Counter key 2 Touch Details in the sub display area The list of counters appears 3 Touch Toner Coverage 4...

Страница 537: ...ne 11 CS191 Phase3 11 11 11 3 When the message Preventive maintenance time appears If the message Preventive maintenance time appears contact your technical representative and request a periodic maint...

Страница 538: ...11 Care of the machine 11 12 CS191 Phase3...

Страница 539: ...12 Managing jobs Job List...

Страница 540: ......

Страница 541: ...as jobs Jobs that are being performed and the job log can be checked from the Job List screen Jobs are printed starting with the one at the top of the Current Jobs list Jobs are numbered in the order...

Страница 542: ...y differ from the actual values depending on other settings Copy mode 5 Interrupt mode 1 Scan mode 5 TWAIN Push Pull 1 Printing 10 Faxes Quick transmissions 1 Faxes Memory transmissions 50 Faxes Timer...

Страница 543: ...d from any other Job List screen However if the screen is changed while a setting is being changed that setting is canceled A Current Jobs list and a Job History list can be displayed for each functio...

Страница 544: ...istory Switches from Current Jobs to Job History This lists the completed jobs Held Jobs Active Jobs displayed on the Cur rent Jobs list of the Print tab Specifies the type of jobs displayed in the Jo...

Страница 545: ...rror details user name queued time completed time and number of copies for jobs in the job lists For details refer to Displayed information on page 12 12 arrows When there are more jobs than the five...

Страница 546: ...m a compu ter If user authentication settings have been applied the names of originals are not displayed for other users The names of confidential originals are not displayed for other users Time Stor...

Страница 547: ...een appears 2 In the Print tab display the job to be deleted Jobs in the Job History list cannot be deleted 3 Select the job to be deleted and then touch Delete If the job to be deleted is not display...

Страница 548: ...o The screen displayed before Delete was touched appears again and the job is deleted from the Current Jobs list 5 Touch Exit or press the Reset key The screen that was displayed before Job List was t...

Страница 549: ...select a different job or touch the button for the selected job again to deselect it The Mode Check screen appears The contents and number of Mode Check screens differ depending on the job that was s...

Страница 550: ...mber of specified recipients 3 Fax TX tab Status Transferring Waiting Dialing Redial Waiting 1 Result Job Complete Error cleared User Delete Deleted Due To Error 2 Error Detail 2 Address Type User Nam...

Страница 551: ...o deselect it The Check Detail screen appears 4 After the desired information has been checked touch Close or Exit or press the Reset key To return to the screen displayed before Detail was touched to...

Страница 552: ...obs Active Jobs Displays only jobs that are being performed Detail For details on the function of each button refer to Job List screens on page 12 5 Stored jobs can be printed from the Release Held Jo...

Страница 553: ...Job List The Job List screen appears 2 Touch Job History The Job History screen appears 3 Touch the button for the desired list Deleted Jobs Displays only jobs that were deleted before they were finis...

Страница 554: ...performed and proof print jobs for data in the boxes 1 Display the Held Jobs list in the Current Jobs list of the Print tab 2 Touch Release Held Job The Release Held Job screen appears 3 From the job...

Страница 555: ...inting of a sample copy stopped Press the Stop key 4 Touch Clear After the single sample copy is printed check the print result Detail To change the settings touch Change setting in the Release Held J...

Страница 556: ...se Held Job The Release Held Job screen appears 3 Select the job to be removed from the Held Jobs list If the job to be removed from the Held Jobs list is not displayed touch and until the desired job...

Страница 557: ...cancel changes to the settings touch Cancel Is there more information about the settings Refer to the appropriate section Can a sample copy be printed For details on printing a sample copy refer to To...

Страница 558: ...rrently being printed can be interrupted printing is interrupted and printing of the job given priority begins Printing of the interrupted job is automatically restarted once printing for the job give...

Страница 559: ...he job to be given priority is not displayed touch and until the desired job is displayed If an incorrect job was selected select a different job or touch the button for the selected job again to dese...

Страница 560: ...12 Managing jobs Job List 12 22 CS191 Phase3...

Страница 561: ...13 Utility...

Страница 562: ......

Страница 563: ...buttons that appear in the screens differ depending on the specified settings Utility Counter One Touch Registration p 13 23 1 Scan p 13 23 1 Address Book 1 E Mail 2 FTP 3 SMB 4 User Box 2 Group 3 Pr...

Страница 564: ...Language Selection 2 Measure ment Unit Set ting 3 Paper Tray Setting 1 Auto Tray Select Set ting 2 Auto Tray Switch ON OFF 3 No Match ing Paper in Tray Setting 4 Print Lists 4 Auto Color Level Adjust...

Страница 565: ...Default Address Book Default Index Address Type Symbol Display 3 Fax Basic ScreenDefault Setting Default Tab Default Pro gram Address Book Default Index Address Type Symbol Display No of Char acters f...

Страница 566: ...en Fold Staple Auto Zoom for Com bine Booklet Sort Group Auto change When AMS Direction is Incorrect Auto Zoom Platen Auto Zoom ADF Select Tray when APS Off Select Tray for Insert Sheet Print Setting...

Страница 567: ...IP A4 A3 LTR LGR Auto Switch Banner Setting 2 Paper Setting Paper Tray DefaultPaper Size 2 Sided Print Bind Direction Staple Hole Punch Banner Paper Tray 3 PCL Setting 1 Font Setting Internal Disk Sof...

Страница 568: ...tering Power Save Mode Fax 2 Output Setting 1 Print Fax Output Settings Printer Fax 2 Output Tray Setting 3 Bin Setting 4 Offset by Each Job Setting 3 Date Time Setting 4 Daylight Savings Time Setting...

Страница 569: ...s Jobs Registering and Chang ing Address es Changing Zoom Ratio Changing the From Ad dress 4 Restrict Operation Setting Restrict Fax Broadcasting 7 Expert Ad justment 1 AE Level Adjustment 2 Printer A...

Страница 570: ...ty Black Black Image Density 5 Image Stabilization 6 Pre De tection of Lines 1 Detect Lines Prior to Job 2 Detect Remove During Job 7 Color Registration Adjust 1 Color Registration Adjust Yel low 2 C...

Страница 571: ...tion 8 List Coun ter 1 Manage ment List Job Setting List 2 Paper Size Type Counter 9 Reset Setting 1 System Auto Reset 2 Auto Reset 3 Job Reset When Ac count is changed When Origi nal is set on ADF W...

Страница 572: ...chine Address 3 One Touch Regis tration p 13 49 1 Scan 1 Address Book 1 E Mail 2 FTP 3 SMB 4 User Box 2 Group 3 Program 4 Sub ject Text for E Mail 1 Subject 2 Text 2 Fax 1 Address Book 1 Addr Dial 2...

Страница 573: ...Subject Text List 4 User Au thentica tion Account Track p 13 50 1 General Settings 2 User Au thentication Setting 1 Adminis trative Set ting User Name List Default Func tion Permis sion Public User K...

Страница 574: ...3 1 TCP IP Setting 2 NetWare Setting 3 http Server Setting Support Op eration Printer Infor mation 4 FTP Setting 5 SMB Setting 6 Apple Talk 7 LDAP Setting 1 Enabling LDAP 2 Setting Up LDAP 3 Default L...

Страница 575: ...t Set ting 3 Status No tification Set ting 1 Notifica tion Address Setting 2 Notifica tion Item Set ting 3 Notifica tion Time Setting 4 Total Counter Re port Setting 5 PING con firmation 6 SLP Set tin...

Страница 576: ...rk Fax Settings 1 Newtork Fax Function Settings IP Address Fax SIP Fax Internet Fax 2 SMTP TX Setting 3 SMTP RX Setting 6 Copier Setting p 13 54 Auto Zoom Platen Auto Zoom ADF Select Tray when APS OFF...

Страница 577: ...s Dialing Method Receive Mode Number of RX Call Rings Number of Redials Redial Interval Line Monitor Sound Line Monitor Sound Volume 4 TX RX Setting Duplex Print RX Inch Paper Priority Over A4 Print P...

Страница 578: ...ting p 13 55 5 Function Setting 1 Function ON OFF Setting F Code TX Relay RX Relay Print Destination Check Dis play Function 3 Memory RX 4 Closed Netword RX 5 Forward TX Setting 7 Incom plete TX Hold...

Страница 579: ...Report Sequential TX Report Timer Reser vation TX Report Confidential RX Report Bulletin TX Report Relay TX Re sult Report Relay Re quest RX Re port PC Fax TX Error Report Broadcast Result Report TX R...

Страница 580: ...onitor Sound 2 Function Setting PC FAX TX Setting 3 MultiLines Setting 4 Sender Fax No 0 Network Fax Setting 1 Black Compres sion Level 2 SIP Adaptor Connection Check 3 Internet Fax RX Ability 4 I Fax...

Страница 581: ...l 4 Security Details Password Rules Prohibit Functions when Auth Error Release Manual Des tination Input Print Data Capture Secure Doc ument Ac cess Method Restrict Fax TX 5 Enhanced Security Mode 6 H...

Страница 582: ...ge ment Func tion Setting 1 Function Settings 2 Max No of Sets to Copy Setting 3 Network Function Setting 4 Authenti cation Time Setting 8 Delete Registered Stamp Check Con sumable Life p 13 128 Banne...

Страница 583: ...r after a user has logged on 1 One Touch Registration appears Fax 2 Note 2 Fax appears only when fax kit FK 502 is installed or when Internet fax functions are available Parameter Description Address...

Страница 584: ...and 3 Relay User Box appear only when fax kit FK 502 is installed or when Internet fax functions are available Parameter Description Public Personal User Box Register recipients for boxes For details...

Страница 585: ...edure describes how to display the One Touch Registration Screen 1 Press the Utility Counter key 2 Touch 1 One Touch Registration An item can also be selected by pressing the key in the keypad for the...

Страница 586: ...creen appears 2 Note To quit specifying the Utility mode setting touch Exit in the sub display area or press the Utility Counter key Otherwise cancel the Utility mode by touching Close in each screen...

Страница 587: ...aper Se lect setting is performed In addition specify the priority of the paper trays when the ATS feature is performed Tray 2 Tray 3 Tray 4 Tray 1 Auto Tray Switch ON OFF Select whether or not a pape...

Страница 588: ...ion Default Setting Adjust the reference level for detecting a color or black and white original when the Auto Color setting is selected The reference lev el can be set to one of 5 settings 3 standard...

Страница 589: ...Fax Output Setting Specify settings for faxing and printing For details refer to the Fac simile Operations and Print Operations of the user manual Output Tray Setting Select the finishing tray for ea...

Страница 590: ...is displayed Setting value Parameter Description Default Tab Specify settings for scanning For details refer to the Network Scanner Operations of the user manual Program Default Address Book Default I...

Страница 591: ...for faxing For details refer to the Facsimile Opera tions and the Network Facsimile Operations of the user manual RX Display Description Default Setting Specify the default display for the Basic scre...

Страница 592: ...anceling the settings automatic panel reset on page 3 31 Description Default Setting Specify the default settings for Copy mode The copy settings selected when the machine is turned on the pow er swit...

Страница 593: ...s selected automatically when the Fold Staple setting is selected This parameter is available only if option al saddle stitcher is installed Auto Select Booklet Auto Zoom for Com bine Booklet Select w...

Страница 594: ...ay Before APS ON The paper tray that was being used before the Auto Paper Select setting was selected is selected Default Tray The tray 1 is used Tray Before APS ON Select Tray for Insert Sheet Select...

Страница 595: ...n Auto Zoom ADF Select Tray when APS OFF and Select Tray for Insert Sheet do not appear If the Administrator Security Level parameter in Administrator mode was set to Level 2 Print Jobs During Copy Op...

Страница 596: ...anner Operations of the user manual Black Compression Level TWAIN Lock Time Parameter Description Basic Setting Specify settings for printing For details refer to the Print Opera tions of the user man...

Страница 597: ...e describes how to display the User Setting Screen 1 Press the Utility Counter key 2 Touch 2 User Setting An item can also be selected by pressing the key in the keypad for the number beside the desir...

Страница 598: ...touch Exit in the sub display area or press the Utility Counter key Otherwise cancel the User mode by touching Close in each screen until the screen for the Copy Fax Scan or Box mode appears Detail Fo...

Страница 599: ...y the desired length of time be tween 15 and 240 minutes until the ma chine enters Sleep mode 30 minutes Power Save Key Select which low power mode is entered when the Power Save key is pressed Low Po...

Страница 600: ...rts Copy Tray 1 Print Tray 1 Report Output Tray 2 Fax Main Line Tray 2 Fax 2nd Line Tray 2 Bin Setting The output tray 1 can be specified as mailbin 5 and the optional output tray can be specified as...

Страница 601: ...meter Description Default Setting Weekly Timer ON OFF Setting Select whether or not the weekly timer function is used OFF Time Setting Specify the time of each day that the ma chine is turned on off D...

Страница 602: ...d Allow Deleting Other User s Jobs Select whether or not jobs from other us ers can deleted when the user authenti cation settings have been specified Restrict Register ing and Changing Addresses Sele...

Страница 603: ...during automatic double sided copying Adjustments can be specified for each paper tray 0 0 mm Media Ad justment If the print image is flawed missing print white spots or uneven printing due to the ch...

Страница 604: ...een adjusted Image Stabilization Only Perform normal image stabilization Initialize Image Stabilization Select when a good result was not achieved after Image Stabilization Only was selected Image Sta...

Страница 605: ...m ratio in the transverse original feed direction for the scanner can be adjusted For details on making this adjustment contact your tech nical representative Vertical Adjust ment If the copy image is...

Страница 606: ...low magenta and cyan on page 13 84 For the procedure on adjusting the gradation levels refer to Adjusting the gradation levels on page 13 88 For details on displaying Erase Leading Edge contact your t...

Страница 607: ...d This machine detects that the user has changed when the optional key counter has been removed or when the Access key is pressed after entering user au thentication and account track informa tion Res...

Страница 608: ...Setting contact your technical representative Parameter Description Default Setting Delete Unused User Box Specify settings for using boxes For details refer to the Box Oper ations of the user manual...

Страница 609: ...ine and its e mail address can be registered The registered machine name is added to the names of files that are sent and to originals saved in boxes As a default the machine name is specified as KMBT...

Страница 610: ...nly a password select Password Only No setting can be selected when Account Track is set to OFF If both user au thentication and account track settings have been specified only Account Name Password c...

Страница 611: ...Default Function Permission Operations that are possible with this machine can be limited when authenti cating with an external server Copy Allow Scan Allow Fax Allow Print Allow User Box Allow Print...

Страница 612: ...machine can be registered Account Track Counter The copy printer scan fax use for each account can be checked Description Default Setting Select whether or not printing is permitted without specifyin...

Страница 613: ...the Net work Scanner Operations of the user manual NetWare Setting http Server Setting FTP Setting SMB Setting AppleTalk LDAP Setting E Mail Setting Detail Setting SNMP Setting Bonjour Setting TCP So...

Страница 614: ...s can celed Tray Before APS ON The paper tray that was being used before the Auto Paper Select setting was selected is selected Default Tray The tray 1 is used Tray Before APS ON Select Tray for Inser...

Страница 615: ...anual Header Footer Position Telephone Line Settings TX RX Setting Function Setting PBX CN Set Report Settings Job Settings List Multi Lines Setting Network Fax Setting Specify settings for network fa...

Страница 616: ...using boxes For details refer to the Box Operations of the user manual Description Default Setting Specify the range of Administrator mode parameters available to users Level 1 Power Save Setting Aut...

Страница 617: ...ial documents User Box Operations for password pro tected boxes SNMP Operations for SNMP v3 Write user authentication Mode 1 Manual Destination Input Select whether or not a recipient can be typed in...

Страница 618: ...operated even after touching Release from the Prohibit Functions when Auth Error parameter to specify the items whose operation restrictions are canceled or if operation is prohibited from a failed at...

Страница 619: ...after the data is printed or sent and the data can be erased This process prevents disclosure of image data on the hard disk OFF Overwrite All Data Select this parameter to overwrite all data on the e...

Страница 620: ...ator to view and retrieve documents in boxes Using the Scan Direct to retrieve documents in boxes Using the Job Spooler to view and retrieve documents in boxes Box operations using the Web Connection...

Страница 621: ...ocedure describes how to display the Administrator Setting Screen 1 Press the Utility Counter key 2 Touch 3 Administrator Setting An item can also be selected by pressing the key in the keypad for the...

Страница 622: ...the sub display area or press the Utility Counter key Otherwise touch Close in each screen until the desired screen appears 2 Reminder The default administrator password is 12345678 The administrator...

Страница 623: ...ugged into the electrical outlet even if the machine has been turned off 0 Press the Utility Counter key touch 3 Administrator Setting then 1 System Setting then 3 Date Time Setting and correctly spec...

Страница 624: ...uring of the machine Normally this position will not need to be adjusted 1 Display the Administrator Setting screen For details on displaying the Administrator Setting screen refer to Displaying the A...

Страница 625: ...the adjustment between 0 2 mm and 3 0 mm To scroll through the values quickly touch or continuously 9 Press the Start key The adjusted test pattern is printed 10 Check the distance from the starting p...

Страница 626: ...eed to be adjusted 0 Only A4 v paper can be used to adjust the bypass tray 1 Display the Administrator Setting screen For details on displaying the Administrator Setting screen refer to Displaying the...

Страница 627: ...5 and 3 5 mm skip to step 10 Each time or is touched the value is increased or decreased by one increment 9 Press the Start key The adjusted test pattern is printed 10 Adjust the distance from the sta...

Страница 628: ...paper can be used to adjust the bypass tray 1 Display the Administrator Setting screen For details on displaying the Administrator Setting screen refer to Displaying the Administrator Setting screen...

Страница 629: ...2 5 and 3 5 mm skip to step 10 Each time or is touched the value is increased or decreased by one increment 9 Press the Start key The adjusted test pattern is printed 10 Adjust the distance from the...

Страница 630: ...page 13 61 2 Touch 1 System Setting The System Setting screen appears 3 Touch 7 Expert Adjustment The Expert Adjustment screen appears 4 Touch 2 Printer Adjustment The Printer Adjustment screen appea...

Страница 631: ...areas in missing print or the white spots is 0 5 mm or less For missing print or white spots in the print image touch to reduce the adjustment For uneven printing of the print image touch to increase...

Страница 632: ...y performing the copy cycle again 10 Check the printed image and finish the adjustment if there are no flaws If more adjustment is necessary repeat steps 1 through 9 If the print image flaws are worse...

Страница 633: ...adjusted for each paper size and for each paper type 0 Before making any adjustments use the Fold Staple function to print a single sample copy Perform the adjustment while checking the sample that wa...

Страница 634: ...idth of the left pages of the copy sample with the width of the right pages to check for the center of the paper If the folding position is too far to the left of the center of the paper touch to incr...

Страница 635: ...sition was at the center of the paper in step 7 this completes the procedure 9 Use the Fold Staple function to print a another sample copy 10 Check the print result Check that the folding position is...

Страница 636: ...erform the adjustment while checking the sample that was created 1 Display the Administrator Setting screen For details on displaying the Administrator Setting screen refer to Displaying the Administr...

Страница 637: ...center of the paper touch to reduce the adjustment between 1 mm and 10 mm To scroll through the values quickly touch or continuously 8 Touch OK To cancel changes to the settings touch Cancel The cent...

Страница 638: ...CS191 Phase3 2 Note If the angle of the staple must be adjusted contact your technical representative For details on adjusting the center folding position refer to Adjusting the center folding positi...

Страница 639: ...t was created 1 Display the Administrator Setting screen For details on displaying the Administrator Setting screen refer to Displaying the Administrator Setting screen on page 13 61 2 Touch 1 System...

Страница 640: ...o decrease the adjustment between 1 mm and 10 mm To scroll through the values quickly touch or continuously 8 Touch OK To cancel changes to the settings touch Cancel The punch horizontal position is a...

Страница 641: ...Utility 13 CS191 Phase3 13 81 10 Check the print result Check that the horizontal position of the punched holes was adjusted If more adjustment is necessary repeat steps 1 and 9...

Страница 642: ...to Displaying the Administrator Setting screen on page 13 61 2 Touch 1 System Setting The System Setting screen appears 3 Touch 7 Expert Adjustment The Expert Adjustment screen appears 4 Touch 3 Fini...

Страница 643: ...holes is adjusted If no adjustment of the angle of the punched holes was necessary in step 6 this completes the procedure 8 Use the Punch function to print a another sample copy 9 Check the print res...

Страница 644: ...adjust the color registration for cyan 0 The test pattern can be printed on A3 w 11 e 17 w A4 v or 8 1 2 e 11 v paper that can only be loaded into the tray 1 1 Display the Administrator Setting screen...

Страница 645: ...attern is printed 7 Check the distance from the reference black lines to the cyan lines in the test pattern along the X and Y directions If the lines are shifted in the X direction as shown below touc...

Страница 646: ...X to increase the adjustment between 1 dot and 6 dots If the lines are shifted in the Y direction as shown below touch under Y to reduce the adjustment between 1 dot and 6 dots If the lines are shifte...

Страница 647: ...djusted test pattern is printed When is the adjustment applied The adjustment is applied when the Start key is pressed To cancel the adjustment touch Cancel instead of pressing the Start key 9 Check t...

Страница 648: ...e is turned off then on again with the main power switch wait at least 10 seconds to turn the machine on after turning it off The machine may not operate correctly if it is turned on immediately after...

Страница 649: ...Utility 13 CS191 Phase3 13 89 5 Touch the button for the mode to be adjusted 6 Press the Start key A test pattern is printed...

Страница 650: ...lank paper on top of the test pattern while it is being scanned in order to prevent the original cover pad of the ADF or original cover from being visible If the original cover pad is visible through...

Страница 651: ...is machine when user authentication or account track settings are specified the user name and password must be entered For details refer to Controlling each user s use of this machine user authenticat...

Страница 652: ...unt track and user authentication settings can be specified separately Check the differences between these features and then specify the appropriate settings For details on external server authenticat...

Страница 653: ...account In addition totals can be maintained on each employee each user and each duty each account even if the same duty is performed by two different employees To manage the use of this machine in t...

Страница 654: ...g To cancel user authentication touch OFF To use the user authentication function from an external server touch ON External Server and then select the server type To use the user authentication functi...

Страница 655: ...ount Name Password To allow this machine to be used after the password is entered in the account track screen touch Password Only 8 Touch Fwd The second screen is displayed 9 Beside When of Jobs Reach...

Страница 656: ...ser authentication and account track information entered Do Not Synchronize This setting requires that all information be entered for user authentication and account track each time that the machine i...

Страница 657: ...Access changes to Restrict Detail For details on external server authentication refer to the Network Scanner Operations of the user manual If both user authentication and account track settings have...

Страница 658: ...public user is not permitted 2 Note of User Counters appears if User Authentication is set to ON External Server or ON MFP and Account Track is set to ON If the number of user counters is set to 50 up...

Страница 659: ...ails on displaying the Administrator Setting screen refer to Displaying the Administrator Setting screen on page 13 61 2 Touch 4 User Authentication Account Track The User Authentication Account Track...

Страница 660: ...13 Utility 13 100 CS191 Phase3 2 Note To limit machine use by authorized users specify settings in the User Registration screen...

Страница 661: ...ions 1 Display the Administrator Setting screen For details on displaying the Administrator Setting screen refer to Displaying the Administrator Setting screen on page 13 61 2 Touch 4 User Authenticat...

Страница 662: ...7 Touch OK The default function permissions are set 2 Note To limit machine use by authorized users specify settings in the User Registration screen If Print Scan Fax From Box setting is used to scan...

Страница 663: ...to Displaying the Administrator Setting screen on page 13 61 2 Touch 4 User Authentication Account Track The User Authentication Account Track screen appears 3 Touch 2 User Authentication Setting The...

Страница 664: ...gs screen is set to ON the number of users set for of User Counters can be registered 1 Display the Administrator Setting screen For details on displaying the Administrator Setting screen refer to Dis...

Страница 665: ...s registered it cannot be changed A user name that has already been registered cannot be used again The user name is set 8 Touch User Password If Account Track Input Method was set to Password Only th...

Страница 666: ...in the User Registration screen Touch Details to display the E Mail Address Details screen and the entire e mail address 13 Touch Account Name The Account Name screen appears 14 Touch the button for t...

Страница 667: ...itch If color printing is restricted printing is not possible with the Full Color 2 Color or Single Color settings If black printing is restricted printing is not possible with the Black setting If bo...

Страница 668: ...allowed If Individual Allowance was selected touch Edit beside the print mode set to Limit and then use the keypad to type in the maximum number allowed Touch All Users to apply the settings in the cu...

Страница 669: ...At this time do not turn off the machine with the main power switch If Print Scan Fax From Box setting is used to scan or fax a document saved in a box printing of the document can be prevented Depen...

Страница 670: ...ing the Full Color setting the 2 Color setting and the Single Color setting Large Size Shows the total number of copies made on paper specified as large size paper using all Color settings the Black s...

Страница 671: ...ally continues with user counters for external server authentication If Public User Access on the General Settings screen was set to Allow public is added to the list of counters If User Box Admin was...

Страница 672: ...n on the General Settings screen is set to OFF 4 Touch 3 User Counter 5 Touch the button for the desired user The User Counter screen for the selected user appears 6 Touch the button for the counter t...

Страница 673: ...Utility 13 CS191 Phase3 13 113 To clear the counters for all users touch Yes The maximum number allowed is not cleared 7 Touch Close...

Страница 674: ...escribes how to specify accounts when Account Track Input Method on the General Settings screen is set to Account Name Password 1 Display the Administrator Setting screen For details on displaying the...

Страница 675: ...se3 13 115 5 Touch the button for the desired account The Account Track Registration screen appears 6 Touch Account Name The Account Name screen appears If Account Name Password was selected If Passwo...

Страница 676: ...he same account name cannot be used more than once The account name is set 8 Touch Password If Account Track Input Method was set to Password Only the same password cannot be registered more than once...

Страница 677: ...e settings to all accounts At this time do not turn off the machine with the main power switch If color printing is restricted printing is not possible with the Full Color 2 Color or Single Color sett...

Страница 678: ...owance was selected touch Edit beside the print mode set to Limit and then use the keypad to type in the maximum number allowed Touch All Accounts to apply the current settings to all other registered...

Страница 679: ...ck setting the Full Color setting the 2 Color setting and the Single Color setting Large Size Shows the total number of copies made on paper specified as large size paper using all Color settings the...

Страница 680: ...13 Utility 13 120 CS191 Phase3 2 Note If User Box Admin was set to Allow and only account track settings have been specified Box Admin appears at the end of the list of counters...

Страница 681: ...cted account appears 6 Touch the button for the counter to be viewed and then check the counter To clear the counters for the current account touch Clear Counter in the Account Track Counter screen fo...

Страница 682: ...same character cannot be registered The same password as one before being changed can not be registered Limitations on the number of characters Limitations on registering changing 8 or more alphanumer...

Страница 683: ...ting screen Use the user password account password when user authentication account track settings have been applied For details on the User Box Password and Password for the confidential document ref...

Страница 684: ...irst be specified or are forcibly set in order for Enhanced Security Mode to be set to ON Before setting Enhanced Security Mode to ON be sure to check the settings for the security functions 2 Reminde...

Страница 685: ...when Enhanced Security Mode is set to ON SSL appears when a certificate is issued from Web Connection Administrator Setting commands Settings User Authentication Account Track General Settings User A...

Страница 686: ...r manual Administrator Setting commands Changed settings System Setting Restrict User Access Restrict Access to Job Settings Registering and Changing Address Set to Restrict User Authentication Accoun...

Страница 687: ...then select the items whose operation restrictions are canceled The recipient cannot be changed by the user This machine s counter data cannot be retrieved by Net Care or VISUALCOUNT MASTER An applica...

Страница 688: ...then touching 4 Check Consumable Life From the Unit Life Indicator screen the status usage level of the following consumables can be viewed Imaging unit C Imaging unit M Imaging unit Y Imaging unit K...

Страница 689: ...reen 1 Press the Utility Counter key 2 Touch 4 Check Consumable Life An item can also be selected by pressing the key in the keypad for the number beside the desired button For Check Consumable Life p...

Страница 690: ...t and then press the Start key 2 Note To quit specifying the Utility mode setting touch Exit in the sub display area or press the Utility Counter key Otherwise cancel the Utility mode by touching Clos...

Страница 691: ...14 Appendix...

Страница 692: ......

Страница 693: ...ow to use the keyboard that appears in the touch panel for typing in the names of registered accounts and custom paper sizes The keypad can also be used to type in numbers Any of the following keyboar...

Страница 694: ...14 Appendix 14 4 CS191 Phase3 Touching Shift switches the keyboard display between lowercase letters numbers and uppercase letters symbols...

Страница 695: ...ad The entered characters appear in the text box 2 Note To cancel changes to the settings touch Cancel To clear all entered text press the C clear key Detail To change a character in the entered text...

Страница 696: ...an original is placed on the original glass or loaded into the ADF and the paper size is selected Auto Paper Select Select this setting to detect the original placed on the original glass or loaded i...

Страница 697: ...n 1 Contrast Set this parameter to adjust the contrast between light and dark Copy Density Set this parameter to finely adjust the copy density to any of 19 levels between 3 and 3 Copy Protection Set...

Страница 698: ...Insert Image Set this function to later scan multiple images from the original glass and insert them at the desired locations in an original scanned with the ADF then feed out all copies together Ins...

Страница 699: ...Interleave Set this function to insert paper between OHP that are being copied This prevents OHP from sticking together Original Type Select the setting for the image type of the original to better a...

Страница 700: ...ide or both sides Sort Select this setting to separate each set of the copies The second copy set is printed after all of the first copy set is finished Staple Select a setting to staple copies togeth...

Страница 701: ...s and labels 2 22 Center binding 4 96 Center erase 4 98 9 31 Chapters 9 21 Checking jobs 12 3 Cleaning 11 3 Clearing a paper misfeed in a paper media tray 6 13 Clearing a paper misfeed in the ADU 6 12...

Страница 702: ...3 6 6 6 53 6 54 6 56 6 57 11 11 Error messages 6 63 F Fax setting 13 55 Features 1 8 Feeding originals 4 9 Finisher FS 514 3 15 Finishing settings 4 83 Folding position adjustment 13 73 Fusing unit 6...

Страница 703: ...ting 13 53 Next job reservation 4 100 Numbering 9 84 O OHP interleave 9 3 Operating environment 2 24 Original direction setting 4 28 Original glass 4 11 8 31 Original image type settings 4 66 Original...

Страница 704: ...60 Single sided copies 4 61 Sleep mode 3 33 3 34 Sort setting 4 86 Sound setting 5 33 Space requirements 2 23 Special paper media 8 6 Special paper media setting 8 24 Specifications 7 3 Staple cartri...

Страница 705: ...CS191 Phase3 14 15 W Waste container 10 23 Waste toner box 10 26 Weekly timer 3 35 13 63 Wide paper setting 8 21 Z Z folded original 4 26 Zoom minimal setting 4 49 Zoom ratio setting 4 52 4 58 Zoom se...

Страница 706: ...14 Appendix 14 16 CS191 Phase3...

Страница 707: ...l provide sufficient background information O Yes O No Is the format of this manual convenient in size readability and arrangement page layout chapter order etc O Yes O No Could you find the informati...

Страница 708: ...s comment sheet is completed by If you prefer to remain unknown please do fill in your occupation Name Occupation Company Phone Address City Country Please return this sheet to Oc Technologies B V For...

Страница 709: ...o S o Paulo SP 04578 000 Brasil http www oce brasil com br Oc Canada Inc 4711 Yonge Street Suite 1100 Toronto Ontario M2N 6K8 Canada http www oce ca Oc Office Equipment Beijing Co Ltd Xu Mu Cheng Chao...

Страница 710: ...Strada Padana Superiore 2 B 20063 Cernusco sul Naviglio MI Italia http www oce it Oc Japan Corporation 3 25 1 Nishi Shinbashi Minato Ku Tokyo 105 0003 Japan http www ocejapan co jp Oc Belgium S A Rue...

Страница 711: ...nia 2128 South Africa Oc Espa a SA Business Park Mas Blau Osona 2 08820 El Prat de Llobregat Barcelona Spain http www oce es Oc Svenska AB Sollentunav gen 84 191 27 Sollentuna Sweden http www oce se O...

Страница 712: ...addresses of local Oc organisations for information about the Wide Format Printing Systems and the Production Printing Systems can be different from the addresses above Refer to the web site http www...

Отзывы: