


64
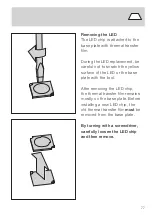
io LED Replacement
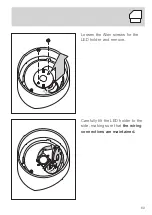
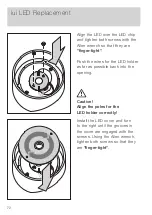
Turn around the LED holder, inclu-
ding the LED chip, and insert it in
the opening in the head. In doing
so, align it so that the opening in
the LED holder is in the correct
position (black arrows). Using the
Allen wrench, tighten both screws
so that they are
"fingertight"
.
The LED replacement is now
completed.
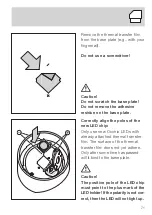
If the LED does not work as usual
after the replacement, solutions
can be found in the chapter entit-
led malfunctions on page 82
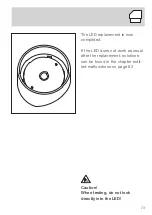
Caution!
When testing, do not look
directly into the LED!
Содержание io Series
Страница 1: ...LED Wechsel LED Replacement Montageanleitung Mounting instructions Sento io lui lei...
Страница 2: ......
Страница 4: ......
Страница 5: ...LED Wechsel Montageanleitung...
Страница 8: ......
Страница 9: ...09 Sento LED Wechsel...
Страница 16: ......
Страница 17: ...17 io LED Wechsel...
Страница 23: ...23...
Страница 24: ......
Страница 25: ...25 lui LED Wechsel...
Страница 32: ......
Страница 33: ...33 lei LED Wechsel...
Страница 39: ...39...
Страница 41: ...41 Achtung Bei anhaltender Funktions st rung den Occhio Kunden service kontaktieren...
Страница 42: ......
Страница 43: ...43 Anhang...
Страница 46: ......
Страница 47: ...LED Replacement Mounting instructions...
Страница 50: ......
Страница 51: ...51 Sento LED Replacement...
Страница 58: ......
Страница 59: ...59 io LED Replacement...
Страница 65: ...65...
Страница 66: ......
Страница 67: ...67 lui LED Replacement...
Страница 74: ......
Страница 75: ...75 lei LED Replacement...
Страница 81: ...81...
Страница 83: ...83 Caution If a malfunction persists then contact Occhio customer service...
Страница 84: ......
Страница 85: ...85 Appendix...


