background image

B.

 Press the Select button once to select the TCP/IP Config menu options, first of which is DHCP:

[TCP/IP Config]
DHCP on/off

C. 

Press the Menu button once to see the TCP/IP IP Address menu:

[TCP/IP Config]
IP Address

D.

 Press the Select button again to select the IP Address menu:

[IP Address]
192.168.40.50

E.

 At this point, the cursor on the display will be blinking on the first number in the IP address on the second 

line.

F.

 To change the number, press the Menu button and the display will cycle through the digits 0-9 as well as 

“.”. Once the correct digit is displayed, press the Select button to advance to the next digit and repeat the 
process until all the digits are correct.

G

. Once the IP address on the AcquiLite matches the assigned IP address, press the Select button once more to 

return to the main TCP/IP menu.

Step 3 -

 Set the Netmask, Gateway, and DNS server(s) addresses as noted in the chart "Network Address Worksheet" using 

the same technique as shown above.  The only change is that after Step B, press the Menu button multiple times to see the 
Netmask, Gateway, and DNS setup menus, then push the Select button to set the options.

Note: If DHCP configuration is selected, the IP,  Netmask, Gateway, and DNS server addresses will be obtained 
automatically. Simply select the “Enable DHCP” from the first TCP/IP configuration menu.

Step 4 -

 After the address information has been set, you must reboot the AcquiLite. Select the "(Previous Menu)" option 

after step B above. The menu will then state that the AcquiLite must be rebooted to take effect. Press the Select button to 
allow the AcquiLite to reboot.

Once the AcquiLite has rebooted, the new IP address will be displayed on the console. If DHCP addressing was specified, 
the server assigned address will be displayed.  

Note: if DHCP is unable to obtain an IP address, the AcquiLite will use the fallback address of 192.168.0.100.

Laptop/Computer Setup

Step 1

 - You must have a computer to access and configure the AcquiLite. This computer must have an Ethernet connection 

(on the LAN or by direct connection) and must have a web browser installed such as Internet Explorer or Firefox.

Note: If your building already has an existing LAN to which the AcquiLite is attached, you can use an existing computer on 
that LAN. Check with your network administrator for details. If this option is available, use a LAN-connected computer and 
skip to the “AcquiLite administration overview” section below.

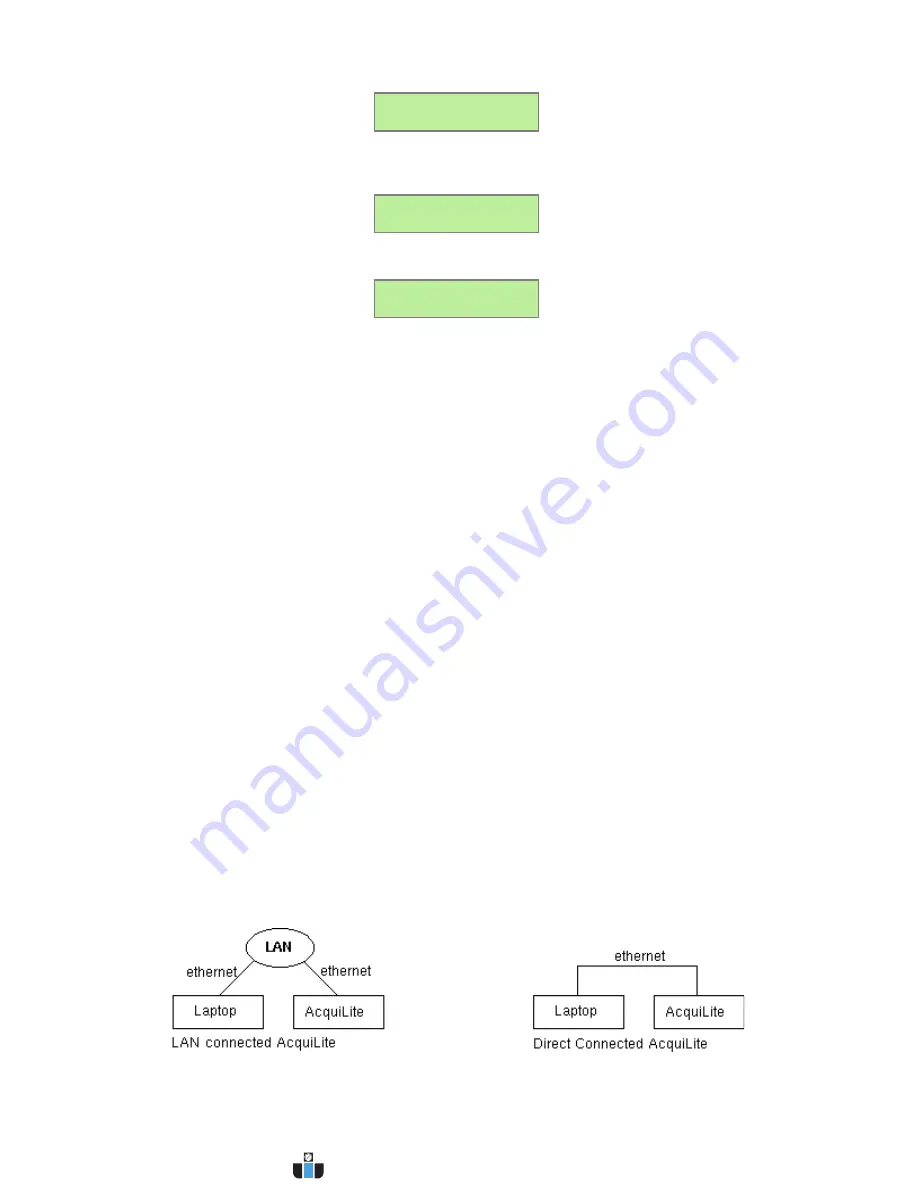
The remainder of this section will assume the installer has brought a laptop to the site, and will connect the laptop to the 

Page 8

A7810 AcquiLite – Data Acquisition Server

www.calcert.com

[email protected]

1.800.544.2843

0

5

10

15

20

25

30

Содержание AcquiLite EMB

Страница 1: ...Data Acquisition Server Obvius LLC Installation and Operation Manual Model A7810 Date Aug 10 2011 Page 1 A7810 AcquiLite Data Acquisition Server www calcert com sales calcert com 1 800 544 2843 0 5 1...

Страница 2: ...utside of Obvius s authorized facilities 4 has not been sold subject to other warranty terms specified at the time of sale and 5 is still owned by the original purchaser This warranty provides specifi...

Страница 3: ...oting Ethernet Problems 18 System Options 18 Status 18 Processes 18 Date and Time 18 Universal Time Is Your Friend 19 System logs 19 Firmware Update 20 Diagnostics 20 Host Lookup 20 Connection Test 20...

Страница 4: ...it connection point hub or switch IP address and Netmask check with system administrator Gateway address check with system administrator DNS server address check with system administrator HTTP Proxy a...

Страница 5: ...ms Pulse rate option 100hz minimum pulse width 5ms Contact closure threshold 100 to 2 5k user selectable Pulse count values are stored in non volatile memory Isolation2 The RJ45 Ethernet is isolated t...

Страница 6: ...erous if wire scraps come into contact with high voltage wires Step 4 Power up and diagnostics A power supply is not provided with the AcquiLite EMB therefore it is up to the installer to provide the...

Страница 7: ...e AcquiLite or Dynamic Host Configuration Protocol DHCP address this process assigns an IP address dynamically to the AcquiLite when it is connected to the network from a host DHCP server or Direct co...

Страница 8: ...ained automatically Simply select the Enable DHCP from the first TCP IP configuration menu Step 4 After the address information has been set you must reboot the AcquiLite Select the Previous Menu opti...

Страница 9: ...d the scope of this document however A From the Windows start menu select the Settings Network Connections option Double click the Local Area network connection icon in the network folder then click t...

Страница 10: ...steps for each Modbus device Step 7 Select the Modbus Setup menu option Specify the Modbus Loop Name This will become the name of the AcquiLite This is the name that will appear on the BMO website se...

Страница 11: ...ord for read only access Log information is stored in var log modbus For read write delete access use the login name root and the admin password The three usernames specified are not able to be change...

Страница 12: ...used to configure a Modbus device that is not presently connected to the system add a framework configured device or add a Modbus TCP connected device See the section on manually adding a device below...

Страница 13: ...the page several buttons are present Done returns you to the device list page Log File This icon will display a table view of the most recent data in the current log file Use the log file export page...

Страница 14: ...ta points are rotated about every 10 seconds The values on the LCD console are updated when the next log interval occurs Point Config Some devices have configurable point features Most data points are...

Страница 15: ...dress already listed in the device list page Modbus TCP Gateway IP This option allows the AcquiLite to log data from a remote Modbus device that is attached to the LAN via a Modbus TCP gateway device...

Страница 16: ...control based on the IP address of the system making the request The Modbus TCP protocol does not have provisions for any authentication password or other methods of security By default the gateway fe...

Страница 17: ...the wireless diagnostics options will be present in the AcquiLite Please refer to the AcquiSuite A8812 or A8810 user manuals for further details on the wireless diagnostic features Networking Network...

Страница 18: ...mmon mistake is configuring the Laptop IP to the same address as the IP address of the AcquiLite In order for the laptop and AcquiLite to communicate the IP addresses should not be identical see the b...

Страница 19: ...data in the database in UTC format and then convert the information when generating a report for the user For example if you wish to draw a graph of KW over Time prompt the user for a date range say J...

Страница 20: ...es will be displayed If any firmware updates are available a button to the right will be shown labeled Download The firmware files are asarm cramfs The main AcquiLite firmware file including the modbu...

Страница 21: ...failure is due to the password not being correct LCD Console The AcquiLite has an LCD console and two push buttons labeled Menu and Select These can be used to configure some of the basic features of...

Страница 22: ...ng requests This test does not verify if the DNS servers can actually resolve DNS names to IP addresses For a more complete test use the Connection Test web page in the AcquiLite diagnostics menu Modb...

Страница 23: ...ame starts with mb xxx where xxx is the Modbus device address number One file with the log extension is the file where the most recent data is being stored Other log files have a gz extension These ar...

Страница 24: ...No space left on device 32 Broken pipe 52 Invalid Exchange 101 Network is unreachable 110 Connection timed out 111 Connection refused 113 No route to host 129 Illegal Function function was not allowe...

Страница 25: ...log files to your server you must manually delete them To delete log files refer to the FTP method of downloading log files One step detailed in the FTP section is how to delete a log file from the Ac...

Страница 26: ...nformation about the transfer process use the Connection Test page in the Testing Diags menu on the AcquiLite for a full report of the data upload progress Retrieving Data From the AcquiLite Overview...

Страница 27: ...s uploaded Designed for integration with existing energy reporting systems Contact Obvius technical support for further details and sample scripts Removing Data From the AcquiLite When using an HTTP P...

Страница 28: ...be shown on that dialog Simply copy paste this URK into your link The AcquiLite can provide Modbus device data in XML format This feature coupled with browser based AJAX Javascript can provide a very...

Страница 29: ...roximately 4 x 4 25 x 2 deep The AcquiLite has 4 mounting holes for use with a 6 screw The drawing above shows the relative position of the mounting holes Page 29 A7810 AcquiLite Data Acquisition Serv...

Отзывы: