


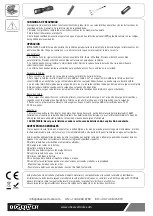


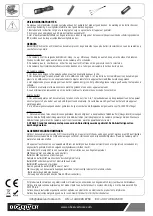

SAFETY INSTRUCTIONS
The owner and/or operator shall have an understanding of the product, its operating characteristics, and safety operating
instructions before operating it. Safety information shall be understood:
1. Study, understand and follow all instructions before operating this device.
2. No alterations shall be made to this product.
3. It shall be the responsibility of the user to ensure that applicable personal protective equipment (PPE) complies with applicable
local safety codes.
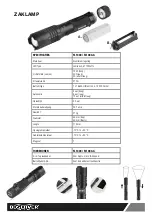
OPERATION
IMPORTANT: Unscrew the back of the flashlight to remove the insulated tape on the battery. Charge the flashlight before first use.
In addition, be aware that if the top metal cap is unscrewed, the lens becomes unsecured.
Flashlight Use
1. The flashlight has the following operational modes: High - Low - Ultra Low. Press the power button to cycle through them.
Press the power button a fourth time to turn the flashlight off.
2. The flashlight can zoom in (spot) and out (flood). Slide the head to the right or left to select the desired zoom.
3. The flashlight has removeable glow bands to help you find your flashlight in the dark.
Charging the Flashlight
1. To access the charging ports, twist the flashlight head to the right.
2. To charge the flashlight, insert the micro-USB connector on the 3-in-1 cable into the flashlight’s micro-USB port and insert the
USB connector into a charging plug, computer, tablet or any device that can charge via USB.
3. The flashing green light indicates that charging is in progress and the solid green light indicates that charging is complete.
4. Do not turn on the flashlight when it is being charged or charging another device.
5. At a minimum, charge every 6 months to keep the battery working normally and to avoid damage.
Power Bank
1. To charge other devices with the flashlight, first, plug the 3-in-1 charging cable into the device’s charging port and second, plug
the cable into the flashlight’s USB port. The solid blue light indicates that the other device is being charged.
2. You can use your own changing cable, just ensure that the USB charging cable is rated for 1A @ 5V DC or higher.
Dual Power
1. This flashlight can use two power sources. When needed, you can replace the 18650 rechargeable battery (included) with the
AAA battery holder (included) and three AAA batteries (not included), and use the flashlight normally. When using AAA batteries to
power the flashlight, the power bank feature will not work.
2. WARNING: Do not charge flashlight when AAA batteries are being used. The AAA batteries will be damaged.
GENERAL WARNINGS
The light from this flashlight is very powerful and should not be shone directly into anyone's eyes, as this may cause short term
blindness. If the beam does shine in your eyes, close them and look away immediately. Avoid putting the flashlight into water or
other liquids.
This device utilizes rechargeable Lithium ion battery that can rupture, ignite and cause series injury if missed usage. Observe the
follow safety rules;
DO NOT place battery or device in high temperature.
DO NOT tamper with battery wiring.
DO NOT puncture or damage battery.
DO NOT use battery that appears damaged.
DO NOT immerse or expose battery to water.
DO NOT alter or modify the battery.
DO NOT dispose of the battery in fire or water.
Failure to heed these warning may result in personal injury and/or property damage.
- Keep out of the reach of children.
- Replace the battery with 18650 lithium ion battery only.
This product has been designed and manufactured using high quality, recyclable and reuseable materials and components.
The crossed wheeled bin symbol applied to the product indicates that it complies with European Directive 2012/19/UE.
Please inquire about the collection of electrical and electronic products in your area.
Please comply with the local regulations. Do not dispose of this product with your normal household waste.
Содержание FL1000
Страница 1: ......


