R
R
T
T
A
A
0
0
4
4
N
N
U
U
s
s
e
e
r
r
’
’
s
s
M
M
a
a
n
n
u
u
a
a
l
l
E
E
d
d
.
.
0
0
.
.
1
1
Page 43 of 78
Click the
Add Route
button to add the new route in the Static Route Table.
The
Static Route Table
shows the current static route entries.
Note:
After configuration, you need to click the
Save
button appeared on the left panel so that your
configuration can still take effect after the Router reboots.
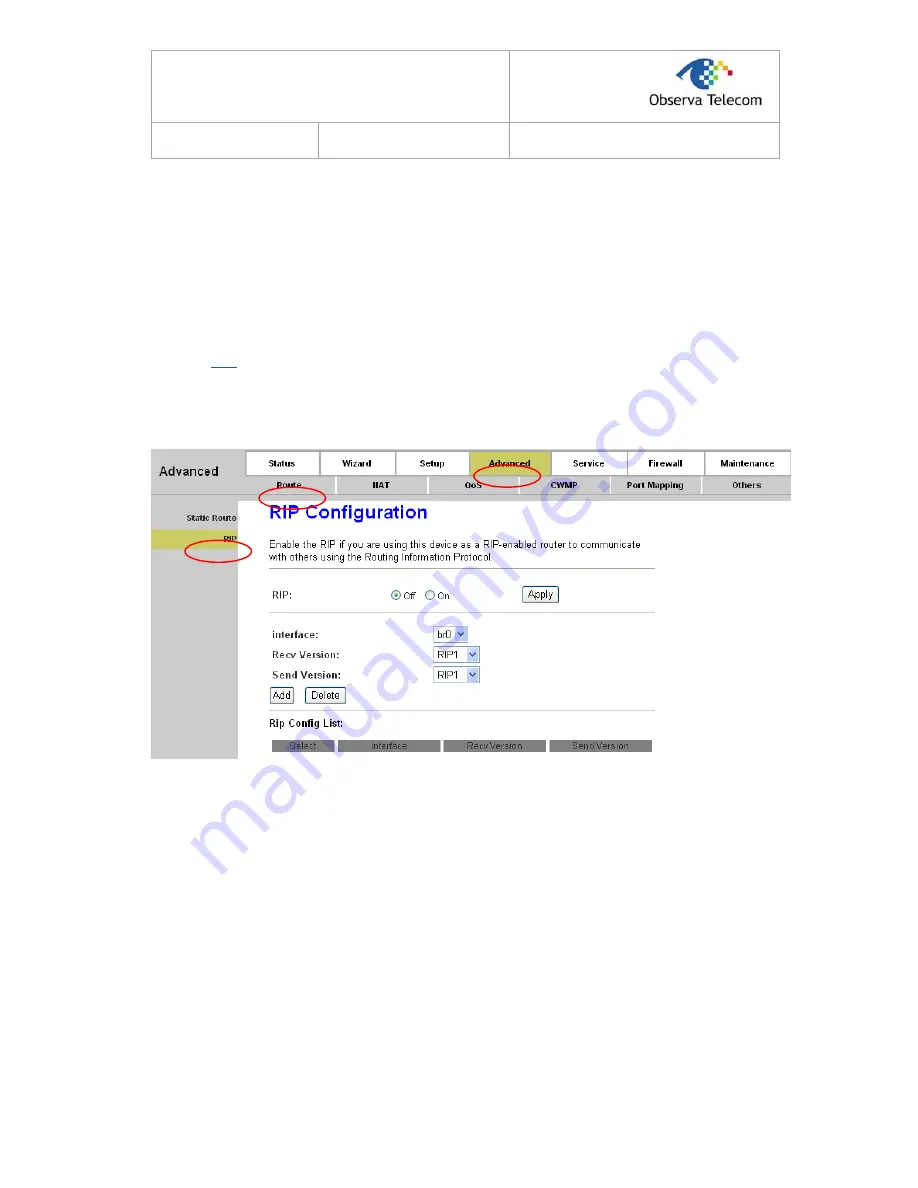
4.3.1.2. RIP
Choose “
Advanced→Route→RIP
” menu, you can configure the RIP settings in the next screen
(shown in Figure 4-25). RIP is an internet protocol you can set up to share routing table information
with other routing devices.
Figure 4-25
RIP
: Select to enable the RIP function or not. Click the
Apply
button to save your configuration.
Interface:
Select the interface on which you want to enable RIP.
Recv Version:
Indicate the RIP version in which information must be passed to the device. It
can be accepted into its routing table.
Send Version:
Indicate the RIP version this interface will use when it sends its route
information to the other device.
Click the
Add
button to add a RIP configuration to the Rip Config List. Click the
Delete
button to
delete it.
The
RIP Config List
shows the current RIP setting of the device.
Note:
After adding a new entry, a
Save
button will appear on the left panel. You need to click the
Save
button to make your changes take effect.


