background image

S452+ User Manual

26

MULTIMEDIA 

Camera 

Copy pictures/videos from the SD card to your PC 

& vice versa. 

Note:

 Pictures/videos will be stored on the phone  

if there is internal memory available. Otherwise 

your pictures/videos will be stored on the SD Card.

Click A Picture Or Video

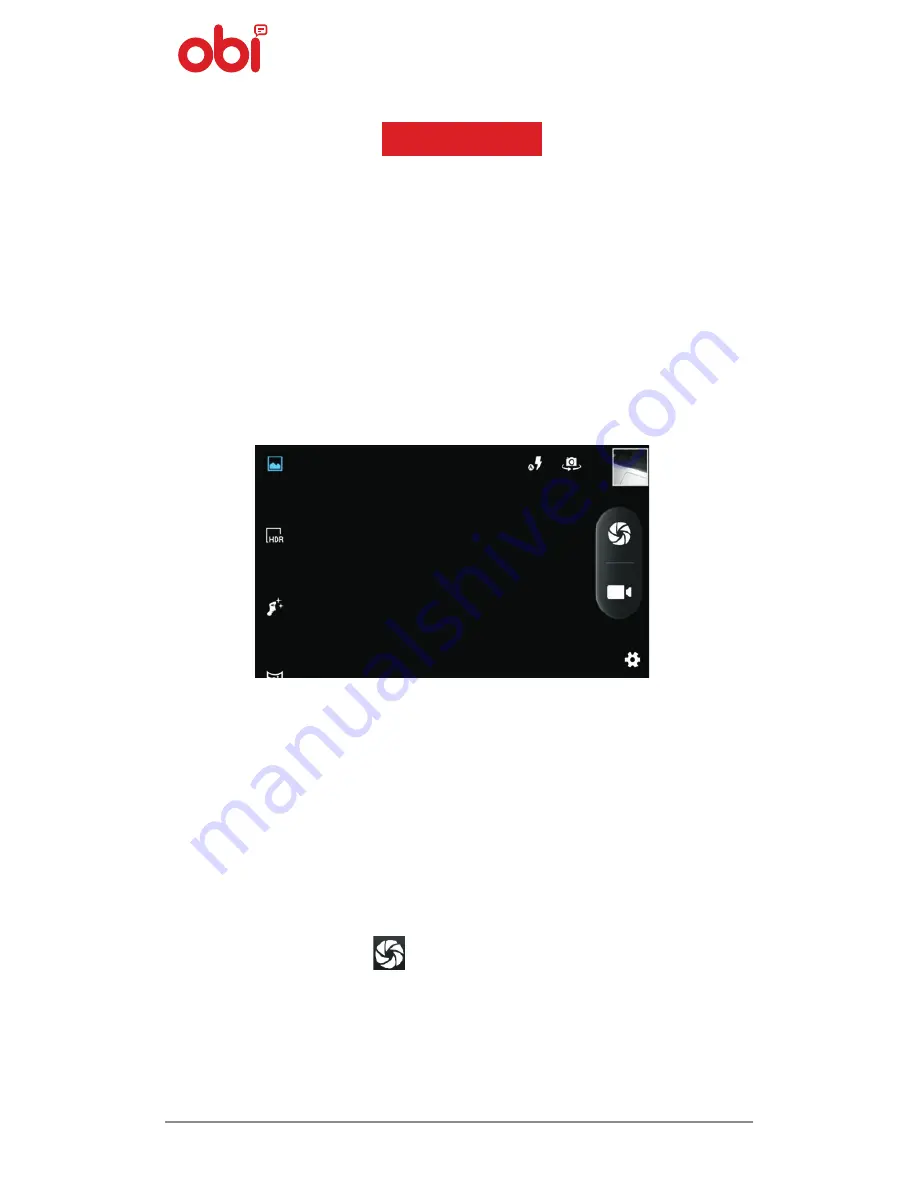
Tap the 

Camera icon in the main menu. And,


z

Adjust the exposure and other settings to 

your liking.


z

Point the lens to your subject.


z

Touch the   icon on the screen to take 

photos.

Содержание S452+

Страница 1: ...S452 User Manual ...

Страница 2: ... 11 43 cm FWVGA Resolution Touch Screen Supported Bands GSM GPRS EDGE 850 900 1800 1900 MHz WCDMA 850 2100 MHz 3G Camera 5 Mega pixels rear with flash 2 Mega pixels front Memory 4 GB ROM 1GB RAM microSD card slot Connectivity WiFi IEEE 802 11b g n Bluetooth USB FM Yes Size 135 62 10 mm SIM Dual SIM Slots Standard Micro Battery 1400 mAh Talk Standby Time Upto 360 minutes Upto 180 hours ...

Страница 3: ...EAD ME FIRST z z To ensure safe and proper use read all safety precautions and this manual carefully before using your phone z z Descriptions in this manual are based on the default settings of your phone z z Embeddedfeaturesandadditionalservicesmay vary by phone software or service provider z z Applications and their functions may vary by geography softwareorhardwarespecifications OBI is not liab...

Страница 4: ... providers and is subject to change without prior notice z z OBI reserves the right to make modifications to this User Guide without any prior notice z z On first use of your phone your phone will send information related to your mobile IMEI numbers location details and other software details through SMS automatically z z Operator tarrif shall be applicable for SMS INSTRUCTION ICONS Before startin...

Страница 5: ...Lock 10 Placing And Receiving Calls 10 Make A Call 10 In Call Options 11 Conference Call 11 Make An International Call 12 End A Call 12 Disable Phone Calls 12 Sensors 13 Using The Touch Screen 13 Drag An Item 13 Scroll 14 Swipe 14 Using The Zoom 15 Double Tap 15 Change The Orientation 16 Open And Close The Launcher 16 Using The Phone Keys 16 The Home Screen 18 Switch Between Home Screens 18 Rearra...

Страница 6: ...allery 27 Music 28 Fm Radio 28 Record Sound 28 Connect To Networks And Devices 29 Connect To The Internet 29 USB Tethering 30 Connectivity Via Wi Fi Hotspot 30 Bluetooth Tethering 31 Pair With Bluetooth Devices 31 Manage Accounts 32 Why Use A Google Account 32 Start Gmail 32 Google Search 32 Synchronize Contact List 33 Applications 33 Download Applications From Android Market 34 Safety Precautions...

Страница 7: ...User Manual 6 PHONE LAYOUT Insert SIM To insert SIM card s 1 Switch off the phone if on remove the rear cover and battery if installed 2 Insert the SIM card correctly in the SIM card slot s See figure below ...

Страница 8: ...able to damage Therefore be careful when using inserting or removing the card Insert Memory Card To store additional multimedia files you must insert a memory card 1 Switch off the phone if on remove the rear cover and battery if installed 2 Insert the memory card into the slot See figure below 3 Finally insert the battery and the rear cover of the phone ...

Страница 9: ...vated you need to enter the password to unlock If the SIM card has been inserted in the phone and the related PIN code protection is activated you need to enter the required password to unlock Warning If you enter three wrong PIN codes in a row the SIM card will be locked and you need to enter the PUK code to unlock Both the PIN code and the PUK code are provided by the network operator ...

Страница 10: ...e the battery for 4 hours continuously at least for the first time LOCKING UNLOCKING THE PHONE You may need to provide PIN password or draw a pattern to unlock your phone To unlock the screen 1 Press the Power Key to wake up the phone 2 Hold and drag the lock icon towards the unlock icon You may be required to unlock your phone based on the unlock method in settings To set the unlock method 1 On t...

Страница 11: ...hown in the picture below PLACING AND RECEIVING CALLS z z Dial a phone number or select a number from your contacts Or z z Place a call from the Call Log or Messages Dial A Number 1 Touch the icon on main menu or home screen to dial the desired number 2 Touch on any of the Phone Call Log or Contacts tab to make a call 3 To adjust the call volume press the volume up down keys on the left side ...

Страница 12: ...e press the icon again 3 Touch the icon to put the call on hold Tap the icon again to resume the call 4 Touch the icon to listen via the speaker 5 Touch the icon for DTMF inputs 6 To end the call press the icon Conference Calls Your phone supports conference calls between select number of participants including you ...

Страница 13: ...on 1 Touch the icon to dial the number 2 To adjust the call volume press the volume up down keys on the left side International Call To dial an international number touch and hold the 0 key from the dial pad to enter the plus symbol and then enter the destination country code followed by the phone number Disable Phone Calls To turn off your mobile Wi Fi and Bluetooth wireless connections z z Press...

Страница 14: ...hes the screen It prevents you from activating phone functions when you are engaged on a call Drag an Item Touch and hold an item and move your finger on the screen until you reach the target new position You can generally drag items on the home screen HOW TO USE TOUCH SCREEN You can use the touch screen in the following ways ...

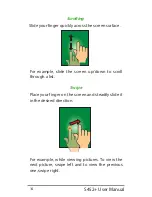
Страница 15: ...reen surface Swipe Place your finger on the screen and steadily slide it in the desired direction For example while viewing pictures To view the next picture swipe left and to view the previous one swipe right For example slide the screen up down to scroll through a list ...

Страница 16: ...and index finger to zoom into the display through the pinch gesture as shown below Double Tap To zoom quickly tap twice on a web page map or any other screen Example double tap a section of a web page in browser to zoom that section to fit the width of the screen ...

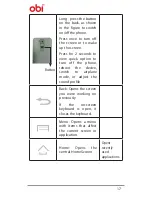
Страница 17: ...LAUNCHER YoucanaddanapplicationicontotheHomeScreen by pressing and holding it until it vibrates and enters Home Screen and then release your finger USING THE PHONE KEYS The table below illustrates set of functions and shortcuts that the phone offers Button Press Press and hold Adjust the phone volume from the keys as shown in the figure Volume Volume Up Down ...

Страница 18: ... view quick option to turn off the phone reboot the device switch to airplane mode or adjust the sound profile Back Opens the screen you were working on previously If the on screen keyboard is open it closes the keyboard Menu Opens a menu with items that affect the current screen or application Home Opens the central Home Screen Opens recently used applications Button ...

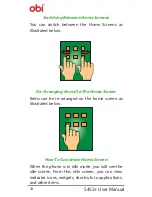
Страница 19: ...ated below Re Arranging Items On The Home Screen Items can be re arranged on the home screen as illustrated below How To Customise Home Screen When the phone is in idle mode you will see the idle screen From this idle screen you can view indicator icons widgets shortcuts to applications and other items ...

Страница 20: ...Re Arrange Or Remove Long press and hold the widget or icon you want to move Once the device vibrates don t release your hold on the icon Drag the widget or icon to a new location on the screen Press and hold an icon till the device vibrates and then drag the widgets or icon to remove HOW TO USE MENUS The phone has Context and Options menus for accessing the features in a methodical manner MENU IC...

Страница 21: ...ser Manual 20 Phonebook Browser MANAGING NOTIFICATIONS z z Notification icons update you of new messages and events z z When a notification is received its icon appears in the status bar along with a summary ...

Страница 22: ...ond To Notifications 1 Open the Notification Panel and to respond touch the specific notification 2 What happens next depends on the notification Closing The Notifications Panel Move and drag the tab at the bottom of the Notifications Panel to the top of the screen You can also press the back button The panel also closes when you touch a notification to respond to it To delete all notifications ju...

Страница 23: ...Airplane Mode Switch On Off Airplane mode z z Battery Consumption Check battery status consumption z z Wi Fi Activate deactivate the WLAN connection z z Bluetooth Activate deactivate z z GPS Activate deactivate z z Data Connection Activate deactivate z z Audio Profiles Choose among various audio profiles z z Brightness Adjust the brightness of your screen and more ...

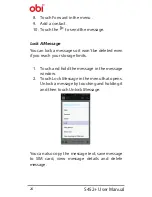
Страница 24: ... 1 Tap the icon to compose or type a new message 2 Tap the icon to attach a multimedia file to the message 3 Tap the composition text box and enter your message body 4 Enter or select a phone number 5 You can also tap the icon to add a contact from your contact list 6 Tap the to send the multimedia message Message Forwarding 7 Open the message and then touch that message in a message conversation ...

Страница 25: ...age so it won t be deleted even if you reach your storage limits 1 Touch and hold the message in the message window 2 Touch Lock Message in the menu that opens Unlock a message by touching and holding it and then touch Unlock Message You can also copy the message text save message to SIM card view message details and delete message ...

Страница 26: ... contact from phonebook Touch once to capitalize the next letter you type Touch and hold for caps Use the icon to erase characters Press space or a punctuation mark to enter the highlighted suggestion z z After typing press the icon to close the keyboard z z Press the symbols key to switch to the numbers and symbols keyboard z z Touch and hold the text field to open a menu and to cut copy texts ...

Страница 27: ...e stored on the phone if there is internal memory available Otherwise your pictures videos will be stored on the SD Card Click A Picture Or Video Tap the Camera icon in the main menu And z z Adjust the exposure and other settings to your liking z z Point the lens to your subject z z Touch the icon on the screen to take photos ...

Страница 28: ...ch the again icon to stop recording Gallery It is used to view pictures play videos and share files z z Touch the Gallery icon in the main menu or in the Camera mode z z Touch an album to open and view its contents z z Touch and hold a picture or a video that is to be shared You can select multiple files at once z z Touch the icon and share using Bluetooth messaging e mail etc ...

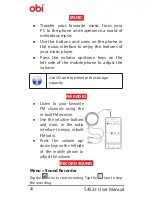
Страница 29: ...s of your music player z z Press the volume up down keys on the left side of the mobile phone to adjust the volume z z Listen to your favourite FM channels using the in built FM receiver z z Use the intuitive buttons and icons in the radio interface to enjoy in built FM radio z z Press the volume up down keys on the left side of the mobile phone to adjust the volume RECORD SOUND Menu Sound Recorde...

Страница 30: ...y the service provider of your SIM card By default your service provider sends the Access Point Name settings via SMS or it comes with your SIM card You may need to install these settings After this you can choose from the listed Access Point Name If the Access Point Names are not listed by default please contact your network provider for the same 3 After you have selected or configured the Access...

Страница 31: ... via your mobile phone Note Your mobile operator will charge you based on your GPRS data usage Connectivity Via Wi Fi Hotspot You need to insert a data service enabled SIM card on your phone to use your phone as a router 1 Go to Settings Wireless Networks More Tethering Portable Hotspot Wi Fi Hotspot 2 Configure your Wi Fi Hotspot as suggested 3 Make sure your computer has Wi Fi After connecting t...

Страница 32: ...Devices Go to Settings Wireless Networks Bluetooth 1 If Bluetooth is off tap on Bluetooth to turn it on Your phone scans and displays the Bluetooth devices in range 2 If the device you want to pair with is not in the list make it discoverable 3 If your phone stops scanning before you make the other device discoverable touch Search For Devices 4 Touch the ID of the other device in the list to pair ...

Страница 33: ...le account lets you take full advantage of Google applications and services that you may want to use such as Gmail Maps Navigation and various other applications Start Gmail You can use Gmail to read and write e mail from any mobile device or browser All your e mail is always up to date and available no matter where you access it from Google Search Google Search can help you find anything you need...

Страница 34: ...ronization will be complete in a few seconds To Auto Sync An Existing Account 1 Tap on an existing account 2 Tap Sync Contacts All phone contacts will be copied to that e mail account with details For this feature to work you need to have internet connectivity via your SIM or Wi Fi If your sync does not proceed as expected check whether data option is set to ON or not APPLICATIONS Your phone comes...

Страница 35: ...g fun experience SAFETY PRECAUTIONS Comply with legal requirements and local restrictions when using the phone For example in airplanes petrol stations hospitals Your phone s radio waves have a tendency to interfere with the functioning of inadequately shielded medical devices Consult a physician or the manufacturer of the medical device to determine whether they are adequately shielded from exter...

Страница 36: ...redit cards and floppy disks Information stored on them could be lost Permanent hearing loss may occur if you use earphones or headphones at high volumes Set your volume to a safe level If you experience discomfort or buzzing in your ears reduce the volume or discontinue use of your earphones or headphones Ringtones info tones and handsfree talking are reproduced through the loudspeaker Do not hol...

Страница 37: ...attery SIM and microSD card You must not open the phone under any other circumstances All other changes to this device are strictly prohibited and will invalidate the warranty The phone may cause interference in the vicinity ofTV sets radios and PCs All batteries can cause property damage injury or burns if a conductive material such as jewelry keysorbeadedchainstouchexposed terminals Exercise car...

Страница 38: ...s DEVICE CARE Your device is a product of superior design and craftsmanship and should be handled with care Please take care of the following in order to protect your phone 1 Keep the device dry Precipitation humidity and all types of liquids or moisture can contain minerals that will rust electronic circuits If your device gets wet remove the battery without turning on the device wipe it with a d...

Страница 39: ...d fine mechanics 6 Do not use harsh chemicals cleaning solvents or strong detergents to clean the device Use only a soft clean dry cloth to clean the surface of the device 7 Do not store your device near magnetic fields or allow your device to come in contact with magnetic fields for extended period of time BATTERY RECOMMENDATIONS z z Please put the battery in a cool and well ventilated place out ...

Страница 40: ...urer approved batteries chargers accessories and supplies OBI will not be held responsible for user s safety when using unapproved accessories or supplies z z Do not discard the battery with household trash Please dispose of used battery according to your local environmental laws and guidelines ...

Страница 41: ... Collection and proper recovery of your electronic waste equipments at the time of disposal will allow us to help preserve the environment Recycling of the electronic waste equipment will ensure safety of human health and environment Note OBI Mobiles will not bear any responsibility for any incompliance with the above mentioned guidelines or improper usage of the mobile phone Copyright All rights ...

Отзывы: