


Introduction
DEMO9S12NE64 Demo, Rev. 0.1
Freescale Semiconductor
3
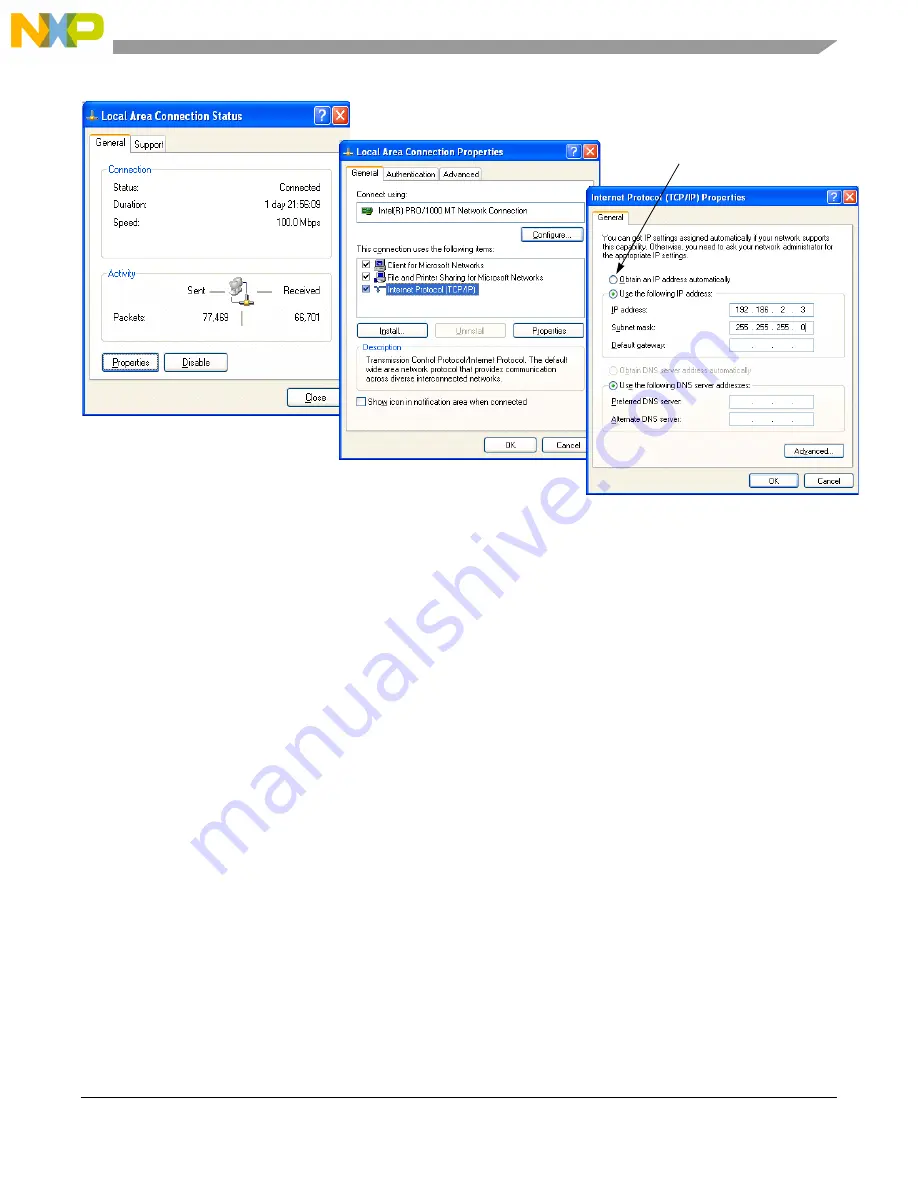
Figure 2. Setting the PC’s IP Address
3.
Ping Test
:
a.
Open a DOS command window (in Windows by clicking Start -> Run, typing “cmd”, and
clicking OK).
b.
In this black window, type “ipconfig” to verify that your PC IP address and mask has changed
(i.e., to 192.168.2.1 and 255.255.255.0).
c.
Now ping the board by typing “ping,” followed by the board’s IP address and the enter key, i.e.,
“ping 192.168.2.3” and <enter>. If the PC and board have a connection and are
communicating, you will see something like:
Pinging 192.168.2.3 with 32 bytes of data:
Reply from 192.168. 2.3: bytes=32 time=1ms TTL=127
Reply from 192.168. 2.3: bytes=32 time=1ms TTL=127 . . .
d.
If communication could not be established, see “
Reasons Why the Ping Test Might Fail
Install CodeWarrior Development Studio Version 3.1 for HC(S)12
If you do not have Version 3.1 of CodeWarrior for HC(S)12 installed on your computer, please refer to the
provided “CodeWarrior Development Studio for Motorola” CD for HC(S)12 Special Edition Version 3.1
and the included CodeWarrior Quick Start.
Important:
You must register and obtain the special edition
license key, which will allow you to experience all the features of the CodeWarrior debugger (see install,
register, and license key instructions in the CodeWarrior Quick Start). Be sure to select “CodeWarrior
Special for HC12 Release 3.1” under “Product Name” in the registration window. To begin a new
MC9S12NE64 project in CodeWarrior, please be sure to install the CodeWarrior service pack (CD is
included in the kit) that includes all stationery files for the MC9S12NE64.
a
b and c
e
(to restore normal LAN settings)
d