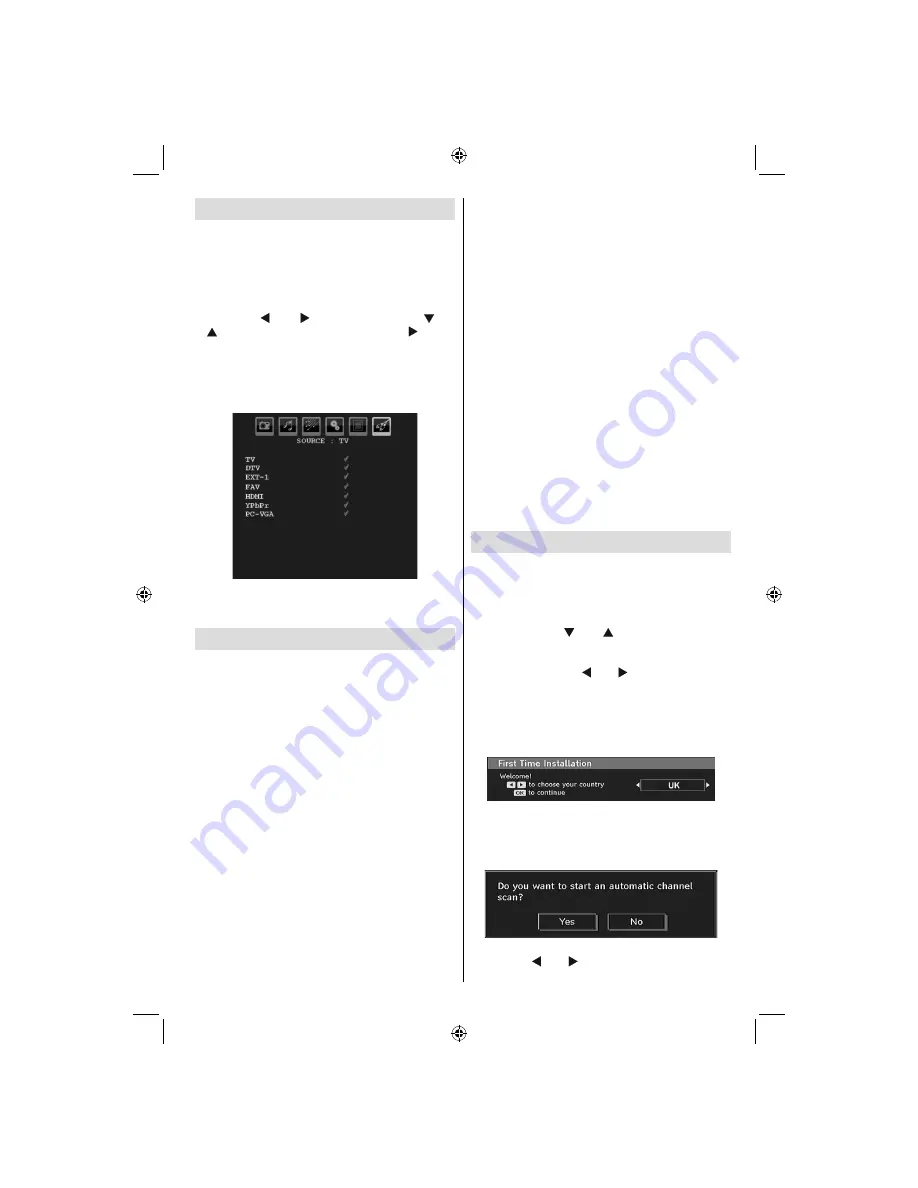
NuTech 22920 Скачать руководство пользователя страница 12

English   

- 11 -

Input Selection

Once you have connected external systems to your 
TV, you can switch to different input sources.
• Press “

SOURCE

” button on your remote control for 

directly changing sources.

or
•  Select  “

Source

”  option  from  the  main  menu 

by  using  “ ”  or  “ ”  button.  Use  then  “ ”  or 
“ ” button to highlight an input and press “ ” button 
to select.

Note: You can mark desired source options by pressing the 
OK button. Therefore, when 

“SOURCE”

 button is pressed, 

only the marked source options will be available (except for 
the TV source).

Note

 : YPbPr mode can be use only when you connect a 

device that has a YPbPr output through the PC input with 
YPbPr to PC cable (YPbPr cable is not supplied).

Basic Operations

You can operate your TV using both the remote 
control and onset buttons.

Operation with the Buttons of the TV

Main  menu  OSD  cannot  be  displayed  via  control 
buttons. “

+/-

” buttons will function as volume up/down 

as default. Even if you set other functions for these 
buttons, “

+/-

” buttons will perform as default after a 

short while.

Volume Setting

• Press “

+/-

” buttons to increase or decrease volume, 

so  a  volume  level  scale  (slider)  will  be  displayed 
on the screen.

Programme Selection

• Press 

P/V/AV

 button once and then use “

+/-

” buttons 

to select the next or previous programme.

AV Mode

•  Hold  the  “

P/V/AV

”  button,  source  OSD  will  be 

displayed.

• Use “

+/-

” buttons to select the desired source.

Operation with the Remote Control

• The remote control of your TV is designed to control 

all  the  functions  of  the  model  you  selected.  The 
functions will be described in accordance with the 
menu system of your TV.

• Functions of the menu system are described in the 

following sections.

Volume Setting

• Press “

V+

” button to increase the volume. Press


V-


button to decrease the volume. A volume level scale 
(slider) will be displayed on the screen.

Programme Selection (Previous or Next 
Programme)

• Press “

P-

” button to select the previous programme. 

• Press “

P

+” button to select the next programme.

Programme Selection (Direct Access)

• Press numeric buttons on the remote control to select 

programmes between 0 and 9. The TV will switch 
to the selected programme. To select programmes 
between 10-500 (for IDTV) or 10-199 (for analogue), 
press the numeric buttons consecutively 

•  Press  directly  the  programme  number  to  reselect 

single digit programmes

Initial Settings

When the TV is turned on for the 

 rst time, the menu 

for the language selection appears on the screen. The 
message  “Welcome  please  select  your  language!” 
is  displayed  in  all  language  options  sequentially  in 
the OSD.
By  pressing  the  “ ”  or  “ ”  buttons  highlight  the 
language you want to set and press OK button. After 
then, “First time installation” OSD will appear on the 
screen.  By  pressing  “ ”  or  “ ”  buttons,  select  the 
country you want to set and press OK button (* for 
EU countries).

Note

: If you would like to use your Television in an unlisted 

country,  please  set  county  option  as    Hungary,  Romania, 
Slovenia, Albania, Germany or Finland.

Note

: Country selection OSD will not be available for UK.

Press OK button on the remote control to continue 
and the following message will be displayed on the 
screen:

• To select the “Yes” or “No” option, highlight the item 

by  using  “ ”  or  “ ”  buttons  and  press  the  “

OK

” 

button.

MB45_[GB]_3902UK_IDTV_BRONZE11_22920W_LED_POWER SAVE MODE_10068917_50168693.indd   11

MB45_[GB]_3902UK_IDTV_BRONZE11_22920W_LED_POWER SAVE MODE_10068917_50168693.indd   11

04.06.2010   17:14:58

04.06.2010   17:14:58

Helpline number: 0845 

199 1574

Содержание 22920

Страница 1: ...OPERATING INSTRUCTIONS 22920 FHD LED COLOUR TELEVISION WITH REMOTE CONTROL Helpline number 0845 199 1574...

Страница 2: ...isconnecting the Device 4 Headphone Volume 4 Installation 4 LCD Screen 4 Warning 4 Environmental Information 5 Repair Information 5 Overview of the Remote Control 6 LCD TV and Operating Buttons 7 View...

Страница 3: ...ep timer Child lock Automatic sound mute when no transmission NTSC playback AVL Automatic Volume Limiting When no valid signal is detected after 5 minutes the TV switches automatically to standby mode...

Страница 4: ...for disposal Don t try to recharge batteries Danger of explosion Replace batteries only with the same or equivalent type Preparation For ventilation leave a free space of at least 10 cm all around th...

Страница 5: ...Do not leave your TV in standby or operating mode when you leave your house The Standby On button doesn t separate this device completely from mains Moreover the device consumes power in the standby o...

Страница 6: ...reduce energy consumption Disconnect power when going away for longer time Note that annually using the TV set in Power Save Mode has more power ef ciency than disconnecting the TV from the mains plu...

Страница 7: ...p 12 Info Reveal in TXT mode 13 Mute 14 Volume Down 15 Programme Down Page up in DTV mode 16 Electronic programme guide in DTV mode 17 Programme Up Page down in DTV mode 18 Sleep Timer 19 Picture Mode...

Страница 8: ...s component output Connect the YPbPr to PC cable between the PC INPUT on the TV and the component video outputs of your device YPbPr cable is not supplied HDMI 3 HDMI input HDMI Input is for connectin...

Страница 9: ...ote If you connect a device to the TV via the VIDEO or PC YPbPr cable YPbPr cable is not supplied you should also connect your device with an audio cable to the AUDIO INPUTS of the TV to enable audio...

Страница 10: ...device before making any connections Note Cables shown in the illustration are not supplied If your DVD player has an HDMI socket you can connect via HDMI When you connect to DVD player as illustrate...

Страница 11: ...ensure the correct polarity is observed and replace the battery cover Note Remove the battery from remote control when it is not to be used for a long period Otherwise it can be damaged due to any le...

Страница 12: ...the following sections Volume Setting Press V button to increase the volume Press V button to decrease the volume Avolume level scale slider will be displayed on the screen Programme Selection Previo...

Страница 13: ...locked you must enter the correct four numeric code to view the channel Enter PIN will be displayed on the screen in such a case Electronic Programme Guide EPG Some but not all channels send informat...

Страница 14: ...be viewed in a number of formats Press the SCREEN button repeatedly to change screen format When Auto is selected the format being displayed is determined by the picture being broadcasted PLEASE NOTE...

Страница 15: ...tton moves to the previous next character Pressing or button toggles the current character i e b character becomes a by and c by Pressing the numeric buttons 0 9 replaces the highlighted character wit...

Страница 16: ...ns for other users You can save the adjustments by pressing theGREEN key or cancel the process by pressing theRED button You can edit the list via GREEN key and delete with the RED button Conditional...

Страница 17: ...ed Scan Encrypted Channel feature will always be ON after performing rst time installation When this setting is on search process will locate the encrypted channels as well If it is set as OFF manuall...

Страница 18: ...se or buttons to change the Time Zone between GMT 12 or GMT 12 Current Time on the top of the menu list will then change according to the selected Time Zone Audio Description Optional Audio descriptio...

Страница 19: ...anguage determines the on screen menu language Audio Language is used for selecting the soundtrack of channels Primary settings are the rst priority when multiple choices are available on a broadcast...

Страница 20: ...ight First Time Installation menu item and press OK button then you will be asked whether or not to delete the settings Selecting Yes by pressing OK button while Yes is highlighted will delete the exi...

Страница 21: ...o Picture Mode Contrast Brightness Sharpness Colour and Colour Temp settings will be invisible and disabled while Game Mode is on Note Picture mode selection button on the remote control will have no...

Страница 22: ...can only be controlled by the remote control In this case the control panel buttons will not work except for the Standby On button When Child Lock is activated you are able to switch the TV into Stan...

Страница 23: ...choose desired source from source menu and turn On to EXT Out from feature menu Ext Out should be On in order to use Timers function in the DTV mode Install Menu Program Press or button to select Pro...

Страница 24: ...button By navigation buttons move the selected programme to the decided programme space and press theGREEN button again Delete To delete a programme press the YELLOW button Pressing the YELLOW button...

Страница 25: ...nd side of the screen Select H Position item by using or button Use or button to adjust the value V Vertical Position This item shifts the image vertically towards the top or bottom of the screen Sele...

Страница 26: ...spect ratio of the picture is included in the broadcast signal or the signal from an external device the TV automatically changes the ZOOM mode according to the WSS signal When the AUTO mode does not...

Страница 27: ...Persistence Please note that ghosting may occur while displaying a persistent image LCD TVs image persistence may disappear after a short time Try turning off the TV for a while To avoid this do not...

Страница 28: ...ESA 4 800 600 56 35 2 VESA 5 800 600 60 37 9 VESA 6 800 600 70 43 8 7 800 600 72 48 1 VESA 8 800 600 75 46 9 VESA 9 832 624 75 49 7 MAC 10 1024 768 60 48 4 VESA 11 1024 768 70 56 5 VESA 12 1024 768 72...

Страница 29: ...z O 1080P 24Hz O 1080P 25Hz O 1080P 30HZ O 1080P 50HZ O 1080P 60HZ O X Not Available O Available Note In some cases a signal on the LCD TV may not be displayed properly The problem may be an inconsist...

Страница 30: ...rt compliant with ISO IEC 135818 6 and UK DTT pro le Frequency range 474 850 MHz for UK models 170 862 MHz for EU models Transmission standard DVB T MPEG 2 Demodulation COFDM with 2K 8K FFT mode FEC a...

Страница 31: ...with the letter N or coloured Black The wire which is coloured brown or red must be connected to the terminal which is marked with the letter L or coloured Red For continued protection against risk of...

Страница 32: ...igital tuner will continue to broadcast all of these channels and more If you are using this product to watch broadcasted TV you should ensure that your Aerial set up is ready for the changes To do th...

Страница 33: ...50168693...

Отзывы: