


Setting Up the PicoDigitizer250
The following procedure will guide you through the PicoDigitizer250 setup to run the Record/Playback example.
Requirements
PicoDigitizer box content
A PC with Windows 7 64-bits and 10 GB of RAM.
Visual Studio 2008 SP1
An Ethernet cable
A 1-MHz signal generator
A 1-GHz oscilloscope
Procedure
1.
Install the ADP software tools on the Windows PC. Follow the instructions available in the
ADP uTCA edition - Software
installation guide for windows7.pdf
document in the
Install documentation
folder of the installation DVD.
2.
Connect the PC to the PicoDigitizer250 with the Ethernet cable. Use the Ethernet port 1 on the PicoDigitizer250 backplane.
3.
Connect an MMCX to SMA cable between the ADAC250 ADC A connector and the signal generator. Configure the signal
generator to output a 0 dBm signal at 1MHz.
4.
Connect an MMCX to SMA cable between the ADAC250 DAC A connector and the oscilloscope.
5.
Power up the PicoDigitizer250 by plugging in the power supply and by clicking once on the backplane reset button.
6.
The Perseus will boot and configure itself with the Record example bitstream previously written in Flash memory.
7.
The PicoDigitizer Perseus is configured to use a static IP upon startup. The Perseus default IP address is 192.168.0.101
8.
Start Microsoft Visual Studio.
9.
On the
File
menu, point to
Open
and click
Project/Solution
.
10.
Browse to the
\perseus6010_adac250_record_playback\host\prj_win\
folder and select the
perseus6010_adac250_playback_record.sln
file.
The host software project opens and you see the hierarchy of the project on the
Solution Explorer
tab. If you do not see the
Solution Explorer
tab, on the
View
menu, click
Solution Explorer
.
11.
Select the build configuration Release x64.
12.
On the
Build
menu, click
Build Solution
.
13.
Double-click
Launch_adac250_record_playback_demo.bat.
The test starts automatically.
14.
When prompted, choose the test you wish to execute. The results for the Record (15) and the Playback(16) tests are shown
below.
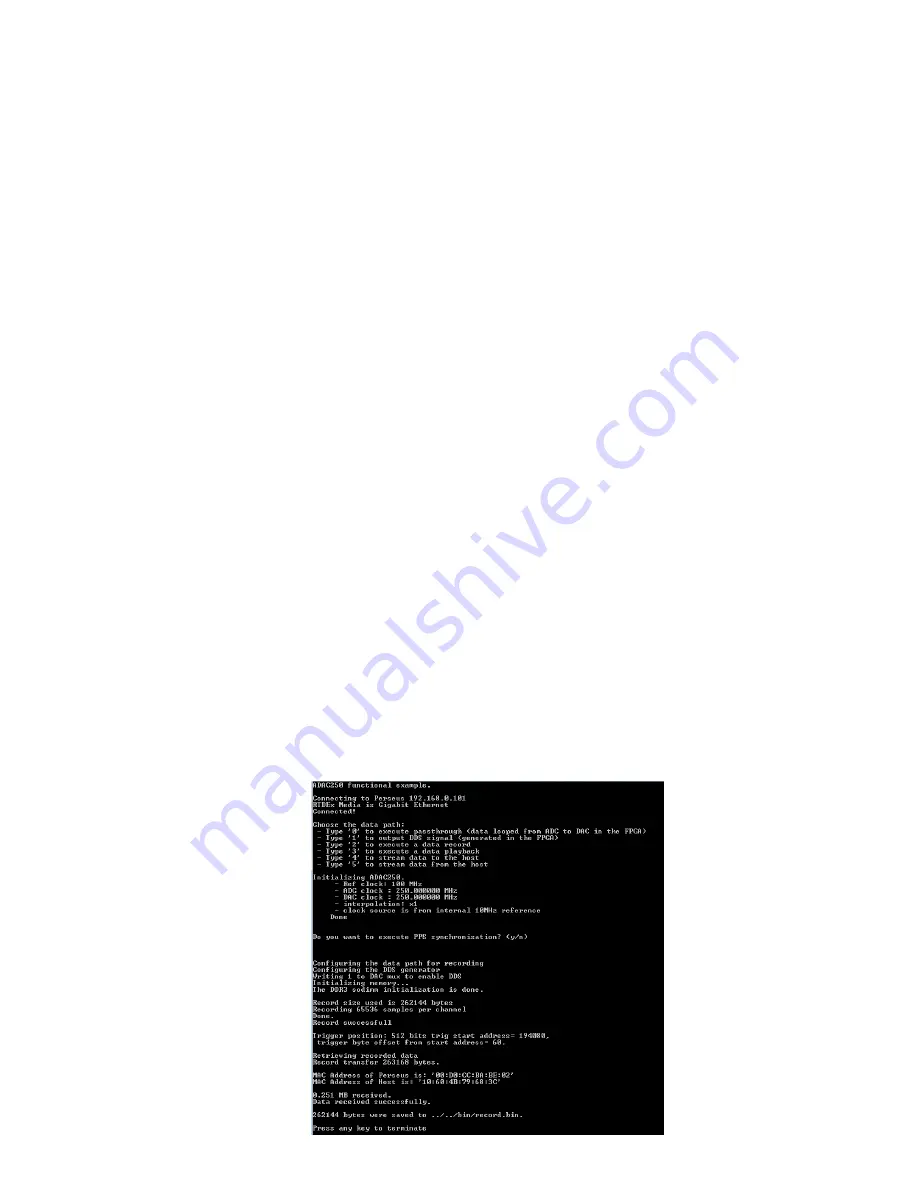
15.
Record Test Result
The following window shows a successful PicoDigitizer250 record test:


