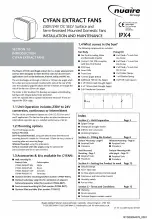
Страница 1: ...IT WH White CYFAN WALLKIT BR Brown CYFAN WALLKIT COT Cotwolds CYFAN WALLKIT TC Terracotta Optional window mounting kit Part number CYFAN WKlT Optional subsidiary spigot kit for ventilation of adjacent bathroom separate toilet Part number CYFAN DKlT Semi recessed mounting kit Part number CYFAN RKlT Optional filter available Part number 7702017 1 4What comes in the box The following components are i...
Страница 2: ...n Unit Dimensions mm Front view 207 Top view 179 II I I I II _ I I I I I I 00 0 N r 1 6 Optional window Kit Dimensions mm x N 0 N I 48 0 150 0 Window thickness 2 Back view Side view _ I N 7 i 00 0 N x r 0 N I 27 05 14 Leaflet Number 671629 RYD00094076_0002 ...
Страница 3: ...tions other than directly through the wall application to avoid failure of the shutters opening Please follow these simple steps to fit your back draught shutters if required It is advised to fit the shutters before installing the fan unit Collect all required parts 125mm shutters 2 off 41285 or 100mm shutters 2 off 41286 Spring Part of Fixing Kit 770173 Fit 1 shutter with the part number facing i...
Страница 4: ...shown in 24V wiring options Fit section 1 of the PCB by first slotting the bottom edge see fig 6 into the fixing clip inside the base of the transformer enclosure then press on the transformer and terminal block until 24V the PCB clicks into place Complete by replacing the transformer 0 cover using the screws provided SL 4 Keep vents clear of obstruction Complete the installation of components by ...
Страница 5: ... Fuse 2A Fig a 230V Wiring options Unit serving bathroom via remote switch Remote light switch 3 Pole isolator Mains N 230V SOHz E J Fuse 2A F Opfo Omp El Fan unit Unit serving bathroom or kitchen via pull cord 2 Pole isolator Mains N 8 NL 230V SOHz Fuse 2A Fan unit 5 N 24V 0 Transformer Fan unit Box Section 2 PCB Fig9 230VWiring options for two room installation Side spigot Wiring for two room in...
Страница 6: ...mm dia 7 Place the fan casing in the mounting position spigot placed into core cut hole and use the base as a template to mark the mounting screw hole positions x3 remove casing once marks are made 8 Drill and plug if necessary the mounting surface 9 Feed wiring flex through the back of the fan casing and secure into place using cable clamps and screws provided in the CYFAN fixing kit 10 Secure th...
Страница 7: ...t fan cover to fan grille Fit fan grille to inner fan case using 4 fixing screws No 6 x 3 4 Fan grille Fan motor Inner fan case Use 3 off M4 x 16 screws 1 to secure inner fan case to the mounting plate Mounting plate to be placed within previously prepaired aperture opening 205mm x 185mm fix into place using appropriate fixings supplied by others Fan cover Semi recessed mounting flange Fig 13 Semi...
Страница 8: ...plug motor into PCB replace PCB fully into position by pushing the dip switches 10 Replace PCB cover by fitting with 2 off No6 x 1 2 inch screws see point 2 of the procedure 8 Fig 17 Use cable clamp on rear of casing to secure wiring 11 Fit front inlet grille using 4 off No6 x 3 4 inch screws found in the fixing kit 12 Remove rubber gasket and adjust control to required settings shown in section 4...
Страница 9: ... draw the inner and outer assemblies together Remove any tape supporting the outer assembly and continue to draw the units together until the O ring is compressed on the window Note do not over tighten the fixing screws as this may distort the assembly 8 Wire unit in accordance with the appropriate wiring diagram A cable clamp is provided inside the case Note the remaining installation procedures ...
Страница 10: ...er fan body with 2 spigot holes I Subsidiary spigot kit outer fan skirt with 1 spigot hole The outer fan skirt can be rotated if required which enables the spigot hole to be positioned on the right or left side to meet the application requirements 10 Install the SOmm dia subsidiary spigot from inside both the inner fan body and outer skirt Turn the spigot a quarter turn to lock Reinstall inner fan...
Страница 11: ...e wiring options on page 5 Use cable clamp on rear of casing to secure wiring 12 Replace fan scroll assembly and plug motor into PCB replace PCB fully into position by pushing the dip switches 13 Replace PCB cover by fitting with 2 off No6 x 1 z inch screws see point 2 of the procedure 14 Fit front inlet grille using 4 off No6 x 3 4 inch screws found in the fixing kit 1S Remove rubber gasket and a...
Страница 12: ...60l s Intermittent fan does not operate continuously but only when the pull cord or remote switch is activated The amount of airflow is adjustable from 8 to 60 l s 4 4 Humidity Tracker Switch The default setting is off Switching to on will enable the unit to sense the humidity in the room The fan will switch itself on when the humidity rises above 60 and will slowly speed up as the humidity rises ...