1
USER INSTRUCTIONS
LINTON PLUS RAISED TOILET SEAT
General Safety Warning
Please make sure that you read and follow these
instructions carefully. Failure to do so can result
in injury. Keep these instructions in a safe place
for future reference.
1.0 INTENDED USE
The Linton Plus toilet seat’s raised design makes sitting and standing from the toilet easier, with less strain
on the user’s joints. The cut-out seat design makes personal cleansing easier and distributes pressure
more evenly away from the coccyx. The seat is adjustable and fixes securely to standard shaped toilets.
Seats are available in 3 sizes and can be supplied with or without a lid.
M53163 2” (50mm) Non Retail Pack - No Lid
M53175 4” (100mm) Non Retail Pack - No Lid
M53564 2” (50mm) Retail - No Lid
P42469 4” (100mm) Retail - With Lid
P42458 2” (50mm) Retail - With Lid
P42446 6” (150mm) Retail - No Lid
M53576 4” (100mm) Retail - No Lid
P42471 6” (150mm) Retail - With Lid
Maximum User Weight
30st
190kg
2.0 SAFETY
The maximum user weight must not be greater than
30st (190kg).
Inspect the seat and fixings at regular intervals to
make sure that it is safe and secure.
Do not use the seat unless you are sure it is safe to
do so. If in doubt, contact your supplier for advice.
Inspect the seat and fixings at regular intervals for
wear and damage.
If damage is found, stop using the seat and contact
your supplier immediately for advice.
1
2
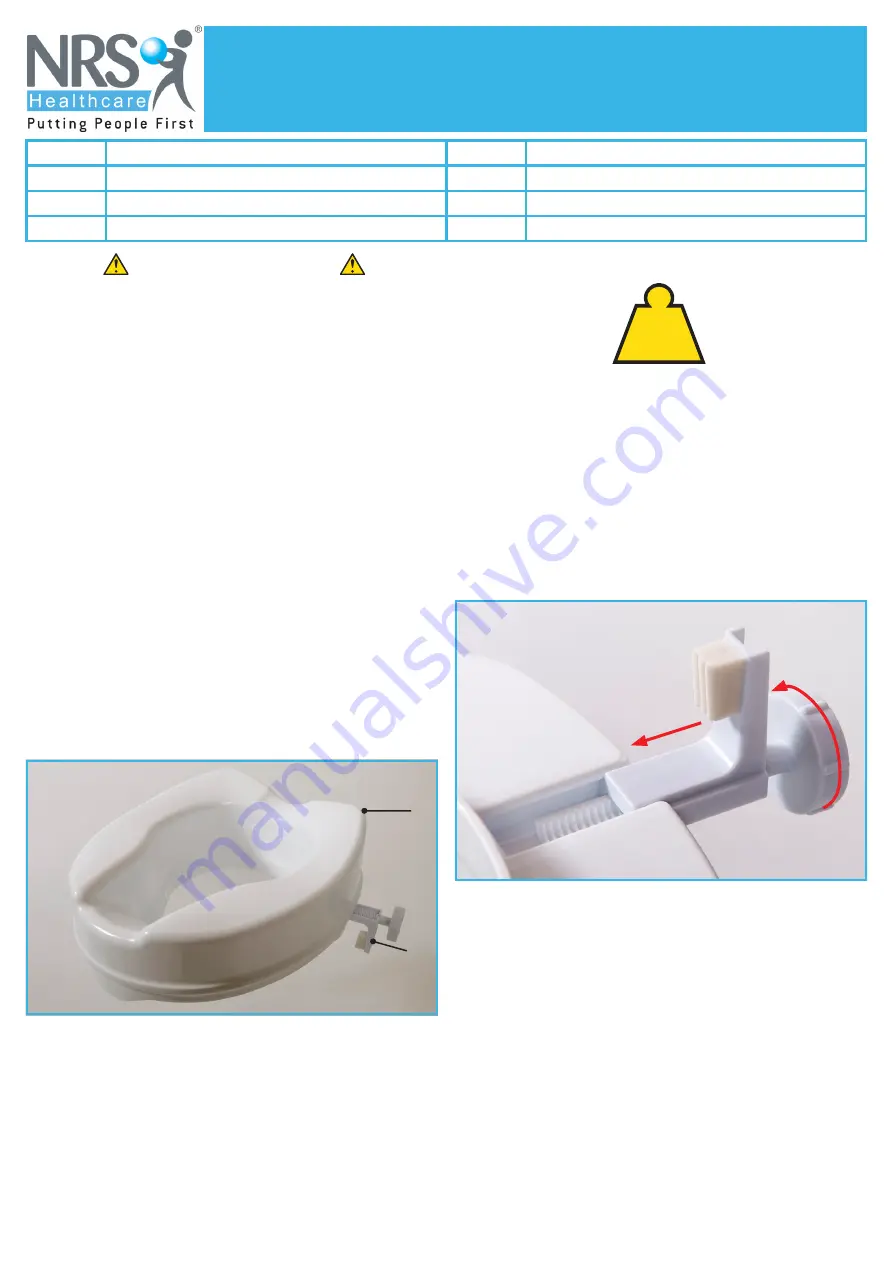
Figure 1: Raised Toilet Seat Assembly
3.0 UNPACKING
Refer to Figure 1. Remove the packaging and check
all parts carefully. Contact your supplier immediately
if parts are missing or damaged and do not try and
assemble.
Contents:
1. Linton Plus Raised Toilet Seat x 1
2. Support Bracket and Handwheel x 2
4.0 ASSEMBLY
4.1 Fitting the Support Bracket:
The support bracket and hand-wheel screw assembly
must be fitted to the seat, before fitting to the toilet.
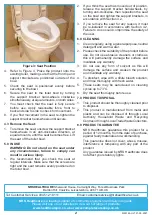
Figure 2: Fitting the Support Bracket
1. Refer to Figure 2. Slide the support bracket into
the slot on the toilet seat.
2. Turn the hand-wheel clockwise until the threads
engage.
Note:
Do not tighten any further at this stage.
3. Repeat steps 1 and 2 for the opposite side.
4.2 Fitting to the Toilet:
1. Make sure that the existing toilet is safe and
secure before you attempt to fit the product.
2. The existing toilet seat and lid must be lifted
before the product can be fitted.
3. Check that the support brackets are securely in
place before fitting.


