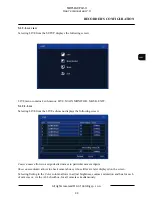
NDR-BA3104-II
User’s manual ver.1.0
All rights reserved © AAT Holding sp. z o.o.
19
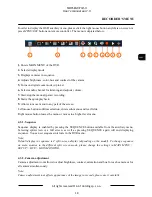
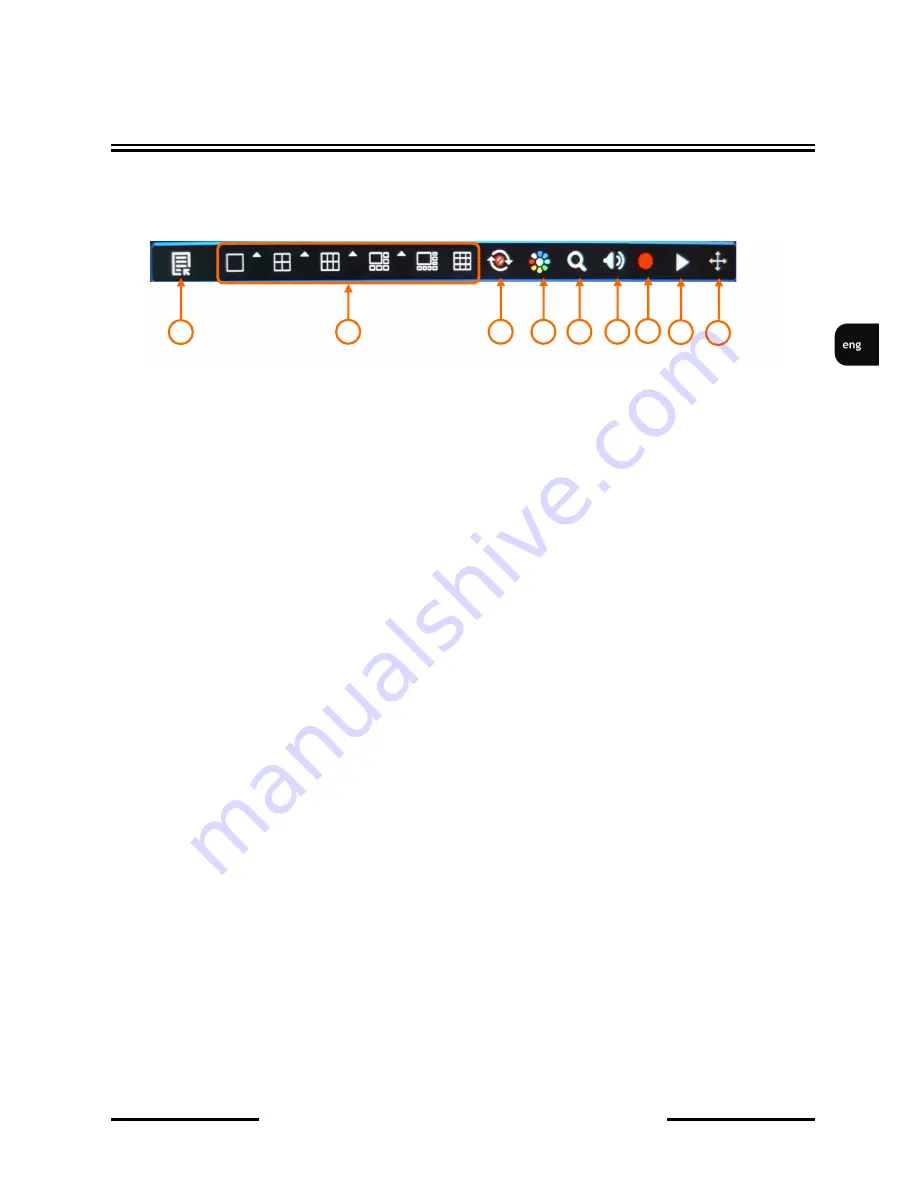
In order to display the OSD auxiliary menu, please click the right mouse button anywhere on screen or
press
MENU/ESC
buttons on remote controller. The menu is depicted below:
1.
Enters MAIN MENU of the DVR.
2.
Selects display mode.
3.
Displays cameras in sequence.
4.
Adjusts brightness, color, hue and contrast of the camera.
5.
Turns on digital zoom mode (up to 4x).
6.
Selects audio channel for listening and adjusts volume.
7.
Start/stop the manual (panic) recording.
8.
Starts the quick playback.
9.
Allows to move menu to any part of the screen.
Left mouse button confirms selection, enters sub-menus and text fields.
Right mouse button leaves the menu or moves to a higher level menu.
4.3.1. Sequence
Sequence display is enabled by pressing the SEQUENCE button available from the auxiliary menu.
Selecting split-screen or a full screen, as well as pressing SEQUENCE again will end displaying
sequence. You can set sequence intervals in the DVR menu.
Note:
Default display in sequence is 4 split-screen display (depending on the model). To change sequence
on main monitor to the different split screen mode, please change the settings in MAIN MENU >
SETUP > LIVE > MAIN MONITOR.
4.3.2. Camera adjustment
Camera adjustment tool allows to adjust brightness, contrast, saturation and hue for each camera or for
all camera simultaneously.
Note:
Camera adjustment tool affects appearance of the image in records, please use it carefully.
RECORDER’S MENU
1
2
3
4
5
6
7
8
9
Содержание NDR-BA3104-II
Страница 1: ...User s manual NDR BA3104 II ...
Страница 75: ...Instrukcja obsługi NDR BA3104 II ...

