background image

ESTABLISHING RECEIVER COMMUNICATION

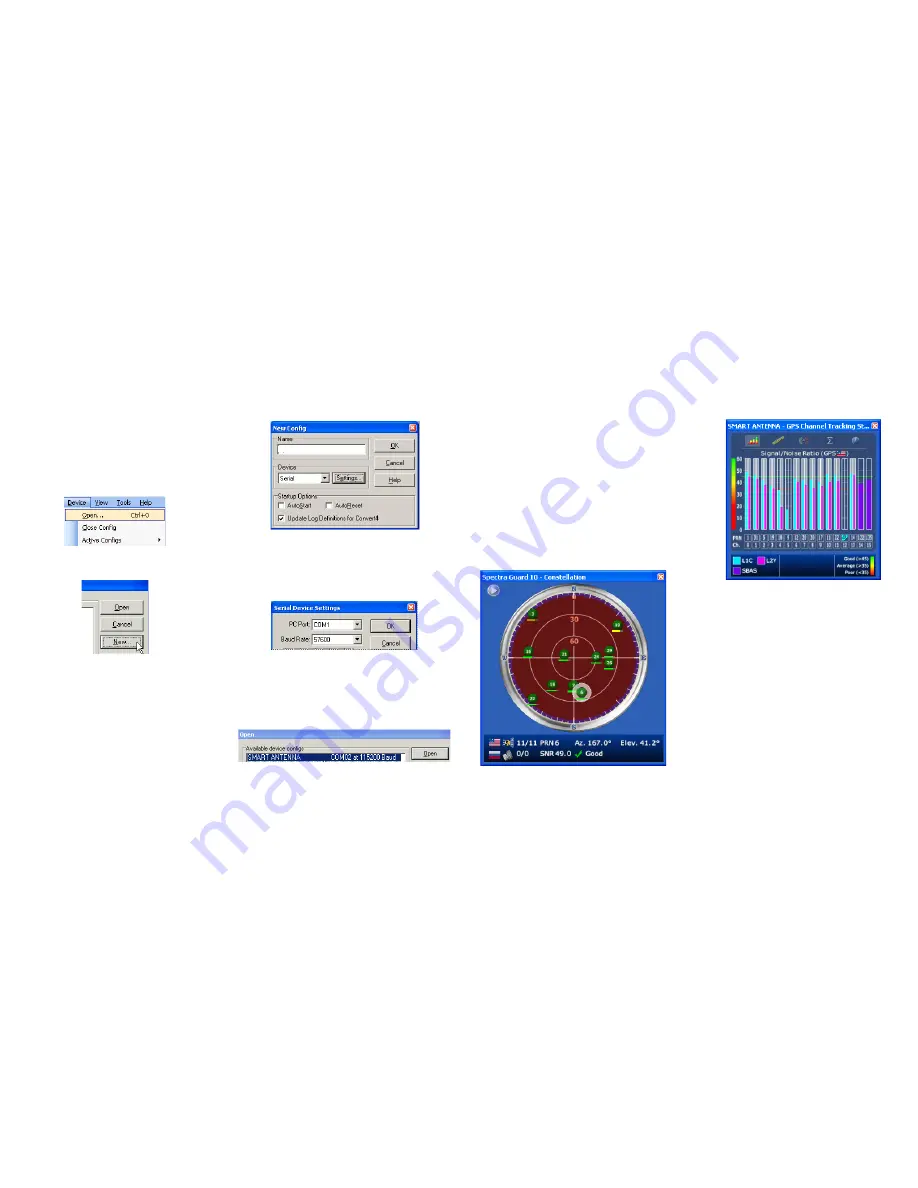
To open a serial port to communicate with the receiver, complete 
the following.

1. Launch 

CDU


from the 

Start

 menu folder specified during the 

installation process. The default location is 

Start | Programs | 

NovAtel OEMV | OEMV PC Software

.

2. Select 

Open.... 

from the

 Device 

menu

.

3. Select the 

New...

 button in the 

Open

 dialog box.

4. Enter a name for the new device configuration in the 

Name


field of the

 New Config 

dialog box.

5. Select the 

Settings

 button.

6. Select the PC serial port the SMART-V1/V1G is connected 

to from the 

PC Port

 drop-down list.

7. Select 

57600

 from the 

Baud Rate

 list. 

8. Uncheck the 

Use hardware handshaking

 checkbox.

9. Select 

OK

 to save the settings.

10. Select the 

OK

 button to close the 

New Config

 dialog box and 

create the new device configuration.

11. Select the new configuration from the 

Available device 

configs

 list in the 

Open

 dialog box.

12. Select the 

Open

 button to open communications with the 

SMART-V1/V1G.

As 

CDU

 establishes the communication session with the 

receiver, a progress box is displayed.

Once 

CDU

 is connected, the progress box disappears and 

several windows open, including the Console window. 

CDU


is now ready to be used to view status information, enter 
commands, or log data.

USING CDU

CDU

 provides access to key information about your receiver and 

its position. The information is displayed in windows accessed 
from the 

View

 menu. For example, select 

Position Window

 from 

the 

View

 menu to display the position solution of the receiver. To 

show details of the GPS and geostationary (SBAS) satellites 
being tracked, select the 

GPS


Tracking Status Window

 from the 

View

 menu. Select 

Help

 from the main menu for more details on 

CDU

, its windows and features.

SMART ANTENNA

Содержание SMART-V1

Страница 1: ...PWR2 orange to the battery s positive terminal Guidelines for grounded and floating installations are shown in the following diagrams WARNING If you do not use a battery you must tie together the bare wires tagged as GND2 brown GND black and DIGGND green to the DC power supply s negative ground connector Failure to tie the appropriate grounds as explained in this section may result in your SMART V...

Страница 2: ... the new device configuration 11 Select the new configuration from the Available device configs list in the Open dialog box 12 Select the Open button to open communications with the SMART V1 V1G As CDU establishes the communication session with the receiver a progress box is displayed Once CDU is connected the progress box disappears and several windows open including the Console window CDU is now...

Страница 3: ...indow you can select which logs to capture and choose to which ports to send the data In addition you can specify a file in which to save the data ENABLING SBAS POSITIONING SMART V1 V1G models are also capable of SBAS positioning This positioning mode is enabled using the SBASCONTROL command The following commands are typically used to enable WAAS North America and EGNOS Europe systems SBASCONTROL...

Страница 4: ...ieved when both the base and rovers are NovAtel products However AdVance RTK will operate with equipment from other manufacturers when using RTCM messaging RT 20 is supported by GPS only and GPS GLONASS models Also RT 20 with GPS GLONASS provides faster convergence Refer to the GPGST log s usage box in the OEMV Firmware Reference Manual for a definition of RMS and other statistics USING THE CAN BU...

Отзывы: