background image

Northstar Explorer 725/705 Quickstart Guide

6

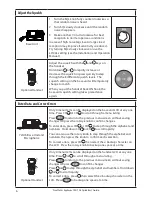
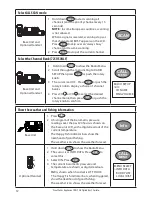
Adjust the Squelch

Base Unit

1  Turn the SQL knob fully counterclockwise so 

that random noise is heard. 

2  Turn SQL slowly clockwise until the random 

noise disappears. 

3  Make another 1/4 turn clockwise for best 

reception in normal open sea conditions.

In areas of high noise (eg close to large cities)  

reception may improve if sensitivity is reduced. 

Try turning SQL slowly clockwise or use the 

LOCAL setting (see the Installation and Operation 

Manual).

Optional Handset

Adjust the squelch with the   and   keys on 

the handset. 
Hold down   or   to rapidly increase or 

decrease the squelch or press quickly to step 

through the 8 different squelch levels.  The 

squelch setting on the base unit will temporarily 

change to match.  
When you put the handset back ON hook, the 

base unit squelch setting takes precedence 

again.


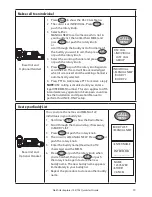
Enter Data  and Correct Errors

721US Base Unit and 

Microphone

Only 4 menu items can be displayed on the base unit LCD at any one 

time. Press CH   or CH   to scroll through a menu listing.
Press 

ESC

 to return to the previous menu screen without saving 

changes OR press the rotary knob to confirm changes.
To enter data, press CH   or CH    to step through the alphabet and 

numbers.  Hold down CH   or CH   to scroll rapidly.
You can also use the rotary knob to step through the alphabet and 

numbers, then press the knob to confirm each selection.
To correct errors, press CH   then select the 

<

 backup character on 

the LCD.  Press the rotary knob to backup one space at a time.

Optional Handset

Only 4 menu items can be displayed on the handset LCD at any one 

time. Press   or   to scroll through a menu listing.
Press 

ESC

 to return to the previous menu screen without saving 

changes OR press 

ENT

 to confirm changes.

Press   or   to step through the alphabet and numbers. Hold down  

 or   to scroll rapidly. 

To correct errors, press   then select the 

<

 backup character on the 

LCD.  Press 

ENT

 to backup one space at a time.

Содержание EXPLORER 705 -

Страница 1: ...www northstarnav com Explorer 725 705 VHF Marine Radio Quickstart Guide ...

Страница 2: ...1 and Explorer 725 function identically except for where noted in this QSG Consult the Installation and Operation Manual for further information on the options described in this Quickstart Guide and for information on other options including radio setup and different DSC call types and options troubleshooting and channel charts ...

Страница 3: ...e used when connecting a peripheral to the serial ports Industry Canada Operation is subject to the following two conditions 1 this device may not cause interference and 2 this device must accept any interference including interference that may cause undesired operation of the device It is the owner s sole responsibility to install and use the instrument in such a manner that will not cause accide...

Страница 4: ... and used with your Explorer 725 There are two versions the Northstar 705US handset for use with the Northstar 725US model and the Northstar 705EU handset for use with the Northstar 725EU model This Quickstart Guide covers BOTH models of the Explorer 725 with or without the optional handsets Northstar Explorer 725EU pictured with 705EU optional handset Northstar Explorer 725US pictured with 705US ...

Страница 5: ...the handset will search for the base unit and establish the wireless link This should take only a few seconds 4 Adjust the volume with the VOL and keys on the righthand side of the handset Hold down VOL or to rapidly increase or decrease the volume or press quickly to step through the 8 different volume levels This will not change the volume on the base unit speaker NOTE The optional Handset funct...

Страница 6: ...nd Correct Errors 721US Base Unit and Microphone Only 4 menu items can be displayed on the base unit LCD at any one time Press CH or CH to scroll through a menu listing Press ESC to return to the previous menu screen without saving changes OR press the rotary knob to confirm changes To enter data press CH or CH to step through the alphabet and numbers Hold down CH or CH to scroll rapidly You can a...

Страница 7: ...tion when entering data similar to mobile phone operation To correct data errors press CH then select the backup character on the LCD Press ENT to backup one space at a time 705EU Microphone Key 0 1 2 3 4 5 6 7 8 9 Normal and Menu Mode 0 1 2 3 4 5 6 7 8 9 Edit Mode Push 1 0 1 2 3 4 5 6 7 8 9 Edit Mode Push 2 Space A D G J M P T W Edit Mode Push 3 B E H K N Q U X Edit Mode Push 4 C F I L O R V Y Ed...

Страница 8: ...esired backlight level There are 8 levels 5 Press ENT to store the setting Set the Contrast Levels Base Unit 1 Hold down CALL MENU to show the Radio Menu 2 Scroll through the menu listing to CONTRAST 3 Press ENT or push the rotary knob 4 Press CH or CH to select the desired contrast level There are 8 levels 5 Press ENT or push the rotary knob to store the setting Optional Handset 1 Hold down CALL ...

Страница 9: ...o exit the INTERCOM mode insert separate row for Handset Intercom mode 5 For operation of the IC key see below WX IC IC H L IC Using the IC key The function of these modes will vary depending on the number of VHF705 handsets connected If no Handsets are connected pressing the IC key will generate an error beep If one handset is connected pressing the IC key will enter Intercom mode If two handsets...

Страница 10: ...traffic just press 16 or 16 9 2 Press again to recall your working channel NOTE On the 725US ONLY the priority channel can be set to Channel 09 To set this just hold down 16 9 until Channel 09 appears on the LCD 16 9 Channel Select Base Unit and Microphone The working channel is shown in BIG numbers on the LCD of the base unit To step through the channels one at a time press CH or CH to display ea...

Страница 11: ...ite channel as CH2 4 Repeat again to store your third favorite channel as CH3 3CH Scan Stop Scanning a Favorite Channel Base Unit and Optional Handset 1 Select the favorite channel 2 Press 3CH then immediately press and release SCAN 3 Press SCAN again to stop 3CH SCAN Scan all 3 Favorite Channels Base Unit and Optional Handset 1 Press 3CH then immediately press and hold down SCAN 2 Press SCAN agai...

Страница 12: ...hannel banks 4 Press CH or CH to select the desired channel bank then press ENT or push the rotary knob to confirm RADIO SETUP UIC CH NAME RING VOLUME CALL MENU Show the weather and fishing information Base Unit 1 Press Info 2 A histogram of the barometric pressure readings over the past 24 hours is shown on the base unit LCD with a digital readout of the current temperature The Happy Fish indicat...

Страница 13: ...egal USER MMSI number This also applies to ATIS inland waterway operation in European countries See the Installation and Operation Manual to perform this ONCE ONLY setup DSC CALL INDIVIDUAL LAST CALL GROUP INDIVIDUAL MANUAL NEW BUDDY 1 BUDDY 2 CALL MENU Create your Buddy List Base Unit and Optional Handset You can store the names and MMSIs of 20 individuals in your buddy list 1 Hold down CALL MENU...

Страница 14: ...ceived or until you press ESC to cancel it Receiving a Distress Acknowledgement from a coast station 1 The radio automatically cancels your distress call and tunes to CH16 2 Press PTT to talk with the Coast Guard Receiving a Distress Call An alert sounds and the Explorer 725 automatically tunes to CH16 1 Press any key to stop the alert 2 Make voice contact on CH16 and lend assistance if needed Pos...

Страница 15: ...bing the Handset to the Base unit 1 Ensure the handset is fully charged 2 Turn the base unit ON 3 Select Subscribe on the base unit Radio Setup menu 4 Turn the handset ON you must be within operational range of the base unit 5 The handset will display Success and then operate normally with the base unit To Un Subscribe the Handset from the Base unit 1 You may wish to un subscribe a handset from yo...

Страница 16: ...DesignedinNewZealand Made in China MN000828A G FOR FURTHER CONTACT DETAILS GO TO www navico com 1177 ...

Отзывы: