


23
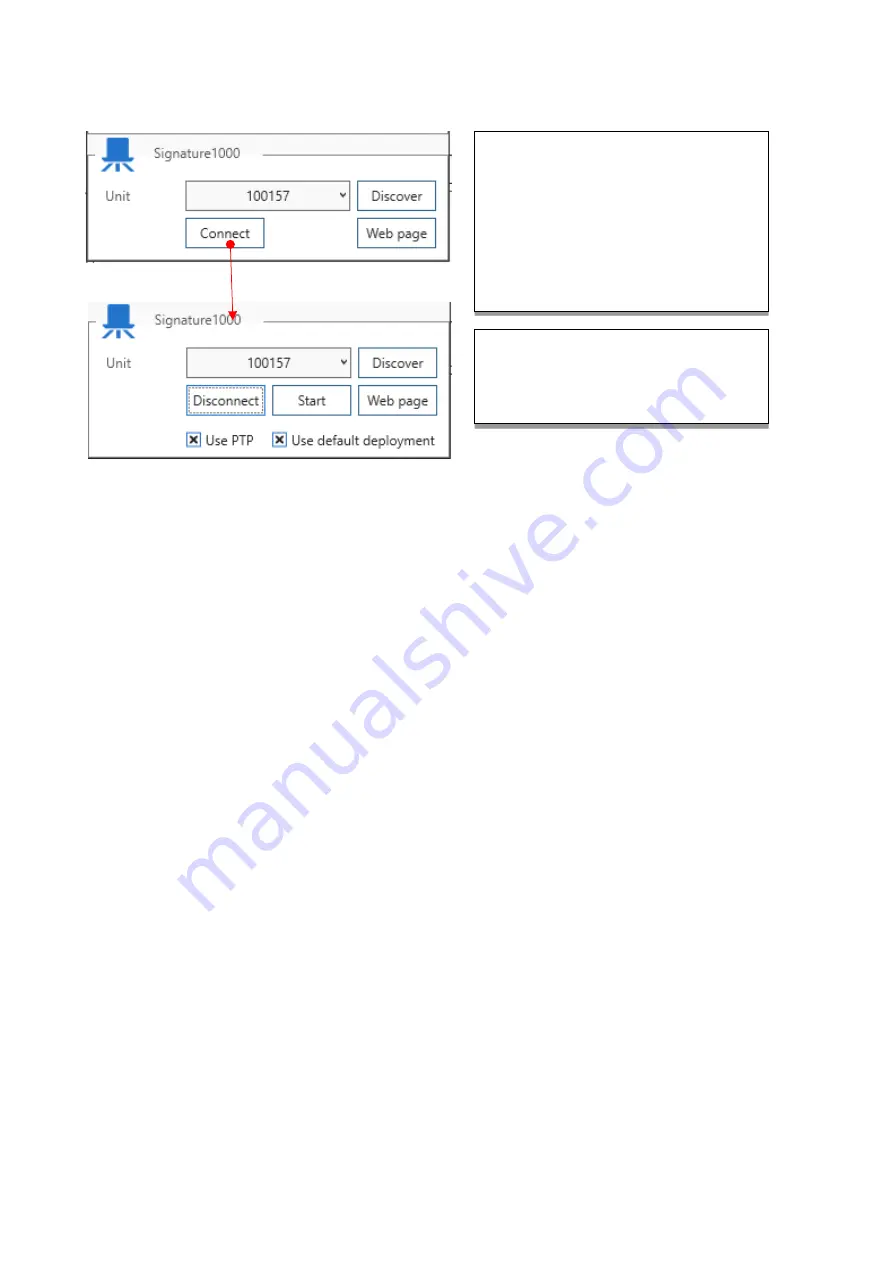
Figure 15 Signature Connect settings
Click ‘Connect’ to start the Nortek sensor. The address / serial number box will turn grey and the button text
w
ill change to ‘Disconnect’ and a ‘Start’ button will be available.
There are two checkboxes available, both are generally ticked:
✓
Use PTP: Use the Precision Time Protocol. This is on by default as the PTP signals are generated
by the GNSS receiver. The PTP signal is used to maximize the synchronisation of all instruments.
Uncheck this box if no PTP signal is available, for example when using a different GNSS receiver.
✓
Use default deployment: The measurement configuration of the Signature VM sensor is stored in a
deployment file. If this checkbox is unchecked the software will ask the user to select a specific
deployment instead of the default one that comes with the software.
The example above assumes only one Nortek sensor is connected to the network. If multiple sensors are
connected it is important to know wh
ich sensor is actually in use. The ‘Discover’ option only shows the serial
number of the first instrument that is found, so this may be the wrong instrument. In that case it is important
to check that the model and serial number as shown here matches the correct instrument. You can use the
drop-down box to select a different instrument.
If no serial number is shown, click
‘Discover’ to have the software search
for connected sensors.
Click the drop-down box to see the IP-
Address of this sensor, or any other
sensor attached to the network.
Click ‘Connect’ to connect to the
instrument
The connection is established. It
detected a Signature1000 sensor, the
button shows ‘Disconnect’, and the
‘Start’ button is available.


