background image

29

11

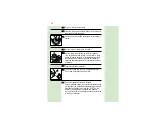
Vuelva a colocar la cuchilla y el protector en el cabezal.

12

Repita el proceso con los otros dos juegos de conjuntos
cortantes.

13

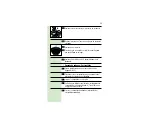
Vuelva a poner el marco.

14

Presione y gire (en sentido horario) la ruedecita hasta
que quede fijada en su lugar.

15

Vuelva a poner el Bloque del Cabezal Afeitador en la
afeitadora.

Después de cada uso : Cortapatillas

1

Pare la afeitadora moviendo el boton a la posición 
"apagada" (OFF).

2

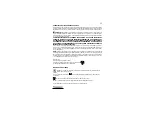
Para hacer salir el cortapatillas, presione hacia arriba el
interruptor deslizante del cortapatillas.

3

Limpie el cortapatillas con el cepillo.

4

Cada 6 meses, lubrique los dientes del cortapatillas con
Lubricante Norelco para Afeitadora (Tipo AL80) o con
una gota de aceite mineral.

5

Cierre el cortapatillas deslizando el interruptor del 
cortapatillas hacia abajo.

Содержание 5812XL

Страница 1: ...5812XL Rechargeable Cord Cordless Razor ...

Страница 2: ......

Страница 3: ...3 ENGLISH 4 ESPAÑOL 18 ...

Страница 4: ...e batteries See Battery Removal instructions WARNING To reduce the risk of burns fire electric shock or injury to persons 1 Close supervision is necessary when this razor is used by on or near children or invalids 2 Use this razor for its intended household use as described in this manual Do not use attachments not recommended by Philips Electronics North America Corporation 3 Never operate this r...

Страница 5: ...icated on plug To disconnect turn razor off then remove plug from outlet 9 Never put the razor in direct sunlight or store in a pouch at a temperature above 140ºF 10 To prevent possible damage to the cord do not wrap cord around the razor SAVETHESE INSTRUCTIONS IMPORTANT Your razor contains NICKEL CADMIUM RECHARGEABLE BATTERIES See Battery Removal instruction sheet for battery disposal information...

Страница 6: ...dress as indicated below and the razor prepaid to Norelco Consumer Products Company A Division of Philips Electronics North America Corporation P O Box 1116 Skokie IL 60076 Please allow 4 6 weeks for delivery of check Please Print Name_________________________________________________________ Address________ ________________________________________________ City______________________________________...

Страница 7: ... OF CONTENTS FEATURES 8 9 INDICATIONS 10 CHARGING 10 PUT ITTOTHETEST SHAVINGTIPS 11 HOWTO SHAVE WITH AN ELECTRIC RAZOR 11 TRIMMING 12 CLEANING 12 15 ASSISTANCE 16 ACCESSORIES 16 BATTERY REMOVAL 16 WARRANTY 17 ...

Страница 8: ...oove channels beard closer to cutting system Lifter raises hair Blade cuts hair which then drops below skin level FEATURES Micro Action Shaving System Razor Head Assembly Protective Razor Head Cap Hair Chamber captures shaven hair ON OFF Switch LED Charging Indicator Light Built In Charger ...

Страница 9: ... Automatic WorldwideVoltage 120V to 240V AC Cleaning Brush Travel Storage Pouch Rechargeable Shaves without a cord Cord Cordless To shave with or without a cord Full 2 Year Warranty 60 Day Norelco Money Back Guarantee ...

Страница 10: ... not recharge while being used corded If razor has not been used for at least 1 month razor must be recharged for a full 12 hours Do not charge razor in pouch 1 Connect cord to razor Plug into any 120V to 240V AC outlet Use only the cord provided The green Indicator Light lights up to indicate razor is re charging You can shave immediately corded An adaptor plug may be necessary for cord usage in ...

Страница 11: ...ystem If you are still not convinced after 21 days Norelco will refund you the full purchase price guaranteed HOWTO SHAVE WITH AN ELECTRIC RAZOR Shaving with dry skin gives the best results 1 Turn razor ON by sliding the switch to the ON position or plug in if using corded Shave against the direction of beard growth using both straight and circular movements 2 Stretch your skin with your free hand...

Страница 12: ...kes with gentle pressure 4 Close Trimmer by sliding Trimmer switch down 5 Turn razor OFF by sliding the switch to the OFF position CLEANING Once A Week Razor 1 Turn razor OFF by sliding the switch to the OFF position disconnect cord from razor and outlet if using razor corded 2 Clean the top of the razor with the supplied brush 3 Remove Razor Head Assembly from the razor unit 12 ...

Страница 13: ...d Assembly from housing unit 3 Brush the inside of the housing 4 Turn Razor Head Assembly over so that the underside is exposed 5 Press down and turn wheel of frame counterclockwise 6 Remove the frame and brush clean 7 Remove and clean one cutter and head at a time Be careful not to mix up cutters and heads They are a matched set and if interchanged it will greatly affect shav ing performance 8 Se...

Страница 14: ...orelco Razor Cleaner model RC1776 or alcohol and lubricated with Norelco Razor Lubricant model AL80 or one drop of mineral oil in the center of the head 11 Replace the cutter and razor head in the Head Assembly 12 Repeat the process for the other two razor heads cut ters and combs 13 Replace the frame 14 Press down and turn the wheel clockwise until it locks into place 15 Replace the Razor Head As...

Страница 15: ...position 2 Push Trimmer Slide Switch up to pop up Trimmer 3 Clean Trimmer with the brush every time you use it 4 Lubricate the Trimmer teeth with Norelco Razor Lubricant model AL80 or with one drop of mineral oil every 6 months 5 Close Trimmer by sliding Trimmer switch down ...

Страница 16: ...del HQ4 Micro Action Replacement Heads DO NOT fit this razor Razor Lubricant Cleaners RC1776 Norelco Razor Cleaner AL80 Norelco Razor Lubricant Norelco Razor Accessories may be purchased at a store near you an Authorized Norelco Service Location on our website www norelco com or by using the order form enclosed BATTERY REMOVAL This Norelco razor contains rechargeable Nickel Cadmium batteries which...

Страница 17: ...the nearestAuthorized Norelco Service Location It is suggested that for your protection you return shipments of product by insured mail insurance prepaid Damage occurring during shipment is not covered by this warranty NOTE No other warranty written or oral is authorized by Philips Electronics North America Corporation This warranty gives you specific legal rights and you may also have other right...

Страница 18: ...ras esté enchufada asegúrese de que no pueda caerse al agua ni a otro líquido 4 Desenchufe siempre esta afeitadora de la red inmediata mente después de usarla 5 Desenchufe la afeitadora antes de limpiarla 6 Cuando se deshaga de la afeitadora desenchufela y quite las baterias recargables Consulte las instrucciones para quitar las baterias ADVERTENCIA Para reducir el riesgo de quemaduras fuego choqu...

Страница 19: ...ta afeitadora con un protector de las cuchillas deteriorado o roto ya que podría producirse daños en la cara 8 Enchufe siempre la clavija en la afeitadora antes de enchu far ésta a la red Asegúrese de que la clavija esté firme mente insertada en la afeitadora hasta la marca indicada en la clavija Para sacarla apague la afeitadora y des enchúfela de la red 9 No exponga nunca la afeitadora a la luz ...

Страница 20: ...l público sugerido Envíe el tíquet de compra con la fecha su nombre y dirección completos tal como se indica más adelante junto con la afeitadora a portes pagados a Norelco Consumer Products Company A Division of Philips Electronics North America Corporation P O Box 1116 Skokie IL 60076 Por favor espere entre 4 y 6 semanas a recibir el cheque Nombre_________________________________________________...

Страница 21: ...CTERÍSTICAS 22 23 INDICACIONES 24 CARGA 24 PRUEBAY CONSEJOS PARA EL AFEITADO 25 CÓMO AFEITARSE CON UNA AFEITADORA 25 26 ELÉCTRICA CORTAPATILLAS 26 LIMPIEZA 27 29 ASISTENCIA 30 ACCESORIOS 30 CÓMO QUITAR LAS BATERÍAS 30 GARANTIA 31 ...

Страница 22: ... elevador levanta el pelo La cuchilla corta el pelo y después éste se esconde por debajo del nivel de la piel CARACTERÍSTICAS Sistema de Afeitado Micro Action Montaje del Cabezal de la Afeitadora Cubierta protectora del Cabezal de la Afeitadora La Cámara del Pelo recoge el pelo afeitado Boton de encendido apagado Lámpara LED indicadora de carga Cargador incorporado ...

Страница 23: ...o entre 120 y 240V CA Cepillo de limpieza Bolsa para viaje o para guardar Recargable Afeita sin cable de red Con sin cable de red Para afeitarse con o sin cable de red Garantía completa durante 2 años 60 Dias de garantia de devolución del dinero ...

Страница 24: ...ue se suministra Esta afeitadora no se recargará mientras esté siendo usada con el cable de red Si la afeitadora no ha sido usada durante al menos 1 mes debe ser recargada durante 12 horas completas No cargue la afeitadora dentro de la bolsa 1 Conecte el cable a la afeitadora Enchufe la clavija a cualquier enchufe de 120 a 240V CA Use sólo el cable que se suministra La lámpara indicadora verde se ...

Страница 25: ...ee 3 semanas y podrá disfrutar por completo de su nueva afeitadora Persevere con ella Si va alternado métodos de afeitado durante el período de adaptación esto hará que sea más difícil la adaptación al sistema de afeitado Norelco Si después de 21 días no está convencido Norelco le garantiza la devolución completa del precio de compra CÓMO AFEITARSE CON UNA AFEITADORA ELÉCTRICA El afeitarse con la ...

Страница 26: ...en el afeitado sustituya los conjuntos cortantes Micro Action modelo HQ4 Plus una vez al año CORTAPATILLAS Para recortar las patillas y el bigote 1 Ponga la afeitadora en marcha 2 Presione hacia arriba el interruptor deslizante del cortap atillas El cortapatillas puede activarse mientras la afeita dora está en funcionamiento 3 Sostenga el cortapatillas como se indica y haga pasadas hacia abajo con...

Страница 27: ...e se suministra 3 Quite el Bloque del Cabezal Afeitador de la unidad afeitadora 4 Cepille el interior de la carcasa y el conjunto cabezal de la afeitadora 5 Vuelva a poner el Bloque del Cabezal Afeitador en la afeitadora Cada dos meses Conjuntos cortantes 1 Pare la afeitadora moviendo el boton a la posición apa gado OFF y desenchúfela de la red 2 Quite el Bloque del Cabezal Afeitador de la unidad ...

Страница 28: ...ezcla las cuchillas y los protectores pueden ser necesarias varias semanas para recuperar el rendimiento óptimo en el afeitado 8 Separe la cuchilla del protector 9 Cepille la cuchilla sólo con un movimiento ascendente Use el lado de cerdas cortas del cepillo 10 Cepille las ranuras del conjunto cortante Para un resultado óptimo los conjuntos cortantes deben ser limpiados con un líquido desengrasant...

Страница 29: ... Afeitador en la afeitadora Después de cada uso Cortapatillas 1 Pare la afeitadora moviendo el boton a la posición apagada OFF 2 Para hacer salir el cortapatillas presione hacia arriba el interruptor deslizante del cortapatillas 3 Limpie el cortapatillas con el cepillo 4 Cada 6 meses lubrique los dientes del cortapatillas con Lubricante Norelco para Afeitadora Tipo AL80 o con una gota de aceite mi...

Страница 30: ...ota Modelo HQ4 Reemplazo de los cabezales no puede ser utilizado por esta afeitadora Limpiador y Lubricante para la afeitadora RC1776 Limpiador para Afeitadora Norelco AL80 Lubricante para Afeitadora Norelco Los accesorios para la afeitadora Norelco pueden comprarse en una tienda en un Servicio de Asistencia Técnica de Norelco en nuestra página Web www norelco com o usando el formulario de pedido ...

Страница 31: ... portes pagados al más cer cano Servicio de Asistencia Técnica de Norelco Le sugerimos que para mayor seguridad haga los envíos por correo certificado con la certificación pagada Los deterioros producidos durante el envío no están cubier tos por esta garantía NOTA Ninguna otra garantía escrita o de palabra está autorizada por Philips Electronics North America Corporation Esta garantía le da derech...

Отзывы: