19
Upflow Furnace Installation
WARNING:
The furnace must not be installed directly on
carpeting, tile, or any combustible material other
than wood flooring.
The *RC series gas furnace is certified for use on wood
flooring or supports. The upflow furnace is shipped with
the bottom panel (
) installed and
must be removed from the bottom of the cabinet before
positioning and installing the furnace. See Bottom Removal
section for removal instructions.
NOTE: These Installation procedures are suggested for
typical furnace installations. Since all installations are
different from each other, the sequence of these steps
may differ from the actual installation.
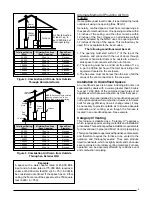
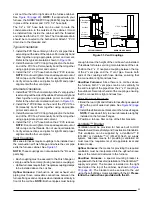
1. Position the furnace on top of the return air ductwork
or return air stand ensuring even alignment of furnace
air opening and return air duct. NOTE: The ductwork or
stand must have an opening equal to that of the return
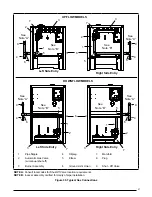
air opening of the furnace. See the cabinet dimensions
in
for the proper return air opening size.
2. Secure the furnace to the floor or base. Check for level
from front to back and side to side. NOTE: Additional
fasteners may be used at rear, sides or through door
frame, as desired, to secure furnace to closet or alcove
framing.
3. Secure the return air ductwork to the bottom of the
furnace with self drilling screws.
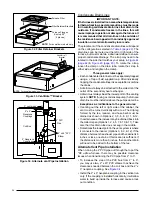
4. Position the A/C coil box on the top of the furnace and
secure in place using the provided attachment brackets.
To install the brackets: position one bracket on side of
furnace and using the provided self-drilling screws,
secure the bracket to the A/C coil box and the furnace.
Repeat for other side of furnace.
5. Position the plenum on top of the coil box and secure
together with sheet metal screws. The screws must
penetrate the sheet metal casing and coil box flange.
6. Secure the supply air ductwork to the plenum. Tape or
seal all seams if required by local code.
Bottom Panel Removal
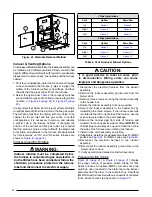
The steps listed below describe how to remove the bottom
panel from the furnace.
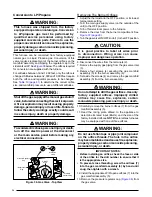
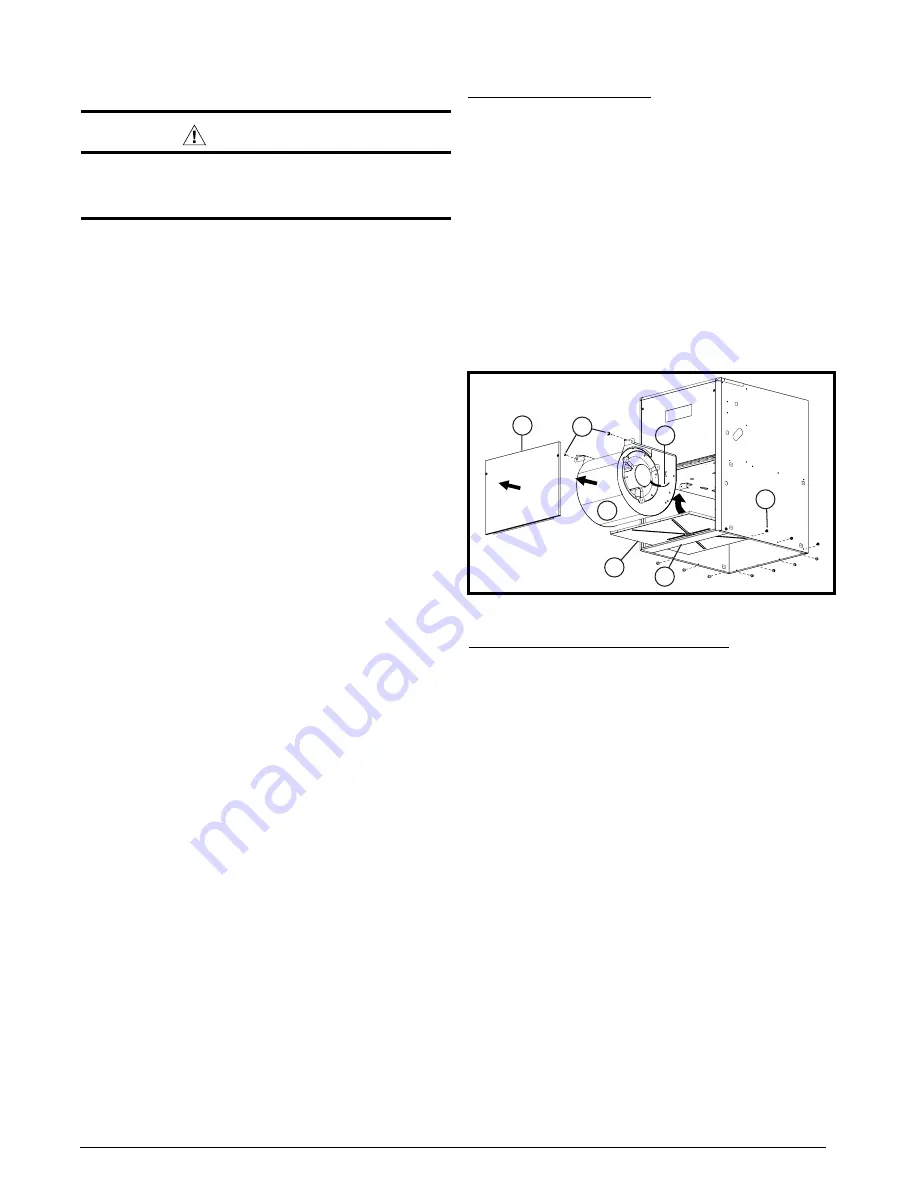
.
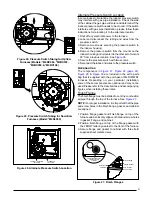
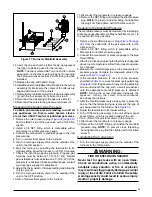
1. Remove the door (1) from the blower compartment.
2. Disconnect the blower motor wiring harness (2) from
the control board.
3. Remove two screws (3) securing the blower assembly
(4) to the furnace.
4. Carefully pull the blower assembly (4) out thru the front
of the furnace.
5. Remove all screws (5) securing bottom panel (6) to
bottom of furnace and front brace (7).
6. Lift up and slide bottom panel (6) out through front of
furnace.
7. Reinstall the blower assembly (4) in reverse order.
Figure 22
6
7
5
1
2
3
4
Figure 22.
Bottom Panel Removal
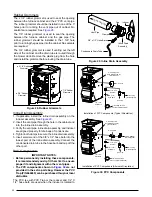
Alternate Bottom Panel Removal
If the bottom panel cannot be removed using the previous
instructions, the steps below are an alternate method for
removing the bottom panel. See
1. Remove the door (1) from the blower compartment .
2. Remove all screws securing the bottom panel (2) to the
front brace (3).
3. Remove two screws (4) securing the furnace cabinet
to the blower deck (5).
4. Remove all screws (6) securing the furnace cabinet to
the bottom panel (2).
5. Remove the screw (7) securing the bottom corner of the
furnace cabinet to the front brace (3).
6. Carefully spread the bottom corner of the furnace cabinet
outwards while sliding the bottom panel (2) out through
the front of the furnace.
7. Reassemble the furnace in reverse order.
Содержание M4RC-072D-35C
Страница 47: ...47...

