RV Series Automated Dispensing Systems
58
www.nordsonefd.com [email protected]
+1-401-431-7000 Sales and service of Nordson EFD dispensing systems are available worldwide.
Setting Up Inputs / Outputs
If you connected inputs / outputs, follow this procedure to test input / output connections.
NOTE:
All automated dispensing systems provide 8 standard inputs and 8 standard outputs. A kit to expand to
16 inputs and 16 outputs is available. Refer to “Accessories” on page 91.
PREREQUISITES
The system is properly installed and set up. Refer to “Installation” on page 17 and “Setup” on page 41.
Input / output wiring is properly connected. Refer to “I/O Port” on page 96 for wiring diagrams.
#
Click
Step
1
>
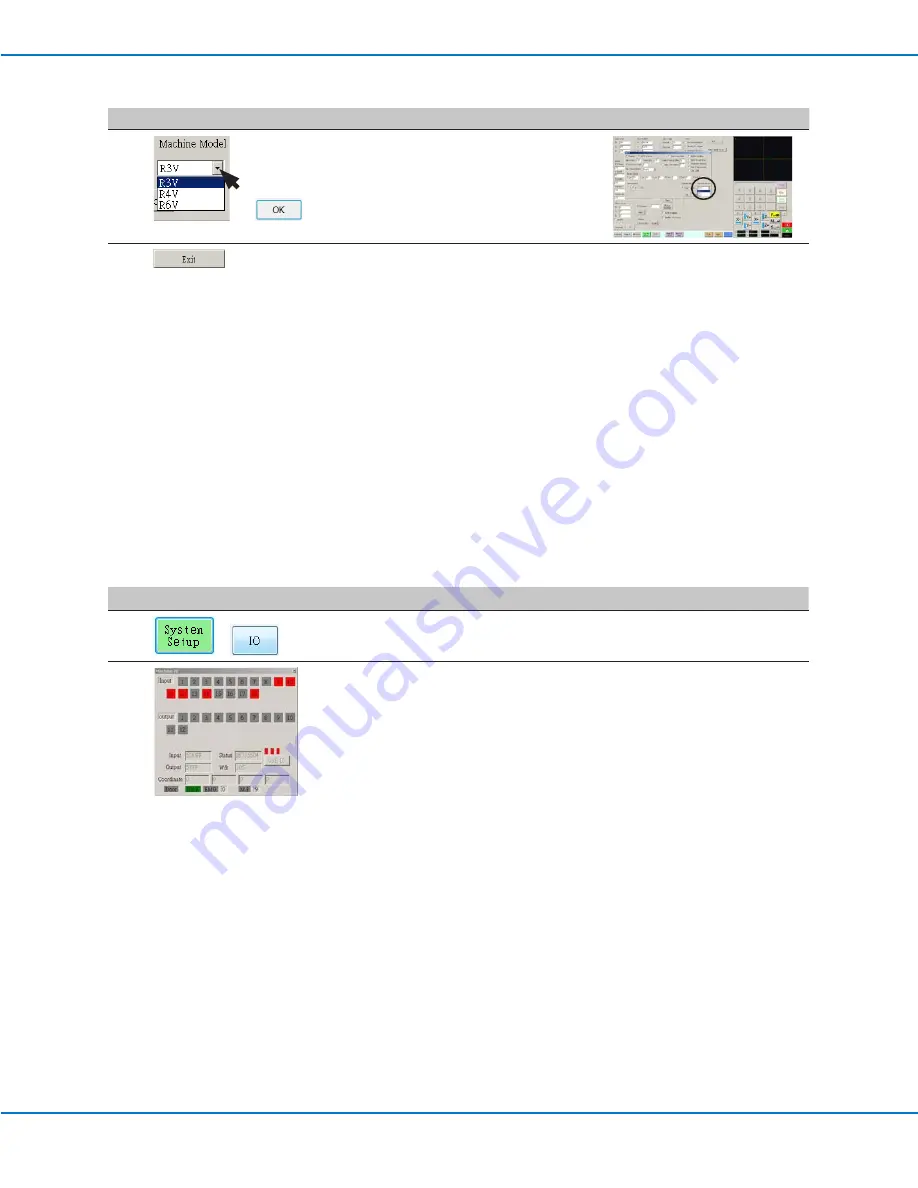
• Click SYSTEM SETUP > IO.
2
• Click the outputs you want turn ON or OFF, then click the X to close the
window.
NOTES:
• Inputs flash red when they are turned ON.
• Use only inputs / outputs 1 through 8. The remaining I/Os are reserved for
the system.
Configuring Input / Outputs for a Special Purpose
The IO Pin Function feature provides a set of user-configurable conditions that affect the operation of the robot.
Refer to “Appendix F, I/O Pin Function Setup” on page 142.
#
Click
Step
Reference Image
4
>
• Select the correct robot model from
the Machine Model drop-down menu.
• Click OK to save.
5
• Click EXIT to close the software.
• Switch off the robot.
• Re-open the DispenseMotion
software and switch on the robot for
the change to take effect.
Changing the Robot Model Selection (continued)


