background image

Содержание NTTL16902

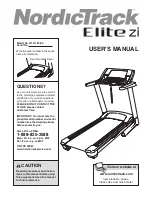
Страница 1: ...ance from our factory TO AVOID UNNECESSARY DE LAYS PLEASE CALL DIRECT TO OUR TOLL FREE CUSTOMER HOT LINE The trained techni cians on our Customer Hot Line will provide immediate assis tance free of charge to you CUSTOMER HOT LINE 1 888 825 2588 Mon Fri 6 a m 6 p m MST CAUTION Read all precautions and instruc tions in this manual before using this equipment Save this manual for future reference USE...

Страница 2: ...ENT 8 HOW TO FOLD AND MOVE THE TREADMILL 25 TROUBLE SHOOTING 26 CONDITIONING GUIDELINES 28 PART LIST 30 ORDERING REPLACEMENT PARTS 31 LIMITED WARRANTY Back Cover Note An EXPLODED DRAWING is attached in the center of this manual NordicTrack is a registered trademark of ICON Health Fitness Inc 2 ...

Страница 3: ...treadmill at all times Adjust the speed in small increments to avoid sudden jumps in speed 7 The treadmill should not be used by persons weighing more than 300 pounds 8 Never allow more than one person on the treadmill at a time 17 The pulse sensor is not a medical device Various factors including the user s move ment may affect the accuracy of heart rate readings The pulse sensor is intended only...

Страница 4: ... to do so by an authorized service representative Servicing other than the procedures in this manual should be performed by an authorized service and incline buttons However when the next representative only chirp is heard the speed and or incline will change to the next settings of the CD or video 29 This treadmill is intended for in home use program only Do not use this treadmill in any commer c...

Страница 5: ...stomer Service Department toll free at 1 888 825 2588 Monday through Friday 6 a m until 6 p m Mountain Time excluding holidays To help us assist you please note the product model number and serial number before calling The model number of the treadmill is NTTL16902 The serial num ber can be found on a decal attached to the treadmill see the front cover of this manual for the location Before readin...

Страница 6: ...f the Extension Legs 102 into the treadmill as shown in the inset drawing Make sure that the Extension Leg is turned so the Base Pad 99 is on the bottom Note It may be helpful to tip the Uprights 69 forward as you insert the Extension Leg Insert the other Extension Leg not shown in the same way 69 2 Press the Lock Knob Sleeve 70 into the left Upright 69 Make sure that the Lock Pin Collar 72 and th...

Страница 7: ...B SettheHandrails 66 ontheSpacers 65 beingcareful nottopinchtheUpright WireHarness 98 Z A Tabs 107 A 81 81 6 Insert two Handrail Bolts 78 with Handrail Washers 77 and Handrail Bushings 75 into the right Upright 69 and the right Handrail Spacer 65 Turn the Handrail Bushings so they fit against the Upright with the thick sides of the Bushings toward the center of the treadmill as shown in the inset ...

Страница 8: ...rge suppressor to indi cate whether it is functioning properly Failure to use a properly functioning surge suppressor could result in damage to the control system of the treadmill If the control system is damaged the walking belt may change speed or stop unexpect edly which may result in a fall and serious injury This product must be grounded If it should malfunc tion or break down grounding provi...

Страница 9: ...ulse sensor seepage24 Theconsole alsofeatures newiFtT com interactive technology IFIT com technology islikehaving aper sonaltrainer rightinyourhome Using theincluded audiocable youcanconnect thetreadmill toyour homestereo portable stereo orcomputer andplay special iFtT com CDprograms CDsareavailable sep arately IFtT com CDprograms automatically control thespeed andincline ofthetreadmill asapersona...

Страница 10: ...tomatically calibrate itself the treadmill will rise to the highest incline level and then return to the lowest incline level During calibration the left side of the main display will show two dashes and the time indicator below the display will flash Enter your weight Although you can use the console without entering your weight the console will count the calories that you burn more accurately if...

Страница 11: ...s 0 to 10 To change the incline quickly press the 1 step Incline buttons Note After the buttons are pressed it may take a moment for the treadmill to reach the selected incline setting The LED track When the manual mode or an iFIT com program is se lected the program dis play will show an LED track representing 1 4 00 00 0 00000000 0 O O00OO000 O O00OO00000 O 000000 00 mile As you exercise the ind...

Страница 12: ...rt Rate indicator will flash and then your heart rate will be shown For the most accurate heart rate reading continue to hold the contacts for about 15 seconds B hen you are finished exercising stop the walking belt and remove the key Step onto the foot rails press the Stop button and adjust the incline of the treadmill to the lowest level The incline must be at the lowest level when the treadmill...

Страница 13: ...ent ends and the speed settings move to the left if all of the indicators in the Current Segment column are lit the speed set tings may move downward so that only the highest indicators in the columns will appear in the pro gram display When the speed settings move to the left again and not all of the indicators in the Current Segment column are lit the speed settings will move back up If the spee...

Страница 14: ...e speed setting for the first segment will be shown in the flashing Current Segment column of the program dis play The incline settings are not shown in the pro Current Segment J o oooooooooooooi O OOOOOOOOOOOOO I O OOOOOOOOOOOOO I 0 0000000000000 I O OO I gram display To program the desired speed and incline settings for the first segment simply adjust the speed and incline of the treadmill to th...

Страница 15: ...ent Segment o oooooooooo ool o oooooo oo ool 0 00 00 0 00 I 0 0 0 00 I O OO I When only three seconds remain in the first seg ment of the program both the Current Segment column and the column to the right will flash a se ries of tones will sound and all speed settings will move one column to the left The speed setting for the second segment will then be shown in the flashing Current Segment colum...

Страница 16: ... your age quickly Your age will then be saved in memory _ _ Press the Start Program button or the Speed button to start the program When the button is DISI NCE pressed the main dis play will show an L 1 L I level 1 indicating that the first four minute level _ _s of the fitness test pro gram has begun The incline of the treadmill will automatically adjust to 3 and the walking belt will begin to mo...

Страница 17: ...pped tem porarily and then restarted However the program can be stopped at any time by pressing the Stop button The main display will then show an esti mated fitness level When the program has ended remove the key See step 6 on page 13 HOW TO USE THE PULSE DRIVEN PROGRAM The pulse driven program automatically adjusts the speed and incline of the treadmill to keep your heart rate near a target leve...

Страница 18: ...setting for the second segment will then be shown in the flashing Current Segment column As you exercise the speed and or incline of the treadmill will automatically change as needed to keep your heart rate near the current target heart rate setting The program will continue until the target heart rate setting for the last segment is shown in the Current Segment column and no time remains in the p...

Страница 19: ...dapter available at electronics stores Plug the Y adapter into the PHONES jack on your CD player Plug your headphones into the other side of the Y adapter h v i PHORES i f i _ 3 5mm i rD _i Audio Y adapter_ _ _ i Cable r Head phones _ c J HOW TO CONNECT YOUR PORTABLE STEREO Note If your stereo has an RCA type AUDIO OUT jack see instruction A below If your stereo has a 3 5mm LINE OUT jack see instr...

Страница 20: ...ack on your stereo and plug the wire into the unused side of the RCA Y adapter Plug the RCA Y adapter into the LINE OUT jack on your stereo tr u RCA r_ Audio Y adapte_ _ Cable Adapter _VCR _T Amp _ __ _ _ Wire removed from _l I_ LINE OUT jack Note If your computer has a 3 5mm LINE OUT jack see instruction A If your computer has only a PHONES jack see instruction B A Plug one end of the audio cable...

Страница 21: ...r with CD player or VCR See HOW TO CONNECT THE TREADMILL TO YOUR CD PLAYER VCR OR COMPUTER on page 19 Note To purchase iFIT com CD s or videocas settes call toll free 1 800 735 0768 Follow the steps below to use an iFIT com CD or video program _1 Insert the key fully into the console See GETTING STARTED on page 10 B Select the iFIT com mode When the key is inserted the manual mode will automatical...

Страница 22: ...y Note To use another CD or video program press the Stop button or remove the key and go to step 1 on page 21 Note If the speed or incline of the treadmill does not change when a chirp is heard Make sure that the iFIT com indicator is lit and that the time is not flashing in the main dis play If the time is flashing press the Start button or the Speed button on the console Adjust the volume of you...

Страница 23: ...n countdown ends the program will begin and the walking belt will begin to move Hold the handrails step onto the walking belt and begin walking During the program an electronic chirping sound will alert you when the speed and or incline of the treadmill is about to change CAUTION Always listen for the chirp and be prepared for speed and or incline changes If the speed or incline settings are too h...

Страница 24: ...our heart rate during your workouts To purchase the optional chest pulse sensor call toll free 1 800 734 2377 _i_i_i_i_i_i_i_i_i_i_i_i_i_i_i_i_i_i_i_i_i_i_i_i_i_i_i_i_i_i_i_i_i_i_i_i_i_i_i_i_i_i_i_i_ This section of the main display will show the total number of hours that the treadmill has been used An E for English miles or an M for metric kilometers will appear on the right side of the main dis...

Страница 25: ...t Do not leave the treadmill in the stor age position in temperatures above 85 Fahrenheit HOW TO MOVE THE TREADMILL Before moving the treadmill convert the treadmill to the stor age position as described above Make sure that the pin on the lock knob is inserted into the slot in the catch 1 Hold the handrails as shown and place one foot against a wheel 2 Tilt the treadmill back until it rolls freel...

Страница 26: ...C Tripped Reset onf Position PROBLEM The power turns off during use SOLUTION a Check the circuit breaker located on the treadmill frame near the power cord see c above If the circuit breaker has tripped wait for five minutes and then press the switch back in b Make sure that the power cord is plugged in c Unplug the power cord wait for five minutes and then plug the power cord back in d Remove the...

Страница 27: ...se the allen wrench to turn the left rear roller bolt clockwise 1 2 of a turn if the walking belt has shifted to the right turn the bolt counterclockwise 1 2 of a turn Be careful not to overtighten the walking belt Plug in the power cord insert the key and run the treadmill for a few minutes Repeat until the walking belt is centered b If the walking belt slips when walked on first remove the key a...

Страница 28: ...t few minutes of exercise your body uses easily accessible carbohydrate calories for en ergy Only after the first few minutes does your body begin to use stored fat calories for energy If your goal is to burn fat adjust the speed and incline of the tread mill until your heart rate is near the lowest number in your training zone For maximum fat burning adjust the speed and incline of the treadmill ...

Страница 29: ...hilles Stretch With one leg in front of the other reach forward and place your hands against a wall Keep your back leg straight and your back foot flat on the floor Bend your front leg lean forward and move your hips toward the wall Hold for 15 counts then relax Repeat 3 times for each leg To cause further stretching of the achilles tendons bend your back leg as well Stretches Calves achilles tend...

Страница 30: ...33 1 Latch Assembly 84 1 34 2 Roller Washer 85 1 35 1 Front Roller Nut 86 1 36 1 Incline Motor 87 4 37 1 Incline Motor Stop 88 1 38 1 Belly Pan 89 1 39 2 Belly Pan Screw Long 90 10 40 2 Static Decal 91 3 41 1 Circuit Breaker 92 7 42 1 Power Cord 93 2 43 1 On Off Switch 94 2 44 1 Left Endcap Insert 95 2 45 4 Belt Guide Screw 96 1 46 2 Belt Guide 97 1 47 4 Isolator 98 1 48 1 Idler Spring 99 5 49 16 ...

Страница 31: ... 1 7 Green Wire MIRing 1 User s Manual Includes all parts shown in the box These parts are not illustrated ORDERING REPLACEMENT PARTS To order replacement parts call our Customer Service Department toll free at 1 888 825 2588 Monday through Friday 6 a m until 6 p m Mountain Time excluding holidays When ordering parts please be prepared to give the following information The MODEL NUMBER OF THE PROD...

Страница 32: ...00 56 58 457 18 47 22 i 37 _ 63 14 32 36 38 26 25 56 31 42 Ill X I O 0 m 0 0 o _D Z 0 Z F O_ _D 0 To identify the parts shown on this exploded drawing refer to the PART LIST on pages 30 and 31 of the USER S MANUAL Y_ ...

Страница 33: ...87 66 90 119 9O 76 111 119 87 76 102 65 75 69 7O I 71 104 100 105 95 14 85 75 97 9 94 93 m X r 0 0 m 0 0 o _D m Z F O_ _D 0 o 1 3 o to 3 ...

Страница 34: ...rating the Product Remember to do the periodic maintenance requirements specified in the Manual to assure proper operation and your continued satisfaction HOW TO GET PARTS AND SERVICE Simply call our Customer Service Department at 1 888 825 2588 and tell them your name and address and the serial number of your Product They will tell you how to get a part replaced or if neces sary arrange for servi...

Отзывы: