background image

17

ETNE99815

FEATURES OF THE CONSOLE 

The treadmill console offers an impressive array of 

features designed to make your workouts more effec-

tive and enjoyable. When you use the manual mode, 

you can change the speed and incline of the treadmill 

with the touch of a button. As you exercise, the console 

will display instant exercise feedback. You can even 

measure your heart rate using the handgrip heart rate 

monitor or the optional chest heart rate monitor.

In addition, the console features a selection of onboard 

workouts. Each workout automatically controls the 

speed and incline of the treadmill as it guides you 

through an effective exercise session.

The console also features a revolutionary iFit

®

 mode 

that enables the treadmill to communicate with your 

wireless network through an optional iFit module. 

With the iFit mode, you can download personalized 

workouts, create your own workouts, track your work-

out results, race against other iFit users, and access 

many other features. To purchase an iFit module at 

any time, go to www.iFit.com or call the telephone 

number on the front cover of this manual. 

You can even listen to your favorite workout music or 

audio books with the console’s sound system while you 

exercise.

To turn on the power, see page 18. To use the 

manual mode, see page 18. To use an onboard 

workout, see page 20. To use a set-a-goal work-

out, see page 21. To use an iFit workout, see page 

21. To use the settings mode, see page 22. To use 

the sound system, see page 24.

Note: The console can display speed and distance in 

either miles or kilometers. To find which unit of mea-

surement is selected, see THE SETTINGS MODE on 

page 22. For simplicity, all instructions in this manual 

refer to kilometers.

IMPORTANT: If there are sheets of plastic on the 

console, remove the plastic. To prevent damage 

to the walking platform, wear clean athletic shoes 

while using the treadmill. The first time you use 

the treadmill, observe the alignment of the walking 

belt, and center the walking belt if necessary (see 

page 28).

CONSOLE DIAGRAM
Содержание C 220i

Страница 1: ...reference www iconeurope com CUSTOMER SERVICE UNITED KINGDOM Call 0330 123 1045 From Ireland 053 92 36102 Website www iconsupport eu E mail csuk iconeurope com Write ICON Health Fitness Ltd Unit 1D T...

Страница 2: ...ions of the warning decals If a decal is missing or illegible call the telephone number on the front cover of this manual and request a free replacement decal Apply the decal in the location shown Not...

Страница 3: ...hed circuit No other appliance should be on the same circuit When replacing the fuse in the power cord adapter insert an ASTA approved BS1362 13 amp fuse into the fuse carrier 13 If an extension cord...

Страница 4: ...nge the incline of the treadmill by placing objects under the treadmill 26 Never insert any object into any opening on the treadmill 27 Inspect and properly tighten all parts each time the treadmill i...

Страница 5: ...over of this manual To help us assist you note the product model number and serial number before contacting us The model number and the location of the serial number decal are shown on the front cover...

Страница 6: ...of this manual The number following the key number is the quantity used for assembly Note If a part is not in the hardware kit check to see whether it is preattached Extra parts may be included 10 Sta...

Страница 7: ...er Left parts are marked L or Left and right parts are marked R or Right To identify small parts see page 6 Assembly requires the following tools the included hex keys one Phillips screwdriver To avoi...

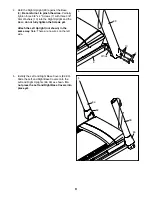
Страница 8: ...pright Wire into the lower end of the Right Upright as you pull the other end of the wire tie out of the Right Upright 3 Lay the Right Upright 90 near the Base 8 Press the Grommet 77 into the square h...

Страница 9: ...pright and the Base do not fully tighten the Screws yet Attach the Left Upright not shown in the same way Note There are no wires on the left side 90 4 7 13 8 Wires 5 Identify the Left and Right Base...

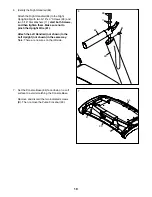
Страница 10: ...ghten them Make sure not to pinch the Upright Wire 81 Attach the Left Handrail not shown to the Left Upright not shown in the same way Note There are no wires on the left side 11 81 84 28 6 90 64 93 B...

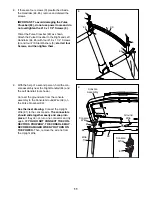
Страница 11: ...elp of a second person hold the con sole assembly near the Right Handrail 84 and the Left Handrail not shown Connect the ground wire from the console assembly to the Console Ground Wire 58 on the Puls...

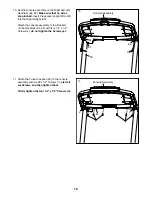
Страница 12: ...0 Attach the console assembly to the brackets on the Handrails 84 85 with four 1 4 x 1 2 Screws 4 do not tighten the Screws yet 11 Attach the Pulse Crossbar 93 to the console assembly with six 8 x 1 2...

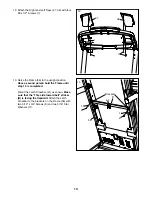
Страница 13: ...osition Have a second person hold the Frame until step 15 is completed Orient the Latch Crossbar 41 as shown Make sure that the This side toward belt sticker D is facing the treadmill Attach the Latch...

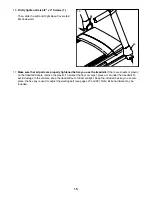
Страница 14: ...d remove the tie 15 Remove the 5 16 Nut 34 and the 5 16 x 2 1 4 Bolt 63 from the bracket on the Latch Crossbar 41 Align the upper end of the Storage Latch 26 with the bracket on the Latch Crossbar 41...

Страница 15: ...se the treadmill If there are sheets of plastic on the treadmill decals remove the plastic To protect the floor or carpet place a mat under the treadmill To avoid damage to the console keep the treadm...

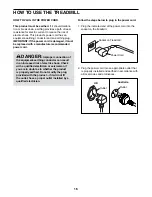
Страница 16: ...power cord into the socket on the treadmill 2 Plug the power cord into an appropriate outlet that is properly installed and earthed in accordance with all local codes and ordinances DANGER Improper co...

Страница 17: ...results race against other iFit users and access many other features To purchase an iFit module at any time go to www iFit com or call the telephone number on the front cover of this manual You can ev...

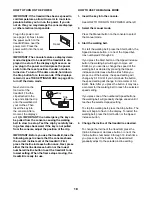
Страница 18: ...e Next press either the Incline decrease button or the lowest numbered incline button to set the treadmill to its lowest setting When the frame stops moving the treadmill is ready for use HOW TO USE T...

Страница 19: ...itor or an optional chest heart rate monitor see page 23 for infor mation about the optional chest heart rate monitor Note The console is compatible with BLUETOOTH Smart heart rate monitors Note If yo...

Страница 20: ...etting for the current segment At the end of each segment a series of tones will sound If a new speed and or incline setting is programmed for the next segment the new speed and or incline setting wil...

Страница 21: ...module at any time go to www iFit com or call the telephone number on the front cover of this manual You must also have access to a computer with a USB port and an internet connection In addition you...

Страница 22: ...peed and incline settings for the next segment 6 Follow your progress with the displays See step 5 on page 19 The console will show a map of the trail you are walking or running or it will show a trac...

Страница 23: ...nsole or when you press the Home button Press the Enter button repeatedly to select the manual main screen or the iFit screen as the default menu CHECK WIFI STATUS Press the Enter button to check the...

Страница 24: ...kips set the CD player on the floor or another flat surface instead of on the console HOW TO ADJUST THE CUSHIONING SYSTEM The treadmill features a cushioning system that reduces the impact as you walk...

Страница 25: ...moving the treadmill fold it as described at the left CAUTION Make sure that the latch knob is locked in the storage position Moving the treadmill may require two people 1 Hold the frame and one of t...

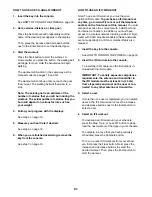
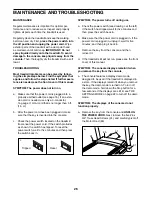
Страница 26: ...itch located on the treadmill frame near the power cord If the switch protrudes as shown the switch has tripped To reset the power switch wait for five minutes and then press the switch back in SYMPTO...

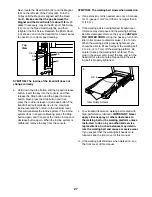
Страница 27: ...m the console SYMPTOM The walking belt slows when walked on a If an extension cord is needed use only a 3 conduc tor 14 gauge 1 mm2 cord that is no longer than 5 ft 1 5 m b If the walking belt is over...

Страница 28: ...the walking belt Then plug in the power cord insert the key and run the treadmill for a few minutes Repeat until the walking belt is centered SYMPTOM The walking belt slips when walked on a First rem...

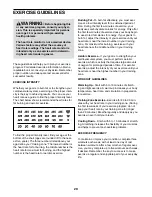
Страница 29: ...c Exercise If your goal is to strengthen your cardiovascular system you must perform aerobic exercise which is activity that requires large amounts of oxygen for prolonged periods of time For aerobic...

Страница 30: ...30 NOTES...

Страница 31: ...king Belt 46 2 Belt Guide 47 1 Right Rear Foot 48 4 Cable Tie 49 1 Drive Roller Pulley 50 1 Magnet 51 1 Reed Switch Clip 52 1 Reed Switch 53 2 1 4 x 1 1 2 Screw 54 1 Drive Motor 55 1 Motor Belt 56 1 F...

Страница 32: ...34 59 23 43 44 21 53 53 46 19 19 46 39 1 37 34 30 59 34 30 59 39 1 37 1 39 1 39 2 57 2 40 40 47 2 2 10 37 37 37 37 50 35 35 35 35 35 35 35 35 35 15 10 2 54 55 6 34 63 41 26 34 62 6 11 11 20 95 97 73...

Страница 33: ...33 66 68 75 65 72 78 67 67 33 29 69 33 70 16 71 33 33 71 32 31 31 31 68 68 68 68 31 31 2 2 2 2 2 76 98 EXPLODED DRAWING B Model No NETL99815 1 R0615A...

Страница 34: ...34 17 17 33 77 81 33 8 22 22 10 82 91 7 38 83 89 85 11 28 90 84 87 79 79 58 38 91 13 74 7 13 74 12 81 87 4 3 12 3 9 5 9 5 11 28 1 1 1 1 1 10 93 4 EXPLODED DRAWING C Model No NETL99815 1 R0615A...

Страница 35: ...35 25 25 92 92 2 86 64 1 36 1 27 18 80 88 2 2 1 1 2 1 1 2 2 2 EXPLODED DRAWING D Model No NETL99815 1 R0615A...

Страница 36: ...If you require more information about safe and correct disposal methods please contact your local city office or the establishment where you purchased this product RECYCLING INFORMATION To order repla...

Отзывы: