21
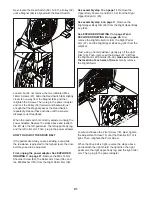
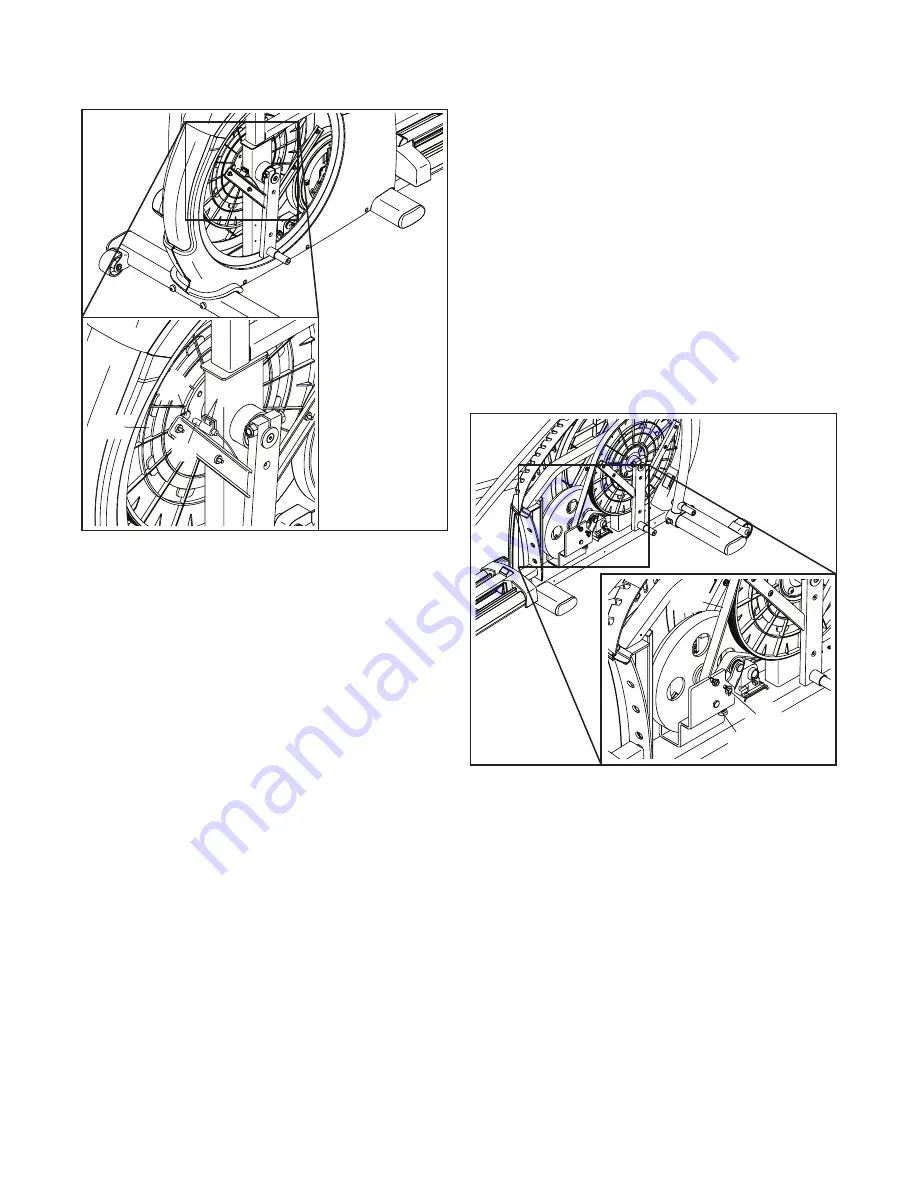
Next, locate the Reed Switch (60). Turn the Pulley (52)
until a Magnet (86) is aligned with the Reed Switch.
Loosen, but do not remove, the two indicated M4 x
16mm Screws (97). Slide the Reed Switch (60) slightly
closer to or away from the Magnet (86), and then
retighten the Screws. Then, plug in the power adapter
and rock the Pulley (52) forward and backward just
enough that the Magnet passes the Reed Switch
repeatedly. Repeat these actions until the console
displays correct feedback.
When the reed switch is correctly adjusted, unplug the
power adapter. Reverse the steps above and reattach
the left disc, the left pedal arm, the left upper body leg,
and the left roller arm. Then, plug in the power adapter.
HOW TO ADJUST THE DRIVE BELT
If the pedals slip while you are pedaling, even while
the resistance is adjusted to the highest level, the drive
belt may need to be adjusted.
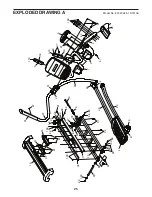
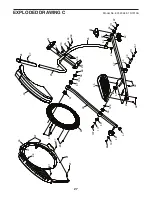
First, unplug the power adapter. See EXPLODED
DRAWING C on page 27.
Remove the M8 x 14mm
Shoulder Screw (89), the Roller Arm Cover (58), and
the M8 Washer (103) from the Right Roller Arm (39).
See assembly step 10 on page 11.
Remove the
Upper Body Covers A and B (31, 32) from the Right
Upper Body Arm (25).
See assembly step 9 on page 11.
Remove the
Right Upper Body Arm (25) from the Right Upper Body
Leg (26).
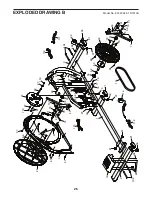
See EXPLODED DRAWING C on page 27 and
EXPLODED DRAWING B on page 26.
First,
remove the Right Roller Arm (39), the Right Pedal
Arm (37), and the Right Upper Body Leg (26) from the
elliptical.
Next, using a flat screwdriver, gently pry off the right
Disc (29). Then, remove all the Screws (97, 98) from
the Right and Left Shields (35, 36);
make sure to note
the location of each size of Screw.
Gently remove
the Right Shield.
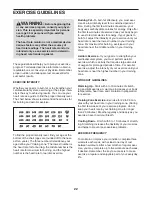
Locate and loosen the Pivot Screw (78). Next, tighten
the Adjustment Screw (75) until the Drive Belt (113) is
tight. Then, retighten the Pivot Screw.
When the drive belt is tight, reverse the steps above
and reattach the right shield, the right disc, the right
pedal arm, the right upper body leg, and the right roller
arm. Then, plug in the power adapter.
75
78
113
97
60
86
52
Содержание 831.23946.1
Страница 4: ...4 all STANDARD SERVICE PLANS...

