background image

© 2008 HeathCo LLC 

598-1198-01

Models 52-4042-2 / 52-4041-4

Features

•  Turns on lighting when motion is detected.
•  On-Time control allows length of time light stays on 

to be adjusted.

•  Photocell keeps light off during daylight hours.
•  LED flashes day or night to indicate motion has been 

detected.

Security Light with 
Motion-Activated 
Sensor

OPERATION

* resets to Auto Mode at dawn.

MANUAL MODE

ON-TIME

10 5 1 TEST

10 5 1 

TEST

ON-TIME

TEST

... back on.

AUTO

1 Second OFF 

then...

Put the ON-TIME switch in the 
1, 5, or 10 minute position.

Put the ON-TIME switch on the bottom 
of the sensor in the TEST position.

Manual  mode  only  works  at  night 
because daylight returns the sensor 
to AUTO.

Flip the light switch off for one second 
then back on to toggle between AUTO 
and MANUAL MODE.

Manual  mode  works  only  with  the 
ON-TIME  switch  in  the  1,  5,  or  10 
position.

Move ON-TIME Switch to 

1, 5, or 10 minutes

Mode Switching Summary

Flip light switch off 

for one second then 

back on*

MANUAL MODE

AUTO

TEST

Requirements

•  The light control requires 120-volts AC.
•  If you want to use Manual Mode, the control must be 

wired through a switch.

• 

Some  codes  require  installation  by  a  
qualified electrician.

•  This product is intended for use with the enclosed 

gasket and with a junction box marked for use in wet 
locations.

Light Control

Sensor

Cover 

Plate

Lamp 

Holders

*  If you get confused while switching modes, turn the 

power off for one minute, then back on. After the cali-
bration time the control will be in the AUTO mode.

Note:  When first turned on wait about 1 

1

/

2

 minutes for 

the circuitry to calibrate.

Plastic Hanger

Rubber Plug

Gasket

Mounting Strap

Mounting Bolt

2 Wire

Connectors

This package includes:

6 Screws

(3 sizes included)

Mode:

On-Time

Works: Day Night

Test

5 Seconds

x

x

Auto

1, 5, or 10 Minutes

x

Manual

To Dawn*

x

Содержание Security Light with Motion-Activated 52-4041-4

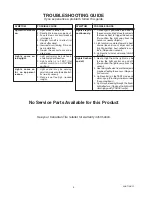
Страница 1: ...TIME switch in the 1 5 or 10 position Move ON TIME Switch to 1 5 or 10 minutes Mode Switching Summary Flip light switch off for one second then back on MANUAL MODE AUTO TEST Requirements The light con...

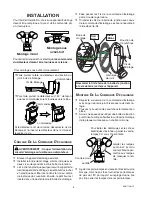
Страница 2: ...and push the sensor back into the ball joint Tighten the clamp screw when done Then rotate the sensor head clockwise 180 so the controls face down Controls Wall Mount Eave Mount For under eave install...

Страница 3: ...ries with surrounding temperature Sensing Angle Up to 150 Electrical Load Up to 300 Watt Maximum In candescent Up to 150 Watt maximum each lamp holder Power Requirements 120 VAC 60 Hz Operating Modes...

Страница 4: ...odlight is positioned too close to thesensororpointedatnearbyobjects that cause heat to trigger the sensor Re position the light away from the sensor or nearby objects 2 Light control is pointed towar...

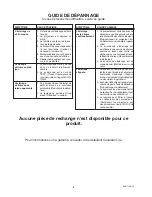
Страница 5: ...5 ou 10 Placer l interrupteur ON TIME 1 5 ou 10 minutes R sum du mode de commutation Mettre l interrupteur hors circuit pendant une seconde puis le remettre en circuit PRIORIT MANUELLE AUTO TEST Exig...

Страница 6: ...age mural Montage sous avant toit Pour viterlerisquedechoc lectrique lescommandes du d tecteur doivent tre tourn es vers le bas Bride de montage Commandes Commandes Vis De Blocage Ajuster les porte la...

Страница 7: ...aximumde 150 W par support Alimentation lectrique 120 V CA 60 Hz Modes de fonctionnement Essai automatiqueetpriorit manuelle D lais 1 5 et 10 minutes Port e R glable Temp rature de fonctionnement 30 4...

Страница 8: ...inuellement L clairage clignote CAUSE POSSIBLE 1 Un projecteur est situ trop pr s du d tecteur ou point vers des objets etlachaleurd clencheled tecteur Repositionnez le projecteur loin du d tecteur ou...

Отзывы: