Nokia 002S526 Скачать руководство пользователя страница 62

1 Select an invitation to an event.

2 Add the event to your device calendar.
This feature is available only if supported by the service.

Camera

About Camera

 Select 

Menu

 > 

Applications

 > 

Camera

.

Why carry a separate camera if your device has all you need for capturing memories?

With the Camera application, you can easily take pictures or record videos. You can later

use your device to view or edit the pictures and videos, share them on the internet, or

send them to compatible devices.

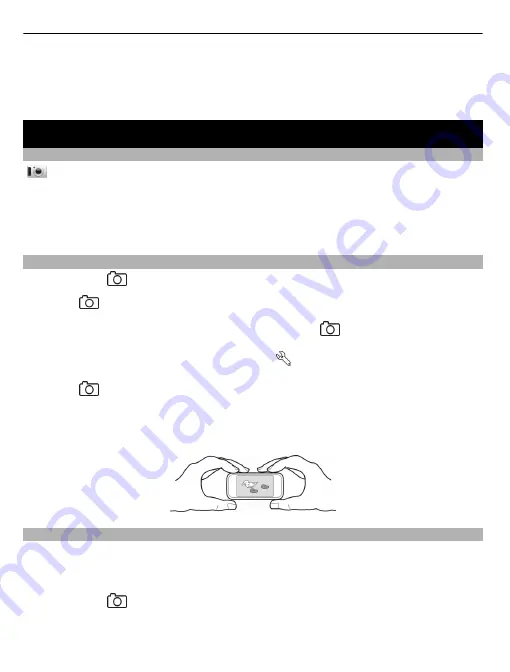
Take a picture

Press and hold 

.

1 Press 

 halfway down to lock the focus on an object (not available in landscape

or sport scene modes). A green locked focus indicator is displayed. If the focus was

not locked, a red focus indicator is displayed. Release 

, and press it halfway down

again. You can also take a picture without locking the focus.

2 To activate the face tracking feature, select 

 > 

Face detect.

. The face tracker

detects and draws rectangles around faces, even when they are moving.

3 Press 

. Do not move the device before the picture is saved and the final picture

displayed.

To change the default memory to save pictures to, select 

Options

 > 

Settings

 >

Memory in use

 and the desired memory location.

Save location information to your pictures and videos

If you sometimes struggle to remember exactly where you were when you took a

particular picture or video while hiking or travelling, you can set your device to

automatically record the location.
Press and hold 

.

62 Camera

Содержание 002S526

Страница 1: ...Nokia N8 00 User Guide Issue 1 1 ...

Страница 2: ...ication light to blink for missed calls or messages 31 Search in your device and on the internet 31 Use your device offline 31 Prolong battery life 31 Personalisation 33 Profiles 33 Change your theme 34 Home screen 34 Organise your applications 37 Telephone 37 Call a phone number 37 Search for a contact 37 Call a contact 38 Make a video call 38 Make a conference call 40 Use speed dial 41 Use your ...

Страница 3: ...r friends status updates in the home screen 60 Upload a picture to a service 60 Share your location in your status update 61 Contact a friend from a social networking service 61 Add an event to your device calendar 61 Camera 62 About Camera 62 Take a picture 62 Save location information to your pictures and videos 62 Take a close up picture 63 Take a picture in the dark 63 Take a picture of a movi...

Страница 4: ...oftware and applications up to date 102 Manage files 104 Increase available memory for more content 105 Manage applications 106 Synchronise content 107 Copy contacts or pictures between devices 108 Protect your device 109 Find more help 110 Support 110 Access codes 110 Troubleshooting 111 If your device stops responding 111 Restore original settings 111 What to do when the memory is full 112 Messa...

Страница 5: ...reless devices may be susceptible to interference which could affect performance QUALIFIED SERVICE Only qualified personnel may install or repair this product CHARGERS AND OTHER ACCESSORIES Use only chargers and other accessories approved by Nokia for use with this device Do not connect incompatible products KEEP YOUR DEVICE DRY Your device is not water resistant Keep it dry GLASS PARTS The front ...

Страница 6: ...PROTECT YOUR HEARING Listen to a headset at a moderate level and do not hold the device near your ear when the loudspeaker is in use 6 Safety ...

Страница 7: ...Get started Keys and parts Top 1 Nokia AV connector 3 5 mm 2 HDMI connector 3 Power key Front 1 Earpiece 2 Menu key 3 Microphone 4 Secondary camera lens Get started 7 ...

Страница 8: ... 1 Camera flash 2 Camera lens 3 Loudspeaker 4 Microphone Sides 1 Memory card slot 2 SIM card slot 3 Charging indicator light 4 Micro USB connector 5 Volume Zoom key 6 Lock switch 7 Camera key 8 Get started ...

Страница 9: ...to write on the touch screen Change the volume of a call song or video Use the volume keys You can adjust the volume during a call or when an application is active The built in loudspeaker allows you to speak and listen from a short distance without having to hold the device to your ear Activate or deactivate the loudspeaker during a call Select or Lock or unlock the keys and screen To avoid accid...

Страница 10: ...y stickers to your SIM card Important Do not use a mini UICC SIM card also known as a micro SIM card or a micro SIM card with an adapter in this device A micro SIM card is smaller than the standard SIM card This device does not support the use of micro SIM cards and use of incompatible SIM cards may damage the card or the device and may corrupt data stored on the card 1 Memory card slot cover 2 SI...

Страница 11: ...ear a click Make sure the contact area of the card is facing down Remove the SIM card 1 Switch the device off 2 Use your fingernail to open the cover of the memory card slot 3 Open the cover of the SIM card slot and push the card in until you hear a click 4 Pull the card out Get started 11 ...

Страница 12: ...e card and the device and corrupt data stored on the card Memory cards are sold separately Do not attach any stickers to your memory card Insert the memory card 1 Use your fingernail to open the cover of the memory card slot 2 Make sure the contact area of the memory card is facing down Push the card in until you hear a click 12 Get started ...

Страница 13: ...battery Authorised retail points may also offer a battery replacement service Important Only qualified personnel or an authorised service facility should replace the battery Unauthorised battery replacement may invalidate your warranty When your device is low on power it goes into power save mode To deactivate power save mode press and select Deactivate power saving When power save mode is activat...

Страница 14: ...battery has not been used for a long time to begin charging you may need to connect the charger then disconnect and reconnect it Tip You can also use a compatible USB charger to charge your battery Charge the battery over USB Battery low but you don t have a charger with you You can use a compatible USB cable to connect to a compatible device such as a computer To avoid breaking the charger connec...

Страница 15: ...attery is charging the charging indicator light next to the USB connector is lit When the battery charge is low the charging indicator light flashes It may take a while for charging to start Antenna locations Avoid touching the antenna area unnecessarily while the antenna is transmitting or receiving Contact with antennas affects the communication quality and may cause a higher power level during ...

Страница 16: ...h the wrist strap Thread the wrist strap as shown and tighten it Headset You can connect a compatible headset or compatible headphones to your device Switch the device on or off Press and hold 16 Get started ...

Страница 17: ...walk and drive navigation Back up and manage your contacts in the Ovi internet service To learn more about Ovi go to www ovi com To create a Nokia account later use your device to access an Ovi service and you are prompted to create an account Copy contacts or pictures from your old device Want to copy important information from your previous compatible Nokia device and start using your new device...

Страница 18: ...ixed For details see the user guide of the device The passcode is valid only for the current connection 3 Select the content and OK Device set up To define some basic settings for your device select the Phone setup shortcut that is in one of your home screens To switch between home screens swipe left or right With Phone setup you can do the following Copy contacts pictures and other content from y...

Страница 19: ...i Suite on your PC With the Nokia Ovi Suite PC application you can manage content on your device and keep it in sync with your computer You can also update your device with the latest software and download maps Download the latest version of Nokia Ovi Suite from www ovi com suite If you cannot connect to the internet to install Ovi Suite and Nokia Ovi Player from your device 1 Use a compatible USB...

Страница 20: ...elect the notification area in the top right corner and select USB Media transfer To learn more about Ovi Suite go to www ovi com suite Explore Nokia s Ovi internet services Ovi by Nokia With Ovi by Nokia you can find new places and services and stay in touch with your friends You can do for example the following Download games applications videos and ringing tones to your device Find your way wit...

Страница 21: ...ecast if available Save your favourite places and organise them into collections at www ovi com Synchronise your saved items with your mobile device and access them on the go To use the Ovi Maps internet service go to www ovi com About Ovi Music With Ovi Music you can purchase and download songs to your device and your computer and copy the songs between the two To manage your music collection and...

Страница 22: ...tion or other screen element Tap the application or element Access functions quickly Tap and hold the item A pop up menu with available options opens For example to send an image or delete an alarm tap and hold the image or alarm and from the pop up menu select the appropriate option If you tap and hold the home screen editing mode is activated 22 Basic use ...

Страница 23: ... steadily slide your finger in the desired direction For example when you are viewing a picture to view the next picture swipe left Scroll in a list or menu Place your finger on the screen slide it quickly up or down the screen then lift your finger The content of the screen scrolls with the speed and direction it had at the moment of release To select an item from a scrolling list and to stop the...

Страница 24: ...m and slide your fingers together Tip You can also tap the item twice to zoom in or out Interactive home screen elements The home screen elements are interactive For example you can change the date and time set alarms write calendar entries or edit the profiles directly in the home screen Set an alarm Select the clock 1 24 Basic use ...

Страница 25: ...u can select the notification area 4 and do the following Modify the connectivity settings Open the Clock application and set an alarm View the battery status and activate power saving mode View notifications of missed calls or received messages Open the WLAN wizard and connect to a WLAN Manage Bluetooth connectivity Switch between open applications You can see which applications and tasks are ope...

Страница 26: ...t the desired character range such as numbers or special or accented characters 5 Arrows keys Move the cursor left or right 6 Space bar Insert a space 7 Input menu Activate predictive text input or change the writing language 8 Enter key Move the cursor to the next row or text input field Additional functions are based on the current context For example in the web address field of the web browser ...

Страница 27: ...nderlined cycle through the word candidates 3 Shift key Change the character case To activate or deactivate predictive text input mode quicklyselect the keytwice To switch between the letter and number modes select and hold the key 4 Close key Close the virtual keypad 5 Arrow keys Move the cursor left or right 6 Input menu Activate predictive text input or change the writing language 7 Backspace k...

Страница 28: ...ct Activate predictive text 2 To write the desired word use the keys 2 9 Select each key once for each letter For example to write Nokia when the English dictionary is selected select 6 for N 6 for o 5 for k 4 for i and 2 for a The word suggestion changes after each key selection 3 If the word is not correct select repeatedly until the correct match is displayed If is displayed after the word the ...

Страница 29: ...tried to call you You are using your second phone line network service You have set your device to divert incoming calls to another number network service If you have two phone lines a number indicates the active line Your device is ready for an internet call You have an ongoing data call network service Messaging indicators You have unread messages If the indicator is blinking the SIM card memory...

Страница 30: ...ended and that a connection is being established A WLAN connection is available network service indicates that the connection is encrypted and that the connection is not encrypted Connectivity indicators Bluetooth is active indicates that your device is sending data If the indicator is blinking your device is trying to connect to another device You have connected a USB cable to your device You hav...

Страница 31: ...ile and Offline When the offline profile is activated your connection to the cellular network is closed All radio frequency signals between the device and the cellular network are prevented If you try to send a message it is placed in the Outbox folder and is sent only when another profile is activated You can also use your device without a SIM card If you remove the SIM card the offline profile i...

Страница 32: ...he light sensor that observes lighting conditions and adjusts the display brightness in the display settings select Light sensor If the signal strength of the cellular network varies in your area it increases the demand on battery power If the network mode is set to use both GSM and 3G dual mode networks the device searches for the 3G network To set your device to use only the GSM network select M...

Страница 33: ...sonalise your device tones for each profile Select Menu Settings Profiles 1 Select the desired profile 2 Select Personalise and the desired option Tip Download ringing tones from Ovi Store To learn more about Ovi Store go to www ovi com Silence your device When the silent profile is activated all ringing and alert tones are muted Activate this profile when you are at the cinema or in a meeting In ...

Страница 34: ...arn more about Ovi Store go to www ovi com Home screen About the home screen In the home screen you can quickly access your most frequently used applications and create shortcuts for different features You can view your favourite contacts and quickly call start conversations or send messages to them You can also control applications such as Music You can have more than one home screen page for exa...

Страница 35: ...an one home screen you can switch between them also while editing and personalise all your home screens at the same time Rearrange items in the home screen 1 Tap and hold the home screen 2 Drag and drop items to a new location 3 Select Done Change the wallpaper 1 Tap and hold the home screen 2 Select Options Change wallpaper 3 Select the desired picture 4 Select Done Tip Download more background i...

Страница 36: ...other one Add a widget to the home screen 1 Tap and hold the home screen 2 Select and the desired widget from the list 3 Select Done Tip To download more widgets select Store Using the service or downloading content may cause transfer of large amounts of data which may result in data traffic costs Some home screen widgets may connect to the internet automatically To prevent this select Options Wid...

Страница 37: ...se Create a new folder Select Options New folder Move an application to a folder Select and hold the application and from the pop up menu select Move to folder and the new folder Tip You can also drag and drop applications and folders Telephone Call a phone number 1 In the home screen select Call to open the dialler and enter the phone number To enter the character used for international calls sel...

Страница 38: ...s Contact search Off Call a contact Select Menu Contacts 1 To search for a contact enter the first letters or characters of the first or second name in the search field 2 Select the contact 3 In the contact card select Voice call 4 If the contact has more than one phone number select and hold Voice call and select the desired number Make a video call When you make a video call network service you ...

Страница 39: ...cessful for example video calls are not supported by the network or the receiving device is not compatible you are asked if you want to try a normal call or send a message instead The video call is active when you see two videos and hear the sound through the loudspeaker The call recipient may deny video sending indicated with and you only hear the voice of the caller and may see an image or a gre...

Страница 40: ...ew call is answered to add the first participant to the conference call select Add a new participant to a conference call Make a call to another participant and add the new call to the conference call Have a private conversation with a conference call participant Select Go to the participant and select The conference call is put on hold on your device The other participants continue the conference...

Страница 41: ...trol your device Voice commands are not dependent on the speaker s voice Commands are automatically created by your device Note Using voice tags may be difficult in a noisy environment or during an emergency so you should not rely solely upon voice dialling in all circumstances When you usevoice dialling the loudspeaker is in use Holdthe deviceat a short distance away when you say the voice comman...

Страница 42: ...vi Store For details go to www ovi com 1 Download an installation widget for the internet call service 2 To start the installation select the installation widget 3 Follow the instructions When an internet call service has been installed a tab for the service is displayed in the contacts list Make an internet call When you are signed into a internet call service you can make a call from the friends...

Страница 43: ...ntervals during the recording Turn to silence If your device rings in a situation where you do not want to be disturbed you can turn the device to silence the ringing tone Activate the turn to silence feature 1 Select Menu Settings and Phone Sensor settings Sensors On 2 Select Turning control Silence calls When your device rings turn your device display down View your missed calls In the home scre...

Страница 44: ...answer your calls you can divert incoming calls to your voice mailbox or another phone number Select Menu Settings and Calling Call divert Voice calls Call divert is a network service For details contact your service provider Divert all voice calls to your voice mailbox Select All voice calls Activate To voice mailbox Divert all voice calls to another phone number 1 Select All voice calls Activate...

Страница 45: ...elect Internet call barring Anonymous call barring On Allow calls only to certain numbers With the fixed dialling service you can restrict calls and only allow calls to certain phone numbers For example you can allow your children to call only family members or other key numbers Select Menu Contacts and Options SIM numbers Fixed dial contacts Not all SIM cards support the fixed dialling service Yo...

Страница 46: ... set up video sharing you need person to person and 3G connection settings A person to person connection is also known as a Session Initiation Protocol SIP connection The SIP profile settings must be configured in your device before you can use video sharing Contact your service provider for the SIP profile settings and save them to your device Your service provider may send you the settings in a ...

Страница 47: ...etails and select OK If entering a phone number you need to enter thecountry code The invitation is sent to the SIP address If you access another application while sharing a video the sharing is paused Continue sharing In the home screen select Options Resume video sharing Stop sharing video Select Stop To end the voice call select When you end the call video sharing also ends Save the live video ...

Страница 48: ...elect Menu Applications Log 2 Select Recent calls Received calls 3 Select and hold a phone number and from the pop up menu select Save to Contacts 4 Select whether you want to create a new contact list entry or update an existing one Save a number from a received message 1 Select Menu Messaging 2 Select Inbox and a message 3 Select the phone number and Save to Contacts 4 Select whether you want to...

Страница 49: ... the pop up menu select Ringing tone 3 Select a ringing tone from the list The ringing tone only applies to the members of the group at the time that the ringing tone is set Send your contact information using My Card My card is your electronic business card With My card you can send your contact information to others Select Menu Contacts Send your contact information as a business card Select and...

Страница 50: ...our SIM card Select Options Settings Contacts to display SIM memory Contacts stored on a SIM card are indicated with If you copy the contacts to your device you can add further details to the entries such as alternative phone numbers addresses or a picture Copy all SIM contacts to your device Select Options SIM numbers Copy all to phone Back up your contacts to Ovi by Nokia If you back up your con...

Страница 51: ...s that you want to share Select Menu Messaging 1 Select New message 2 To select recipients from the contacts list select the To title To enter the recipient s phone number manually enter the number in the To field 3 To add an attachment select 4 Select Sending a message with an attachment may be more expensive than sending a normal text message For more information contact your service provider Yo...

Страница 52: ...e message in the Conversations folder or in the Inbox folder in Messaging Select Menu Messaging When you receive a message and 1 new message are displayed in the home screen To open the message select Show By default the message is opened in the Conversations view Reply to a received message in the Conversations view Select the text input field at the bottom of the display write a message and sele...

Страница 53: ...ew conversation is started When you open a received message from the home screen by default the message opens in the Conversations view If you want messages to open in the Inbox view select Options Message view Inbox Listen to a text message You can set your device to read your text messages aloud 1 Select Menu Messaging 2 Select Inbox 3 Select and hold a message and from the pop up menu select Li...

Страница 54: ...ive text input Select Predictive text Mail Mail About Mail Select Menu Applications Mail With Mail you can add several mailboxes and access them directly from your home screen In the main mail view you can switch from one mailbox to another 1 Write a mail 2 Switch between your mailboxes 3 Sort your mail by for example date 4 Mail in current mailbox 54 Mail ...

Страница 55: ...the home screen In the home screen tap and hold an empty area Select and the desired widget from the list Delete a mailbox Select Options Delete mailbox and the mailbox Read mail You can use your device to read and reply to mail Select Menu Applications Mail Read a mail Select a mail To zoom in or out pinch the screen Open or save an attachment Selecttheattachment and from the pop up menu selectth...

Страница 56: ...s manually select the To Cc or Bcc field 3 To add an attachment to the mail select 4 To send the mail select Open mail from the home screen You can have several mail widgets in the home screen depending on your device Each mail widget contains one mailbox In the widget you can see if you have received new mail and the number of unread mails Add a mail widget to the home screen In the home screen s...

Страница 57: ...ou have or have tried to access confidential information or a secure service requiring passwords clear the cache after each use Empty the cache Select Options Clear privacy data Cache Add a bookmark If you visit the same websites all the time add them to your Bookmarks view so you can easily access them Select Menu Web While browsing select Go to a bookmarked website while browsing Select and a bo...

Страница 58: ... content may be inaccurate and is subject to availability Some services may not be available in all countries and may be provided only in selected languages The services may be network dependent For more information contact your network service provider Using the service or downloading content may cause transfer of large amounts of data which may result in data traffic costs Social networks About ...

Страница 59: ...that service Familiarise yourself with the terms of use and the privacy practices of that service See your friends status updates in one view When you are signed in to social networking services through the Social application you can see your friends status updates from all those services in a single view You do not have to switch between different applications to see what everyone is up to Select...

Страница 60: ... updates in the home screen When you are signed into a service you can see updates in the Social widget Open the Social application from the home screen Select the Social widget If you are signed in the status updates view opens If you are not signed in the sign in view opens Upload a picture to a service With the Social application you can upload pictures to social networking services Select Menu...

Страница 61: ...lf with the terms of use and the privacy practices of the service and use appropriate consideration before disclosing your location data to others or viewing the location of others Contact a friend from a social networking service When commenting your friend s status is not enough you can call or send a message to the friend Select Menu Applications Social 1 Select a friend s profile picture 2 Fro...

Страница 62: ...cked focus indicator is displayed If the focus was not locked a red focus indicator is displayed Release and press it halfway down again You can also take a picture without locking the focus 2 To activate the face tracking feature select Face detect The face tracker detects and draws rectangles around faces even when they are moving 3 Press Do not move the device before the picture is saved and th...

Страница 63: ...ation can be attached to an image or a video clip if location coordinates can be determined via network and GPS If you share an image or a video clip which has location information attached the location information is visible to others that view the image or the video clip You can deactivate geotagging in the camera settings Take a close up picture It can be tricky to get small objects such as ins...

Страница 64: ... Scene mode User defined Edit Modify the settings and select Set as default scene mode Yes Keep a safe distance when using the flash Do not use the flash on people or animals at close range Do not cover the flash while taking a picture Record a video Besides taking pictures with your device you can also capture your special moments as videos Press and hold 1 To switch from image mode to video mode...

Страница 65: ...m in categories View pictures and videos Select Menu Photos Browse the pictures and videos Select a folder and swipe up or down View a picture in full screen mode Select the picture and turn your device to landscape mode To browse pictures in full screen mode swipe left or right To view the zoom slider tap the picture Alternatively place two fingers on the screen and to zoom in slide your fingers ...

Страница 66: ...ies or slideshows The following file formats are supported MPEG4 H263 H263 BL WMV JPEG PNG BMP GIF MP3 AAC AAC eAAC WAV and AMR NB AMR WB Save the sound files that you want to use in a movie to the Sound files folder on your device You cannot add a DRM protected sound file to a movie Create a movie With Storyboard you can easily create short movies from videos and pictures Select Menu Applications...

Страница 67: ...ode 2 Select the picture to print 3 Select Options Print 4 To use the USB connection to print select Print Via USB 5 To print the picture select Options Print Tip You can also use a Bluetooth printer Select Print Via Bluetooth Change the selected printer to Bluetooth and follow the instructions on the display Tip When the USB cable is connected you can change the USB mode In the top right corner o...

Страница 68: ...ce 1 Connect an HDMI adapter to a compatible HDMI cable cable sold separately 2 Use the cable to connect your device to your home theatre The home theatre needs to support the HDMI 1 3 standard and be able to pass through video to your TV over HDMI Your device decodes Dolby Digital Plus and outputs PCM audio to your home theatre 3 To set the home theatre to use the respective HDMI input see the us...

Страница 69: ...he screen Copy a video between your device and PC Do you have videos on your computer that you want to watch on your device Or do you want to copy videos that you have downloaded or recorded on your device to your computer Use a USB data cable to copy videos between your computer and your device 1 Use a compatible USB data cable to connect your device to your computer 2 Open Nokia Ovi Suite on you...

Страница 70: ...V services To download Web TV services from Nokia s Ovi Store select Get more Downloaded services are saved in the Applications folder but you can move them to another folder such as a dedicated Web TV folder To learn more about Ovi Store go to www ovi com Music and audio Music player About Music player Select Menu Music player With the Music player application you can listen to music and podcasts...

Страница 71: ... a song Select and hold or Tip When listening to music you can return to the home screen leaving Music player application playing in the background Create a playlist Want to listen to different music for different moods With playlists you can create selections of songs to play in a specific order Select Menu Music player 1 Select Options Playlists Music and audio 71 ...

Страница 72: ...st for the most played songs recently played songs and recently added songs Copy music from your PC Do you have music on your PC that you want to listen on your device Nokia Ovi Player is the fastest way to transfer music on your device and you can use it to manage and synchronise your music collection 1 Use a compatible USB data cable to connect your device to your computer 2 On your device selec...

Страница 73: ...n the File manager application Send a recorded sound clip as an audio message Select Options Send Play music through a radio About the FM transmitter Select Menu Applications Tools FM transmit With the FM transmitter you can play songs stored in your device through any compatible FM radio such as a car radio or a home stereo system The operating distance of the FM transmitter is approximately 2 me...

Страница 74: ...M transmitter 5 To activate the FM transmitter select FM transmitter On 6 Enter the frequency to which you tuned the receiving radio Example If the frequency 107 8 MHz is free in your area and you tune your FM radio to that frequency also tune the FM transmitter to 107 8 MHz To adjust the volume use the volume function in the receiving radio Tip You can buy more music at www ovi com FM radio About...

Страница 75: ...et a frequency manually 1 From the toolbar select Tune manually 2 Use the up and down arrow icons to enter a frequency Listen to the radio You can enjoy your favourite FM radio stations on the go Select Menu Applications Radio Listen to a saved station From the toolbar select and select a station from the list Go to the next or previous saved station Swipe right or left Alternatively select or Sca...

Страница 76: ... and services Find your way with turn by turn directions Synchronise your favourite locations and routes between your mobile device and the Ovi Maps internet service Check weather forecasts and other local information if available Some services may not be available in all countries and may be provided only in selected languages The services may be network dependent For more information contact you...

Страница 77: ...le a red halo around the positioning icon indicates the general area you might be in In densely populated areas the accuracy of the estimate increases and the red halo is smaller than in lightly populated areas Move on the map Drag the map with your finger By default the map is oriented north View your current or last known location Select Zoom in or out Select or If you browse to an area not cove...

Страница 78: ...view In the standard map view details such as location names or motorway numbers are easy to read Satellite view For a detailed view use satellite images Terrain view View at a glance the ground type for example when you are travelling off road 3D view For a more realistic view change the perspective of the map Landmarks Display prominent buildings and attractions on the map Night mode Dim the col...

Страница 79: ...en travelling abroad To make sure your device does not use an internet connection in the main menu select Internet Connection Offline Use the compass When the compass is activated both the arrow of the compass and the map rotate automatically in the direction to which the top of your device is pointing Select Menu Maps and My position Activate the compass Select Deactivate the compass Select again...

Страница 80: ...ss point to use to download map information use A GPS or connect to a WLAN The availability and quality of GPS signals may be affected by your location satellite positions buildings natural obstacles weather conditions and adjustments to GPS satellites made by the United States government GPSsignals may not be available inside buildings or underground Do not use GPS for precise location measuremen...

Страница 81: ... about a specific location or place such as a hotel or restaurant if available Select Menu Maps and My position View the details of a place Select a place its information area and Show details When you find a place that does not exist or contains inappropriate information or incorrect details such as the wrong contact information or location it is recommended that you report it to Nokia The availa...

Страница 82: ...anning a trip Select Menu Maps and Favourites View a saved place on the map 1 Select Places 2 Go to the place 3 Select Show on map To return to the list of saved places select List Create a collection Select Create new collection and enter a collection name Add a saved place to a collection 1 Select Places and the place 2 Select Organise collections 3 Select New collection or an existing collectio...

Страница 83: ...up and shut d The device starts the synchronisation when you open or close the Maps application Synchronising requires an active internet connection and may involve the transmission of large amounts of data through your service provider s network For information about data transmission charges contact your service provider To use the Ovi Maps internet service go to www ovi com Share location Publi...

Страница 84: ...e guidance if available for your language helps you find your way to a destination leaving you free to enjoy the journey Select Menu Maps and Drive or Walk When you use drive or walk navigation for the first time you are asked to select the language of the voice guidance and download the appropriate files If you select a language that includes street names also the street names are said aloud Voic...

Страница 85: ...your home location To later change the home location do the following 1 In the main view select 2 Select Navigation Home Location Redefine 3 Select the appropriate option Tip To drive without a set destination select Map Your location is displayed on the centre of the map as you move Change views during navigation Swipe the screen to select 2D view 3D view Arrow view or Route overview Obey all loc...

Страница 86: ...f available for your country or region Select Menu Maps and Drive View traffic events on the map During drive navigation select Options Traffic info The events are displayed as triangles and lines Update traffic information Select Options Traffic info Update traffic info When planning a route you can set the device to avoid traffic events such as traffic jams or roadworks Avoid traffic events In t...

Страница 87: ...rive home or Walk home for the first time you are prompted to define your home location To later change the home location do the following 1 In the main view select 2 Select Navigation Home Location Redefine 3 Select the appropriate option Tip To walk without a set destination select Map Your location is displayed on the centre of the map as you move Plan a route Plan your journey and create your ...

Страница 88: ...rtation mode to Drive or Walk If you select Walk one way streets are regarded as normal streets and walkways and routes through for example parks and shopping centres can be used 3 Select the desired option Select the walking mode Open the Settings tab and select Walk Preferred route Streets or Straight line Straight line is useful on off road terrain as it indicates the walking direction Use the ...

Страница 89: ...larm 2 Set the alarm time and enter a description 3 To set the alarm to sound for example at the same time every day select Repeat Remove an alarm Select and hold the alarm and from the pop up menu select Delete alarm Snooze an alarm When an alarm sounds you can snooze the alarm This pauses the alarm for a defined length of time When the alarm sounds select Snooze Set the length of the snooze time...

Страница 90: ...hen travelling abroad In the home screen select the clock and open the world clock tab Add a location Select Options Add location and a location Set your current location Select and hold a location and from the pop up menu select Set as current location The time in your device is changed according to the selected location Make sure the time is correct Check the time in different cities To view the...

Страница 91: ... calendar entries in different views To easily check all the entries for a particular week use the week view In the home screen select the date From the toolbar select Add a task to your to do list Do you have important tasks to handle at work library books to return or maybe an event you want to attend You can add tasks to do notes to your calendar If you have a particular deadline set a reminder...

Страница 92: ...rk and free time You can have more than one calendar Create one for work and another for your free time In the home screen select the date Create a new calendar 1 Select Options Manage calendars 2 Select Options Create new calendar 3 Enter a name and set a colour code for the calendar 4 Define the visibility for the calendar When a calendar is hidden the calendar entries and reminders are not disp...

Страница 93: ...upgrades Read Microsoft Word Excel and PowerPoint documents With Quickoffice you can view Microsoft Office documents such as Word documents Excel worksheets or PowerPoint presentations Select Menu Applications Office Quickoffice Open a file Select the memory where the file is stored browse to the correct folder and select the file Sort files Select Options Sort by Send files to a compatible device...

Страница 94: ... meeting memos and save received plain text files TXT files to the Notes application Make a shopping list Shopping lists on paper are easy to lose Instead of writing them on paper you can make your shopping lists with Notes This way you always have the list with you You can also send the list to for example a family member Select Menu Applications Notes 1 Select Options New note 2 Enter text in th...

Страница 95: ...ects to an available known network when a network connection is needed Selection is based on the connection settings unless there are application specific settings applied Select Menu Settings and Connectivity Settings Automatically switch to a known wireless local area network WLAN connection when available Select Switch to WLAN Known WLANs only You can also connect to WLANs manually using the WL...

Страница 96: ...ncrease the security of your WLAN connection Using encryption reduces the risk of others accessing your data Note Using WLAN may be restricted in some countries For example in France you are only allowed to use WLAN indoors For more information contact your local authorities Connect to a WLAN at home To help save data costs connect to your home WLAN when you are at home and want to browse the web ...

Страница 97: ...ctivity Bluetooth With Bluetooth connectivity you can make a wireless connection to other compatible devices such as mobile devices computers headsets and car kits You can use the connection to send items from your device transfer files from your compatible PC and print files with a compatible printer Since devices with Bluetooth wireless technology communicate using radio waves they do not need t...

Страница 98: ...le devices and to your computer You can have several Bluetooth connections active at a time For example if you are connected to a compatible headset you can also send files to another compatible device at the same time 1 Select and hold the item for example a picture From the pop up menu select Send Via Bluetooth 2 Select the device to connect to If the desired device is not displayed to search fo...

Страница 99: ...mote SIM mode Press the power key and select Exit remote SIM mode Protect your device When Bluetooth is activated in your device you can control who can find and connect to your device Select Menu Settings and Connectivity Bluetooth Prevent others from detecting your device Select My phone s visibility Hidden When your device is hidden others cannot detect it However paired devices can still conne...

Страница 100: ...cognised as a USB flash memory You can also connect your device to other devices such as a home or car stereo to which you can connect a USB drive While connected to a computer in this mode you may not be able to use some of the device applications The memory card and mass memory in your device cannot be accessed by the other device Media transfer Connect your device to a compatible computer that ...

Страница 101: ...ttings and Connectivity Connection manager Select and hold the connection and from the pop up menu select Disconnect In the active data connections view you can see your current network connections indicates a packet data connection and indicates a wireless local area network WLAN connection View details for a connection Select and hold the connection and from the pop up menu select Details Detail...

Страница 102: ...point to use to connect to the remote drive select Access point User defined If you select Always ask you are prompted for the destination or access point every time the application connects to the network 5 Enter your user name and password if required by the remote drive service Modify the settings of an existing remote drive Select Remote drives and the desired drive Use the File manager applic...

Страница 103: ...r device software or applications the instructions in the user guide may no longer be up to date Update device software and applications using your device You can check if there are updates available for your device software or for individual applications and then download and install them to your device network service You can also set your device to automatically check for updates and notify you...

Страница 104: ...en files on your device View the files stored in your device Select Menu Applications Office File mgr and the desired memory The folders on the root of the memory are displayed Organise files You can use the File manager application to delete move copy or create new files and folders If you organise your files into their own folders it might help you find the files in future Select Menu Applicatio...

Страница 105: ...ice File mgr 2 Select and hold the mass memory and from the pop up menu select Format Do not format the mass memory using PC software because it may cause degraded performance You can use Nokia Ovi Suite to back up data to a compatible computer Digital rights management DRM technologies may prevent some backup data from being restored For more information about DRM used for your content contact yo...

Страница 106: ...the wgz file extension Only install applications that are compatible with your device Remove an application from your device You can remove installed applications that you no longer need or use to increase the amount of available memory Select Menu Settings and Application manager 1 Select Installed apps 2 Select and hold the application to remove and from the pop up menu select Uninstall If you r...

Страница 107: ...the server Synchronise content between your device and a remote server Would you like to have your calendar notes and other content backed up and at hand whether you are sitting by your computer or on the go with your mobile device With the Sync application you can synchronise the important content between your device and a remote server Select Menu Settings and Connectivity Data transfer Sync You...

Страница 108: ...backed up on Ovi With the Ovi Sync application you can synchronise the content between your device and Ovi manually or automatically Select Menu Applications Tools Ovi sync When you open the application for the first time the synchronisation wizard helps you define the settings and select the content to synchronise Define the content to synchronise Select Options Sync settings Items to synchronise...

Страница 109: ...vice to lock itself automatically when you re not using it 1 Select Menu Settings and Phone Phone management Security settings Phone and SIM card 2 Select Lock code and enter a lock code A minimum of 4 characters is required and numbers symbols and upper and lower case letters can be used Keep the lock code secret and in a safe place separate from your device If you forget the lock code and your d...

Страница 110: ...he lock code Find more help Support When you want to learn more about how to use your product or you are unsure how your device should function go to www nokia com support or using a mobile device nokia mobi support You can also select Menu Applications User guide in your device If this does not resolve your issue do one of the following Reboot your device Press and hold for about 8 seconds The de...

Страница 111: ...gainst unauthorised use You can create and change the code and set the device to request the code Keep the new code secret and in a safe place separate from your device If you forget the code and your device is locked your device will require service Additional charges may apply and all the personal data in your device may be deleted For more information contact a Nokia Care Point or your device d...

Страница 112: ...a Ovi Suite to save messages to a compatible computer A contact appears twice in the contacts list Q I have a contact twice in my contacts list How can I remove the extra contact A You can merge two contacts into one Select Options Merge contacts select the contacts to merge and select Merge Unreadable characters while browsing the web If unreadable characters are displayed select Menu Web and Opt...

Страница 113: ...isture can form inside the device and damage electronic circuits Do not attempt to open the device other than as instructed in the user guide Unauthorised modifications may damage the device and violate regulations governing radio devices Do not drop knock or shake the device Rough handling can break internal circuit boards and mechanics Only use a soft clean dry cloth to clean the surface of the ...

Страница 114: ... You may also lose the licences and the content if the files on your device get corrupted Losing the licences or the content may limit your ability to use the same content on your device again For more information contact your service provider Some licences may be connected to a specific SIM card and the protected content can be accessed only if the SIM card is inserted in the device Batteries and...

Страница 115: ...elect Call 5 Enter the official emergency number for your present location 6 Select 7 Give the necessary information as accurately as possible Do not end the call until given permission to do so Important Activate both cellular and internet calls if your device supports internet calls The device may attempt to make emergency calls both through cellular networks and through your internet call servi...

Страница 116: ... exposure guidelines in the normal use position at the ear or at least 1 5 centimetres 5 8 inch away from the body Any carry case belt clip or holder for body worn operation should not contain metal and should position the device the above stated distance from your body To send data files or messages requires a quality connection to the network Data files or messages may be delayed until such a co...

Страница 117: ...e below the maximum value because the device is designed to use only the power required to reach the network That amount changes depending on a number of factors such as how close you are to a network base station The highest SAR value under the ICNIRP guidelines for use of the device at the ear is 1 02 W kg Use of device accessories may result in different SAR values SAR values may vary depending...

Страница 118: ...e limit any representations warranties damages and liabilities of Nokia s licensors The availability of products features applications and services may vary by region For more information contact your Nokia dealer or your service provider This device may contain commodities technology or software subject to export laws and regulations from the US and other countries Diversion contrary to law is pr...

Страница 119: ...ing 44 45 video calls 38 Camera 62 location information 62 recording videos 64 sending pictures 64 taking pictures 62 63 64 charging the battery 13 14 clock 89 90 connectivity 101 connectors 67 contacts 47 50 adding 47 copying 17 108 editing 47 favourites 48 groups 49 50 in social networks 60 61 ringing tones 49 saving 47 48 searching 37 sending 49 98 synchronising 50 107 troubleshooting 112 widge...

Страница 120: ...pad 27 keys and parts 7 8 9 L language settings 53 licences 73 local events and services 58 location information 61 62 lock code 109 110 locking device 109 keys 9 remotely 110 screen 9 Log 43 loudspeaker 9 M mail 21 54 attachments 56 creating 56 mailbox 55 reading and replying to 55 sending 56 setup 55 widgets 56 mailbox voice 44 Maps 76 browsing 77 changing views 78 compass 79 display elements 78...

Страница 121: ... office applications 93 offline profile 31 Ovi account See Nokia account Ovi by Nokia 17 20 50 Ovi Mail 21 Ovi Maps 21 Ovi Music 21 Ovi services 17 Ovi Store 21 Ovi Suite 19 Ovi Sync 108 P personalising your device 33 34 35 36 Phone switch 17 108 phonebook See contacts Photo editor 66 photographs See pictures pictures copying 17 99 108 editing 66 HDMI 67 location information 62 printing 67 sending...

Страница 122: ...speakerphone 9 speed dialling 41 status updates 60 61 support 19 110 switching device on off 16 111 synchronisation 50 107 108 T taking pictures See Camera tasks 91 text input 26 27 28 text messages 51 themes 34 time and date 90 tones personalising 33 touch screen 9 22 26 27 transferring content 17 69 72 99 108 troubleshooting 112 turning device on off 16 111 TV watching programmes 69 U updates ap...

Страница 123: ...ce commands 41 volume control 9 W wallpaper 35 web See Internet web browser 56 112 web connection 95 web feeds 57 widgets 36 56 69 WLAN wireless local area network 96 97 world clock 90 wrist strap 16 Z Zip manager 95 Index 123 ...

Отзывы: