background image


24 

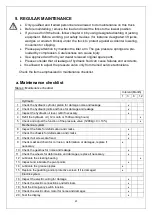
21  Check if correct fuses are used, if necessary replace. 


22  Test the audio warning signal 


23  Check the contactors   


24  Check the frame leakage (insulation test) 


25  Check function and wear of the accelerator 


26  Check the electrical system of the drive motor 


b. Lubricating points


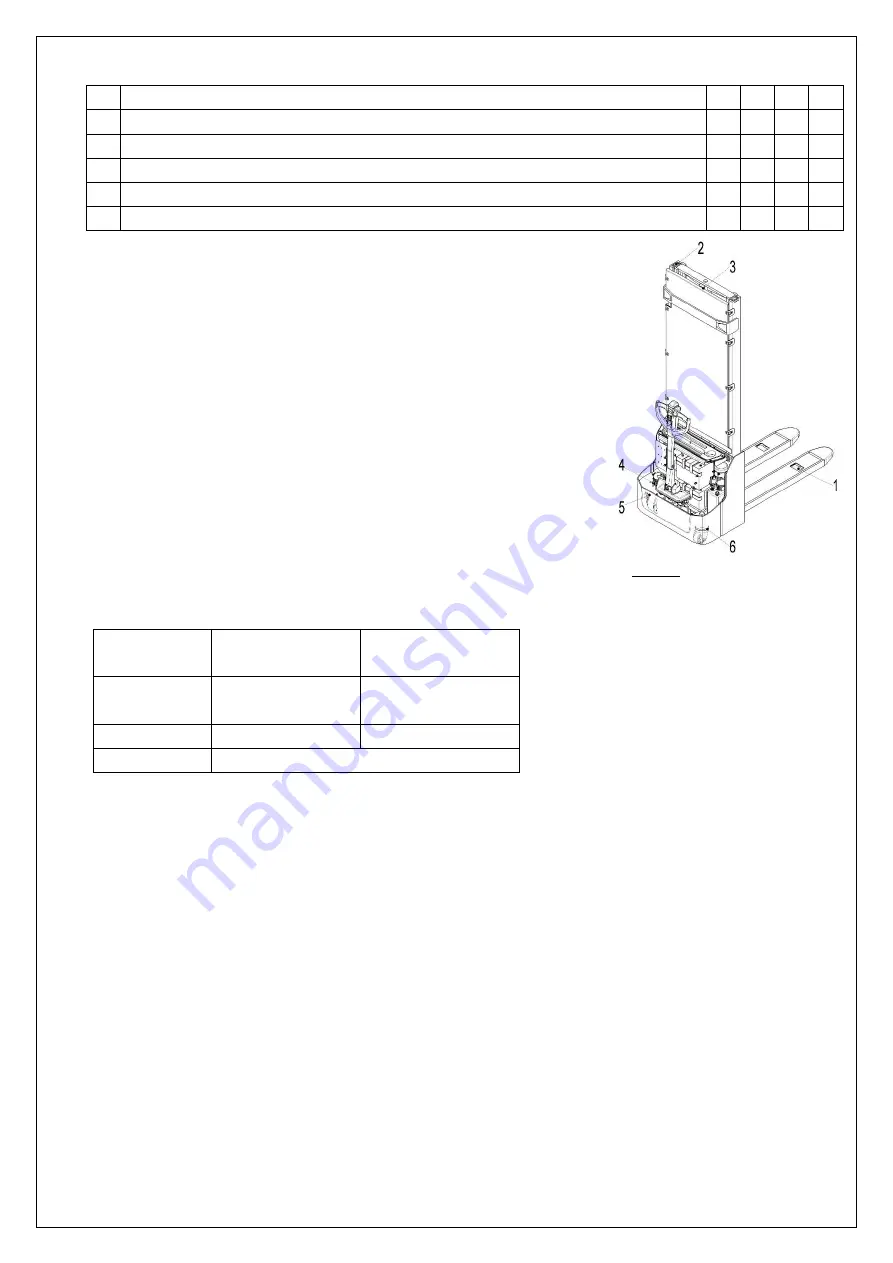
Lubricate the marked points according to the maintenance checklist. The 
required grease specification is: DIN 51825, standard grease. 


c. Check and refill hydraulic oil 

It is recommended to use hydraulic oil in connection with average temperature:


Environment 
temperature


–5

~25


>25


Type


HVLP 32


DIN 51524 

  HLP 46


DIN 51524 

Viscosity


28.8-35.2 

41.4 - 47 

Amount


5L (depends on specific model) 

 
Waste material like oil, used batteries or other must be probably disposed and recycled according to the 
national regulations and if necessary brought to a recycling company. 
The oil level in the oil tank should be between min and max marks with fully lowered forks. 
If necessary add oil at the filling point. 
 

Load roller bearing 

Mast   

Chain   

Steering bearing   

Gear box 

Steering roller bearing 


Fig. 14: Lubricating points 


Содержание PSE12BD

Страница 1: ...ctric truck before reading and understanding these operating instructions NOTE Please check the designation of your present type at the last page of this document as well as on the ID plate Keep for future reference INSTRUCTION HANDBOOK Electric Stackers PSE12BD PSE12ND ...

Страница 2: ...such as batteries oil and electronics will have a negative effect on the environment or health if handled incorrectly The waste packages should be sorted and put into solid dustbins according to the materials and be collected disposal by local special environment protection bureau To avoid pollution it s forbidden to throw away the wastes randomly To avoid leaking during the use of the products th...

Страница 3: ...Lifting 15 d Lowering 15 e Travelling 16 f Steering 17 g Braking 17 h Malfunctions 17 i Emergency 17 7 PIN CODE PANEL 18 a Introduction 18 b Main parameters 18 c Main functions 18 8 BATTERY CHARGING AND REPLACEMENT 19 a Safety Instructions lithium battery 19 b Matters requiring attention lithium battery 20 c Replacement 21 d Battery Indicator 21 e Charging 22 9 REGULAR MAINTENANCE 23 a Maintenance...

Страница 4: ...ngs and safety instructions Operating lighting must be minimum 50 Lux Modification No modifications or alterations to this stacker which may affect for example capacity stability or safety requirements of the truck shall be made without the prior written approval of the original truck manufacturer its authorized representative or a successor thereof This includes changes affecting for example brak...

Страница 5: ... 4 Chassis 5 Driving wheel assembly 6 Protective cover tiller 7 Steering roller assembly 8 Cover 9 Cover 10 Main cover 11 Cover 12 Cover 13 Protective board 14 Buckle 15 Protective board 16 Belly button 17 Tiller 18 Pin code panel 19 LCD 20 Emergency button 21 Spring cord 22 Charging LED 23 Panel 24 USB port PSE12ND 25 Button switch PSE12ND ...

Страница 6: ...6 b Main technical data Fig 2 Technical data ...

Страница 7: ...Additional wheels dimensions x w mm Φ100 x 50 3 5 Wheels number front rear x driven wheels 1x 1 2 3 6 Track front b10 mm 550 3 7 Track rear b11 mm 400 515 Dimensions 4 2 Lowered mast height h1 mm 2320 4 3 Free Lift height h2 mm 4 4 Lift height h3 mm 3514 4 5 Extended mast height h4 mm 4077 4 6 Initial lift h5 mm 120 4 9 Height of tiller in drive position min max h14 mm 710 1150 4 15 Height lowered...

Страница 8: ...e stage mast 1970 1514 1514 1970 2370 1914 1914 2370 Two stage mast 1970 2814 3377 2120 3114 3677 2320 3514 4077 c Description of the safety devices and warning labels Europe and other except USA A Crane hook label B Warning decal Do not step under or on the forks C Residual lift capacity sticker D Never reach through E Identification plate ID plate F Sticker to read and follow these instructions ...

Страница 9: ...ls if they are damaged or missing d Identification plate 1 Designation type 2 Serial number 3 Rated capacity in kg 4 Supply voltage in V 5 Own mass self weight in kg without battery 6 Name and address of manufacturer 7 Battery weight minimum maximum 8 Nominal power in kW 9 Load center distance 10 Manufacturing date 11 Option Fig 4 Identification plate 1 2 4 5 3 7 If sold to the EU here the place o...

Страница 10: ...ortation of load is safe Do not operate the truck with removed covers or the apron Watch difference in floor levels when driving Load could fall down or the truck could get uncontrollable Keep watching the condition of load Stop operating the truck if load becomes unstable Brake the truck and activate the emergency button 20 by pushing when sliding load on or off the truck If the truck has any mal...

Страница 11: ...ry is charged follow chapter 8 Do the work according to the daily inspections as well as functional checks b Lifting transportation For transporting remove the load lower the forks to the lowest position and fix the truck safe with dedicated lifting gear according to the following figures Lifting USE DEDICATED CRANE AND LIFTING EQUIPMENT DO NOT STAND UNDER THE SWAYING LOAD DO NOT WALK INTO THE HAZ...

Страница 12: ...orting truck c Decommissioning For storage remove the load lower the truck to the lowest position grease all in this handbook mentioned greasing points regular inspection and eventually protect the truck against corrosion and dust Remove the batteries and jack the truck safely so that there will be no flattening after storage For final decommissioning hand the truck to a designated recycling compa...

Страница 13: ...driving buttons release of driving buttons and of the safety belly button section 6g Check the function of driving with tiller in its vertical position section 6e Check the function of the emergency brake by activating the emergency button Check the lifting and lowering functions by operating the buttons section 6c and 6d Check the function of steering by turning the tiller from one end position t...

Страница 14: ...he button switch and a green light will appear on the switch Fig 8 type the password on pin code panel and press button to start the truck Truck can also be activated with RFID access card Press the horn button Fig 7 27 to activate the audible warning signal a Parking DO NOT PARK THE TRUCK ON INCLINED SURFACES The truck is equipped with an electromagnetic failsafe stopping and parking brake PSE12B...

Страница 15: ...th the lowered forks fully underneath the pallet and press the lifting button Fig 7 31 until you reached the desired lifting height This truck can be used as pallet truck and stacker When press the fork lift button Fig 7 31 the fork and pallet lift together the maximum lift height is 120 mm maximum load is 1200 kg When the fork lifts to the height within 120 mm press the pallet lift button Fig 7 2...

Страница 16: ... be engaged Drive carefully the truck to the destination Watch the route conditions and adjust the travelling speed with the accelerator button Press turtle button Fig 7 30 to enter into slow speed mode travel slowly by moving the accelerator button Fig 7 26 press turtle button again to return back to regular mode Press turtle button and hold for 2 seconds to activate driving function with tiller ...

Страница 17: ...the braking zones B If the tiller is released the tiller moves automatically up to the upper baking zone B The truck brakes until it stops The safety belly button 16 prevents the operator from being crushed If this button is activated the truck decelerates and or starts traveling into the backwards direction Bw for a short distance and stops Please consider that this button also operates if the tr...

Страница 18: ...can be operated only when correct password is typed or valid ID card is used There are two passwords of pin code panel one is the default user password 1234 and you can use it immediately The other one is the administrator password 3232 with this you can set a new user password according to the following steps Type 3232 click Type previous user password click Type new password and click previous p...

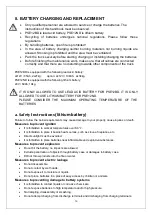
Страница 19: ... LITHIUM BATTERY FOR PSE12ND PLEASE CONSIDER THE MAXIMUM OPERATING TEMPERATURE OF THE BATTERIES a Safety Instructions lithium battery Failure to follow the below requirements may cause damage to your property cause injuries or death Measures to prevent ignition It is forbidden to work at temperatures over 60 It is forbidden to place it beside heat sources such as stoves fireplaces etc Direct sunli...

Страница 20: ...ies may be blocked by Battery Management System if temperature of cells inside the battery case is lower than 5 Make sure the own temperature of battery is above this value and the temperature of the battery is even Batteries are forbidden to charge at low temperatures but they can be used in occasional low temperature environment please refer to normal working conditions allowed for the truck but...

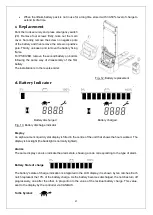
Страница 21: ...play An alpha numeric liquid crystal display is fitted in the centre of the unit that shows the hours worked The display is backlight the backlight is normally lighted Alarms The same display can also indicate the alarm state showing a code corresponding to the type of alarm Battery State of charge The battery s state of charge indication is integrated in the LCD display it is shown by ten notches...

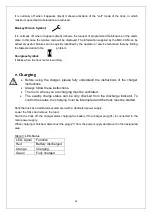
Страница 22: ...ging Before using the charger please fully understand the instructions of the charger instructions Always follow these instructions The room where you are charging must be ventilated The exactly charge status can be only checked from the discharge indicator To control the status the charging must be interrupted and the truck must be started Park the truck at a dedicated secured area with a dedicat...

Страница 23: ...e 4 Maintenance checklist Interval Month 1 3 6 12 Hydraulic 1 Check the hydraulic cylinder piston for damage noise and leakage 2 Check the hydraulic joints and hose for damage and leakage 3 Inspect the hydraulic oil level refill if necessary 4 Refill the hydraulic oil 12 month or 1500 working hours 5 Check and adjust the function of the pressure valve 1200kg 0 10 Mechanical system 6 Inspect the fo...

Страница 24: ... It is recommended to use hydraulic oil in connection with average temperature Environment temperature 5 25 25 Type HVLP 32 DIN 51524 HLP 46 DIN 51524 Viscosity 28 8 35 2 41 4 47 Amount 5L depends on specific model Waste material like oil used batteries or other must be probably disposed and recycled according to the national regulations and if necessary brought to a recycling company The oil leve...

Страница 25: ...ng clamps carefully For reattaching place the screen to its correct position and place holding clamps back to their original position If you need to replace parts please call your service partner Please make sure that the screen is fixed correctly and that the fixing elements are not damaged Table 5 Size of the fuses Rate FU01 150A FU02 60A FU1 10A FU2 PSE12ND 1 5A Fig 15 Location of fuses ...

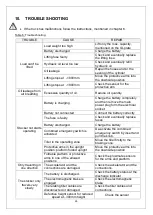
Страница 26: ...ect the battery correctly The fuse is faulty Check and eventually replace fuses Battery discharged Charge the battery Combined emergency switch is activated De activate the combined emergency switch by insert and pull the knob Tiller in the operating zone Move the tiller firstly to the braking zone Protective arms in the upright position platform folded upright Move the protective arms into the do...

Страница 27: ...s up suddenly The controller is damaged Replace the controller The accelerator not moves back to its neutral position Repair or replace the accelerator If the truck has malfunctions and can t be operated out of the working zone jack the truck up and go with a load handler under the truck and safe the truck securely Then move the truck out of the aisle ...

Страница 28: ...28 11 WIRING CIRCUIT DIAGRAM a Electrical circuit diagram Fig 16 Electrical diagram manual steering PSE12BD FU1 60 A FU2 150 A FU01 10 A FU1 10 A FU2 6 A FU01 150 A FU02 60 A ...

Страница 29: ...29 Fig 17 Electrical diagram manual steering PSE12ND FU1 10 A FU2 6 A FU3 1 5 A FU01 150 A FU02 60 A ...

Страница 30: ...witch 2 USB Charger FU2 Fuse 6A SB3 Button switch 3 YB Brake FU3 Fuse 1 5A SC Sensor of speed reduction on curve YV2 Lowering valve GB battery SH1 Height detection switch 1 YV3 Fork valve HA Horn SH2 Height detection switch 2 YV4 Mast valve b Hydraulic circuit Code Item Code Item A Hydraulic power unit F1 Cylinder Mast B Check valve F2 Cylinder Chassis C Electromagnetic valve G Safety valve D Over...

Страница 31: ...нетична съвместимост включително с техните промени както и на съответния указ за прилагане на нормативите в националното право Подписаните при това са упълномощении поотделно да съставят техническата документация CZ EG PROHLÁŠENÍ OSHODĚ Nížepodepsaný tímtopotvrzuje žepodrobný popisuvedené strojeodpovídáEvropskýmsměrnicím 2006 42 EC směrniceprostroje a 2014 30 EU elektromagnetická interference EMV ...

Страница 32: ...ektivi 2006 42 EC Direktiva o strojih in 2014 30 EU Elektromagnetna skladnost EMV vključno z njihovimi spremembami ter ustrezno pravno uredbo o prevzemu smernic v nacionalno pravo Podpisniki so vsakokrat posamezno pooblaščeni za izdajanje tehnične dokumentacije TR AB Uygunluk Açıklaması İmza sahibi şahıslar ayrıntıları belirtilen makine aracının 2006 42 EC Makine Yönergesi ve 2014 30 EU Elektroman...

Отзывы: