background image

9

2.6 ADJUSTING THE BRAKES

The length of the main brake lines is adjusted at the factory according to 
the length established during the certification procedure (see technical 
data). However, it can be changed to adapt to the pilot’s own flying 
style. In any case, we recommend flying for a while using the default 
line length factory settings before making any adjustment. It will enable 
you to become more familiar with the ROLLER and its unique flying 
characteristics. If you then decide to change the length of the brake lines, 
untie the knot, slide the line through the brake link to the desired length, 
and strongly re-tie the knot.
Only qualified personnel should carry out this adjustment. You must 
ensure that the modification does not slow the glider down without pilot 
input. Both brake lines should be symmetrical and of the same length. 
We recommend using a clove hitch or bowline knot.

When changing the brake length, it is necessary to check that they do 
not engage when the accelerator is used. When accelerated using the 
speed-bar, the glider rotates over the ‘C’ risers and the trailing edge 
rises. The brake lines should be checked for proper adjustment, while 
taking this extra length into consideration.

2.7 ADJUSTING THE TRIMMERS

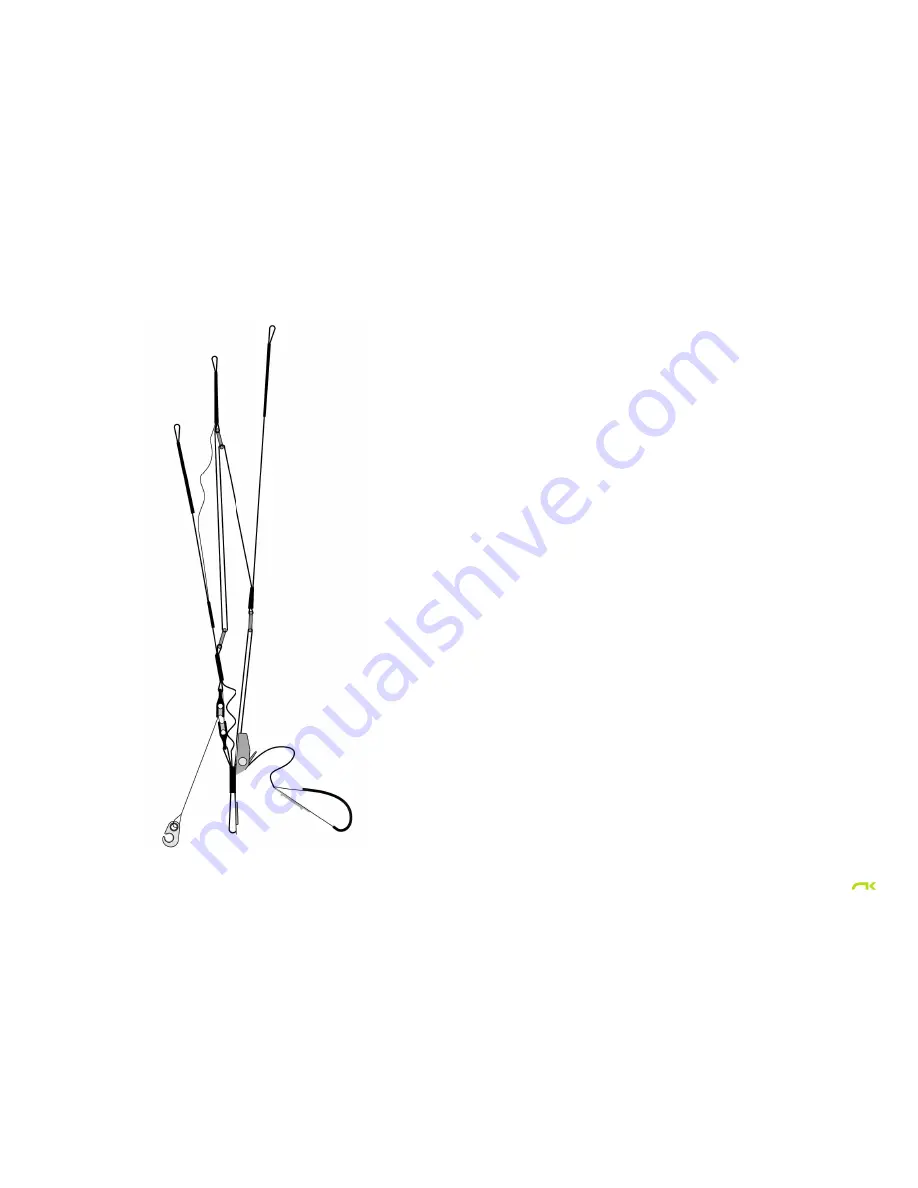
The trimmers are installed in the factory and the pilot only needs to check 
their proper operation and adjustment.

The ROLLER has three risers. The trimmers are situated on the C-riser 
and have a maximum travel of 10 cm.
The use of the trimmers results in changes to the speed and reactions of 
the wing.

The pilot is responsible for the trimmer setting.

The trimmer setting and symmetry must be constantly checked during 

Содержание ROLLER

Страница 1: ...USER S MANUAL ROLLER...

Страница 2: ...a high degree of safety and user friendliness This is the user manual and we recommend you read it carefully The NIVIUK Team USER S MANUAL NIVIUK GLIDERS ROLLER This manual provides you with the neces...

Страница 3: ...CHECK LIST 11 3 5 WING INFLATION CONTROL AND TAKE OFF 11 3 6 LANDING 12 3 7 FOLDING INSTRUCTIONS 12 4 IN FLIGHT 12 4 1 FLYING IN TURBULENCE 12 4 2 POSSIBLE CONFIGURATIONS 13 4 3 ACCELERATED FLIGHT 15...

Страница 4: ...n commencing speedflying The ROLLER is a wing designed for a large target group of pilots in order to enjoy the experience of speed 1 2 CERTIFICATION The ROLLER has been submitted for the European EN...

Страница 5: ...ase note The term speedflying implies that together with the experience and skill required to fly a glider of this type the pilot should fly actively and be able to anticipate the wing s reactions to...

Страница 6: ...rom Olivier Nef s computer to fabric cutting the operation does not allow for even a millimetre of error The cutting of each wing component is performed by a rigorous extremely meticulous automated co...

Страница 7: ...ce oriented in the direction of inflation Check the condition of the fabric and the lines for defects Pay attention to the maillons connecting the lines to the risers to make sure they are fully close...

Страница 8: ...ect them to the speed system cords on the A risers The length of the speed bar travel must be adjusted depending on the height of the individual pilot We recommend testing the complete system when han...

Страница 9: ...does not slow the glider down without pilot input Both brake lines should be symmetrical and of the same length We recommend using a clove hitch or bowline knot When changing the brake length it is n...

Страница 10: ...ange the position Engaging and releasing the trimmers is effective and quick as well as sensitive and accurate When the trimmer is in the neutral position the wing will fly at a lower speed with great...

Страница 11: ...he wing harness helmet and any other equipment Given that the ROLLER can fly in a wide range of conditions it is essential to assess the conditions and terrain before every flight The conditions must...

Страница 12: ...ground will not be necessary 3 7 FOLDING INSTRUCTIONS The ROLLER has a complex leading edge manufactured using a variety of different materials and it must be packed carefully A correct folding method...

Страница 13: ...is information is crucial to know how to react during these manoeuvres in real flight so you can deal with these situations as safely as possible Asymmetric collapse In spite of the ROLLER s profile s...

Страница 14: ...aintain brake pressure until the glider has returned to its default overhead flying position To resume normal flight conditions progressively and symmetrically release the brake line tension to regain...

Страница 15: ...to avoid knots and tangles is to thoroughly inspect the lines as part of a systematic pre flight check If a knot is spotted during the take off phase immediately abort the launch sequence and stop If...

Страница 16: ...remember that the wing will stop flying will lose all forward horizontal speed and its reactions will change significantly when compared to normal flight configuration 5 3 SPIRAL DIVE This is a more e...

Страница 17: ...r R D team Careful maintenance of your equipment will ensure continued top performance Apart from the general checks we recommend actively maintaining your equipment A pre flight check is obligatory b...

Страница 18: ...for any damage caused by incorrect repairs 8 SAFETY AND RESPONSIBILITY Please remember that speedflying is considered a risk sport where safety depends on the person who is practicing it Wrong use of...

Страница 19: ...6 FLATTENING 12 12 12 12 CORD MAXIMUM m 2 17 2 32 2 46 2 59 MINIMUM m 0 72 0 77 0 81 0 86 AVERAGE m 1 80 1 93 2 05 2 16 LINES TOTAL METERS m 180 4 193 5 205 8 217 5 HEIGHT m 4 88 5 23 5 54 5 84 NUMBE...

Страница 20: ...AMAN GERMANY SUSPENSION LINES FABRIC CODE SUPPLIER UPPER CASCADES DC 60 LIROS GMHB GERMANY MIDDLE CASCADES DC 60 LIROS GMHB GERMANY MIDDLE CASCADES PPSL 120 LIROS GMHB GERMANY MIDDLE CASCADES TNL 140...

Страница 21: ...21 10 3 RISERS LAYOUT...

Страница 22: ...b2 b3 b4 b5 b6 b7 b8 b9 b10 b11 b12 b13 b14 c1 c2 c3 c4 c5 c6 c7 c8 c9 c10 c11 c12 c13 c14 d1 d2 d3 d4 br1 br2 br3 br4 br5 br8 br6 br7 2A1 2A2 2A3 2A4 3A1 3A2 2stab1 2 s ta b 2 stab 2B1 2B2 3B1 2B3 2...

Страница 23: ...4094 4149 14 4091 4082 4161 RISERS LENGTH m m A B C 480 480 480 STANDARD 480 507 580 TRIMMER OPENED 390 445 580 ACCELERATED LINES HEIGHT m m A B C D br 1 4761 4684 4801 4762 5517 2 4694 4617 4706 473...

Страница 24: ...4727 4789 14 4723 4713 4801 RISERS LENGTH m m A B C 480 480 480 STANDARD 480 507 580 TRIMMER OPENED 390 445 580 ACCELERATED LINES HEIGHT m m A B C D br 1 5378 5294 5435 5397 6229 2 5305 5221 5331 537...

Страница 25: ...The importance of small details niviuk com...

Отзывы: