Nipponia Miro-II 125 Euro IV Скачать руководство пользователя страница 48


47 

SERVICE SCHEDULE 


*

Please refer to the owner’s manual 

for the maintenance schedule of your vehicle 


VIN:………………………………………………………………………….


Содержание Miro-II 125 Euro IV

Страница 1: ...Owner s manual Miro II 125 Nipponia S A...

Страница 2: ...llow these instructions may result in damage to your scooter or minor injury WARNING Important information or instructions Failure to follow these instructions may result in heavy damage to your scoot...

Страница 3: ...11 Left Right turning signal indicator 11 EFI trouble indicator 11 Fuel gauge 12 Oil pressure indicator 12 High beam indicator 12 Odometer 12 Speedometer 12 Controls 12 Main Ignition switch 12 Steerin...

Страница 4: ...pection 32 Rear brake inspection 33 Rear brake lining 34 Battery 34 Battery removal 35 Electric fuse 36 Headlight beam adjustment 36 Care and Storage Guide 37 Long term storage 37 Use after storage 37...

Страница 5: ...n for many accidents Driving speed must not exceed the limit specified by traffic regulations and allowed by road conditions Always signal when turning or changing lanes in order to attract the attent...

Страница 6: ...affect its performance and safety and or render it illegal for use Observe applicable laws and all national and local regulations concerning vehicle equipment Additionally such modifications will can...

Страница 7: ...kg Accessories When installing accessories not approved by Nipponia attention should be paid to the following points 1 The installation of the accessories must not affect the suspension travel the lig...

Страница 8: ...e Vehicle identification number VIN 3 is located on the main front bar of the scooter frame and is covered by the VIN cap You can write your scooter s identification numbers here Vehicle identificatio...

Страница 9: ...8 VEHICLE DESCRIPTION Left view 1 Combined brake lever 2 Helmet hook 3 Pillion step 4 Seat lock 5 Kick starter 6 Air cleaner 7 Main stand 8 Side stand...

Страница 10: ...9 VEHICLE DESCRIPTION Right view 1 Rear carrier 2 Luggage box 3 Front brake lever 4 Right pillion footstep 5 Exhaust muffler...

Страница 11: ...ntrols 1 Horn button 2 Turn signal switch 3 Rear braking lever 4 Dimmer switch 5 Left rear view mirror 6 Instrument panel 7 Right rear view mirror 8 Front braking lever 9 Throttle grip 10 Light switch...

Страница 12: ...battery voltage is lower than 12V indicated by the red zone then the battery needs to be recharged at an authorised Nipponia service point Left Right turning signal indicator 2 This indicator flashes...

Страница 13: ...pressure indicator 7 This indicator lights when the main ignition switch is in position and turns off after the engine has run for approx 3 seconds Speedometer 8 This meter displays the current drivi...

Страница 14: ...key can be removed Steering lock To lock the steering turn the handlebars all the way to the left and insert the key in the main switch 1 Then press down and while pressing turn to LOCK position to lo...

Страница 15: ...he front or rear brake Then press the start button to start the engine Dimmer switch 1 This switch controls the headlight beam with the light switch in position High beam Low beam Turn signal switch 2...

Страница 16: ...first unlock it from the seat lock 1 turning the key 2 clockwise and then lift it up To close the seat lower it down and push the rear part of the seat until you hear a clicking sound This indicates...

Страница 17: ...ning the fuel tank cap clockwise Fuel Use only 90 97 octane unleaded petrol gasoline NOTE Be careful while washing your scooter as the storage compartment may get wet Do not keep valuable items in the...

Страница 18: ...flammable and may be explosive Always turn off the engine before refuelling Never smoke while refuelling and avoid sparks flames or any other source that could ignite the fuel Do not overfill the tan...

Страница 19: ...l level and refuel if necessary Inspect the fuel circuit for any fuel leakage Engine oil and gear oil Check the engine oil and the gear oil and refill to the specified level if necessary Inspect the s...

Страница 20: ...moothly and lubricate the joints if necessary Lights and instruments Inspect operation of the headlight rear light brake light turn signal lights horn and panel instruments If you need assistance on h...

Страница 21: ...little It may make the engine easier to start After long term inactivity periods it may be difficult to start the engine In such a case hold the start button a little more than usual and turn the thro...

Страница 22: ...e rear brake lever 3 Get on the scooter keeping at least one foot on the ground to support and prevent it from falling 4 Adjust the rear view mirrors 5 Before starting off turn on the indicator light...

Страница 23: ...speed Do not hold the brake levers while driving as it may cause abnormal wear to the brakes Also it will turn the brake light on affecting the drivers behind you WARNING Avoid braking while turning...

Страница 24: ...nt as it helps to prolong the life of the engine The break in period is the first 1000km During the period from 0 to 500km driving speed should not exceed 30km h while from 500 to 1000km it should not...

Страница 25: ...Cam chain A I Throttle valve I Fuel screen I R every 20 000km Fuel pump screen R every 48 000km Braking system pads fluid I I Fine filter element R R Driving belt I R Fasteners bolts screws nuts I I H...

Страница 26: ...ine oil level inspection The engine oil level must be checked daily before riding 1 Set the scooter on the centre stand on a level surface 2 Start the engine and run at idle for 2 to 3 minutes 3 Switc...

Страница 27: ...ug 2 at the right side of the crankcase The oil spring 4 will fall out 3 Depress the kick starter several times to drain the oil completely 4 Retrieve the oil screen 5 and clean it 5 Inspect the drain...

Страница 28: ...es Recommended oil type API GL 5 SAE 80W 90 Gear oil replacement 1 Set the scooter on the centre stand on a level surface 2 Remove the filling bolt 1 and the drain bolt 2 NOTE Used engine oil must be...

Страница 29: ...o prevent the gear oil from flowing out 7 For a new scooter replace the gear oil after the first 500 km After that replace every year or every 6000 km ATTENTION This work should only be done at an aut...

Страница 30: ...nded spark plug for standard use C7HSA NGK or A7RTC BAILIAN Spark plug inspection and replacement 1 Remove the seat the storage compartment and the cover under the seat 2 Remove the dirt around the sp...

Страница 31: ...n the tyres cause unsteady steering or even tyre blow out Note that tyre pressure is measured with cold tyres Note 1 bar 1 kgf cm2 100 kPa Driving with worn tyres is very dangerous The tyres must be r...

Страница 32: ...d out If the free play of the brake lever is excessive 2 3cm and the brake pad wear is within its specified limits air may be trapped in the braking system It must be expelled Take your scooter to an...

Страница 33: ...The brake fluid must be handled with care as it can damage the paint surfaces and plastic parts When refilling the brake fluid make sure the reservoir is set level otherwise fluid will spill out when...

Страница 34: ...s worn to the wear mark replace both pads If the thickness of brake disk is worn to its limit the disk must be replaced at once Rear brake inspection 1 Set the scooter on the main stand on a level sur...

Страница 35: ...eduled inspections of wear condition of brake lining must be carried out When pressure is applied to the lever the indicator 4 moves to the sign 2 on the brake drum Holding the lever tightly if the in...

Страница 36: ...film of Vaseline or grease 4 When installing the battery terminal bolts must be screwed tightly Battery removal 1 Remove the cover screw and open the battery case cover 2 Disconnect the negative cable...

Страница 37: ...stem or short circuiting Switch off the main switch turn to position in advance to avoid a short circuit when replacing and or inspecting a fuse Headlight beam adjustment To adjust the direction of th...

Страница 38: ...or preserving agent on coloured parts and grease on moving metal parts 5 Inflate tyres to specified pressure and then lift the scooter onto blocks to keep the wheels off the ground 6 Finally cover yo...

Страница 39: ...The plastic parts should be cleaned with a cloth or sponge using a neutral cleaning agent 2 After drying let the engine run at idle for several minutes 3 Before riding the brakes should be inspected...

Страница 40: ...herefore keep the fuel level higher than the pump port Pay attention to the fuel indicator level and always refill the tank when the level indicator reaches E 3 Throttle valve assembly The idling adju...

Страница 41: ...of major components used to determine the actual fuel quantity within cylinder as the fuel intensity may be affected by the variation of the fuel temperature The intake pressure sensor measures the p...

Страница 42: ...re even with the engine stopped pressurized fuel may remain in the fuel system Therefore any fuel hose replacement must be carried out by a qualified technician in a well ventilated area 5 The throttl...

Страница 43: ...sition 10 When performing an ignition test the injector connector should be disconnected to prevent starting difficulties caused by over rich fuel mixture within the cylinder or by allowing fuel mixtu...

Страница 44: ...high voltage cable works Low battery voltage is causing low fuel pressure and low winding discharge voltage Charge or replace battery Spark plug carbon deposits or wrong spark plug gaps Clean carbon d...

Страница 45: ...code display Faults store When a part fails the fault code in memory are stored in memory Troubleshooting After a problem is detected if it does not re occur when the system is turned on 3 times it i...

Страница 46: ...t the diagnostic instrument can be connected with the ECU enabling enabling communication between these two components Thus the fault codes can be read from the instrument Values of various sensors an...

Страница 47: ...10 Spark plug A7RTC Rear tyre 3 50 10 Spark plug gap 0 7 0 1 Climbing ability 22o Fuel tank capacity L 5 7 Braking distance m initial speed 30 km h 7 m Valve clearance IN EX mm 0 12 0 02 High low bea...

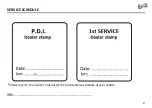
Страница 48: ...47 SERVICE SCHEDULE Please refer to the owner s manual for the maintenance schedule of your vehicle VIN...

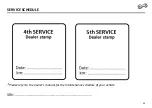
Страница 49: ...48 SERVICE SCHEDULE Please refer to the owner s manual for the maintenance schedule of your vehicle VIN...

Страница 50: ...49 SERVICE SCHEDULE Please refer to the owner s manual for the maintenance schedule of your vehicle VIN...

Отзывы: