Need Help?
877.716.8550
starlight.org/gaming/support
24
7.
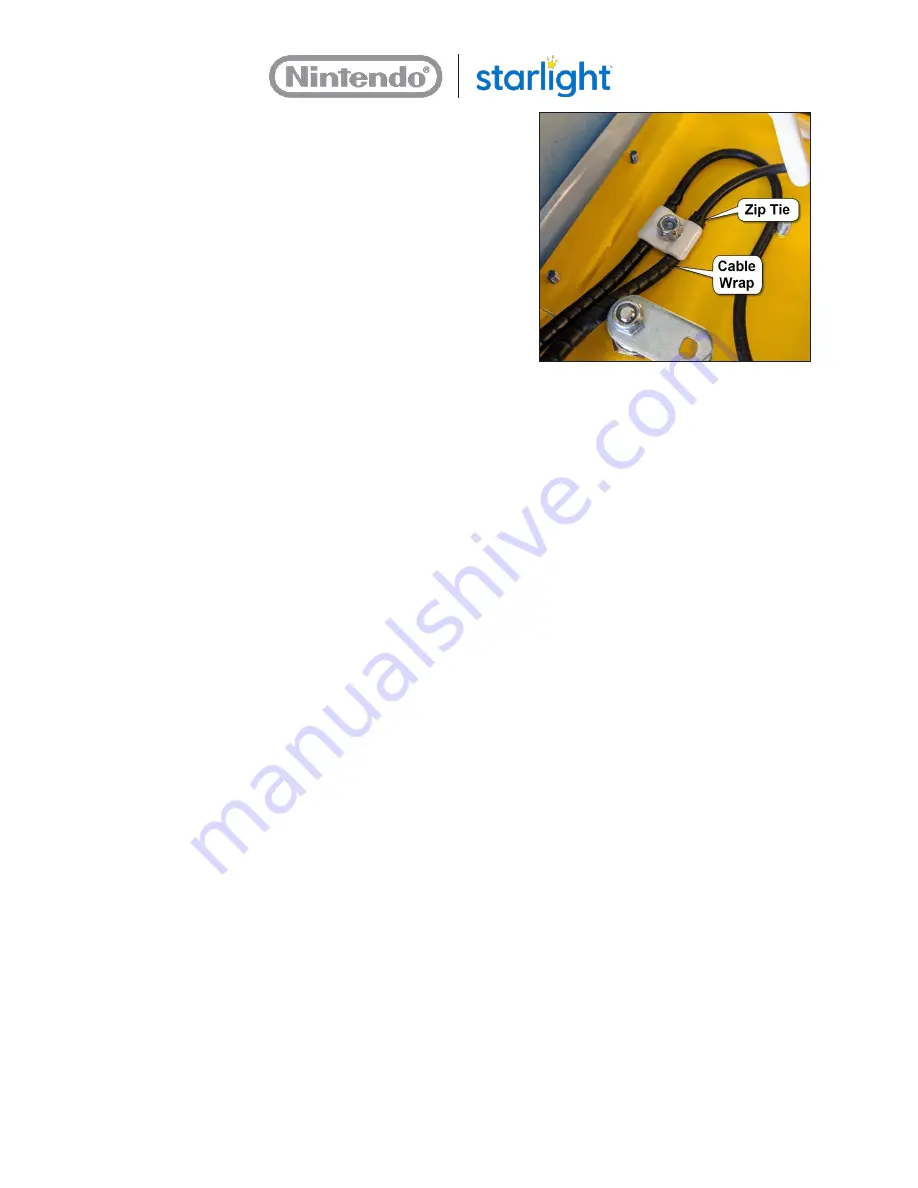
Install the new controller by inserting the
controller cable into the clamp so that the spiral
cable wrap is under the clamp and the zip tie
butts up against the back of the clamp.
8.
For Joy-Con Controllers: Use a 7/16” socket
driver to tighten the nut for the cable clamp just
until the cable is held in place, but loose enough
that you can twist the cable under the clamp.
9.
For Joy-Con Controllers: Hold the controller like
you are playing a game, take note if the cable is twisting the controller uncomfortably in
your hand. If the controller needs adjusting, twist the cable under the clamp until the
controller is comfortable to hold.
10.
Use a 7/16” socket driver to tighten the nut on the cable clamp until the cable is firmly
pinched, and tugging or twisting the cable does not move the cable under the clamp. Be
careful to not tighten it too much; it may damage the cable.
11.
Connect the controller USB connector to the dock.
12.
Install the console cover assembly back over the console and dock. Make sure to route any
cables so they do not get pinched between the cover assembly and the cabinet.
13.
Use a 7/16” socket driver to reinstall the two nuts that hold the console cover assembly in
place.
14.
Install the cabinet cover by inserting the back tabs of the cover into the slots in the back
side of the bottom cabinet, then lower into place.
15.
Use the key provided with the Gaming station to lock both locks on the underside of the
main cabinet.
16.
The controllers may need to be synced with the console.
•
Section 4.2, Syncing the Pro Controller
•
Section 4.3, Syncing the Joy-Con Controllers.
4.2
Sync the Pro Controller
The Pro Controller syncs to the console on its own when it is plugged into the dock via a USB
cable, just press the HOME Button to wake it up. If the Pro Controller does not sync on its
own, do the following:
1.
Make sure the Gaming station’s power cord is connected to a power outlet.


