6
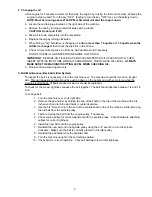
3. Changing the oil
a.Run engine for 5 minutes to warm oil, then stop the engine by closing the fuel service valve, allowing the
engine to stop by itself. Turn the key "OFF". (Failing to turn the key "OFF" may run the battery down.)
NOTE: Must be running above 2150 RPM or SmartAir
will shut the engine down.
b. Locate the oil drain pipe located on the right side of the machine.
c. Remove the cap by turning counterclockwise with a wrench.
CAUTION: Do not pull it off!
d. Allow oil to drain completely into the receptacle.
e.
Replace the cap by turning clockwise.
f.
When filling a "dry" burnisher or changing oil,
add no more than 1.5 quarts or 1.75 quarts when the
oil filter is changed,
then check the dip stick in the fill cap.
g.
Check oil level with dip stick in oil fill cap. Add additional oil if necessary.
DO NOT OVERFILL AND NEVER RUN ENGINE LOW ON OIL!
IMPORTANT:
REMOVE OIL FILLER CAP AND CLEAN DIPSTICK WITH CLEAN CLOTH, THEN
INSERT DIPSTICK INTO TUBE WITHOUT SCREWING IN. THEN CHECK OIL LEVEL.
ALWAYS
MAKE SURE THE MACHINE IS SITTING LEVEL WHEN CHECKING OIL.
h.
Replace fill cap. Hand tighten only.
To inspect the belt it is necessary to turn the machine over. The machine should be turned on its right
side. This can be easily accomplished by pushing down on the handle grip with some force while the
machine is tilted back. (If badly cracked or worn it should be replaced.)
To check for the proper tightness squeeze the belt together. The belt should depress between 1/4 and 1/2
inch.
To change belt:
1. Turn the machine over on its right side.
2. Remove the pad holder by holding the end of the shaft on the top of the machine with a 3/4
inch wrench and turn the pad holder counterclockwise.
3. Use the 3/4" wrench to turn the end of the spindle shaft on top of the machine while removing
the old belt from the spindle pulley.
4. Finish removing the belt from the engine pulley, if necessary.
5. Check engine pulley for correct alignment with the spindle pulley. Check hardware attaching
pulleys for correct tightness.
6. Install the new belt onto the engine pulley.
7. Reinstall the new belt onto the spindle pulley using the 3/4" wrench to turn the spindle
clockwise. Make sure the belt is correctly placed on the idler pulley.
8. Reinstall the padholder onto the spindle shaft.
9. Turn the machine upright in the burnishing position.
10. Check belt for correct operation. Check all hardware for correct tightness.
C. Belt Maintenance (Back-Side Idler System)
Содержание Kent 56010815
Страница 2: ......
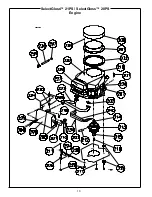
Страница 16: ...10 SelectGloss 21PS SelectGloss 28PS Engine ...
Страница 18: ...12 SelectGloss 21PS Deck Sub Assembly ...
Страница 20: ...14 SelectGloss 28PS Deck Sub Assembly ...
Страница 22: ...16 SelectGloss 21PS SelectGloss 28PS Handle ...


