1)
Grinding process
Prepare the following tools and items:
grinding disc holder, grinding disc
(usually the granularity is 300#. 500#.
2000#), window squeegee, wet vacuum
cleaner,
“
caution wet floor
”
caution
signage.
Attach the base grinding disc to the
grinding disc holder (first use the
grinding disc with smallest granularity
(the smaller the granularity number, the
coarser the disc)) and then fit it onto the
machine. Fill the tank with water.
Turn on the machine, put clean water on
the floor. Grind slowly and evenly.
Remove the water on the stone surface
using a window squeegee. Repeat the
procedure as required until there are no
marks on the floor.
Pick up the powder thoroughly using
wet/dry vacuum cleaner, and replace
the grinding disc with the next larger
granularity. Use the above directions,
and continue grinding until the result is
acceptable.
The floor MUST be cleaned thoroughly
before beginning the crystallization
process.
Caution
, Make sure there is no sand on
the floor. The grinding disc should be
installed uniformly. Be sure to grind
slowly and evenly with enough water.
You must completely remove the
powder from the last process before
beginning next process. Immediately
clean the floor with the vacuum cleaner,
replace the grinding disc from coarsely
granular to finely granular. You can
’
t
skip steps. There is coarse grind,
half-finishing grind and finishing grind,
During finishing grind, if you feel
resistance, you can reduce the quantity
of grinding.
2) Crystallization process.
Prepare the following tools and items:
pad driver. fiber pad (steel pad), dust
mop, K2 stone treatment, or K3 stone
shining plasm, or crystallization powder.
Fit the pad driver onto the machine,
then attach the fiber pad (steel pad).
Turn on the machine, grind and spray
K2 chemical simultaneously. Apply the
chemical on the floor uniformly, and
then spray K3 chemical. Rub to a high
gloss and enter the next area. If using
the crystallization powder, you can mix
the powder with water and then spray
this directly to the floor.
Caution
: It
’
s best if there is no wax
application on the floor. The floor MUST
be free of water and dirt. The color of
the pad is white (or colorless). Replace
pad if dirty.
Directions for the grinding and crystallization processes.
Содержание F18-150HD
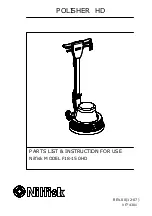
Страница 1: ...POLISHER HD REV 00 12 07 VF74301 PARTS LIST INSTRUCTION FOR USE Nilfisk MODEL F18 150HD...
Страница 6: ...PARTS LIST HANDLE GROUP FOR F18 150HD...
Страница 9: ...BASE GROUP FOR F18 150HD PARTS LIST...
Страница 12: ...1 l l l l l l l l 2 l 3 l l l l l l l 4 l 5 l l 1 2 3 1 2 3 4 5 6 7 1 2 3 4 5 6 7 8 9 10 11...
Страница 13: ...1 300 500 2000 6 2 K2 K3 K2 K3...


