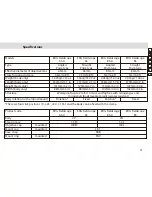
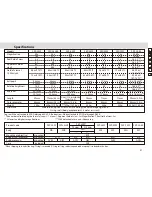


42
En
Fr
Es
Ru
Jp
De
It
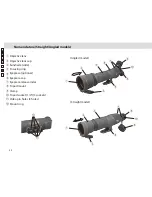
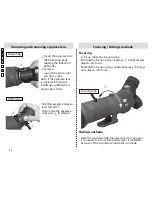
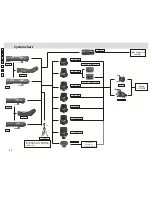
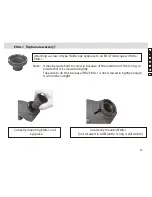
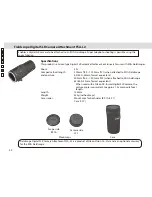
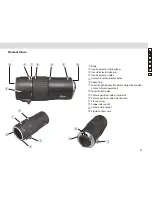
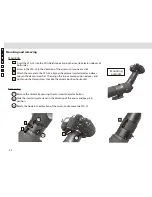
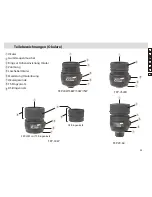
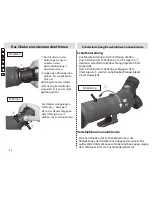
Mounting and removing
Mounting
Removing
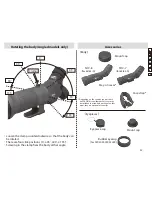
Mounting
example
Remove the camera by pressing the lens inserter/ejector button.
Slide the inserter/ejector lever in the direction of the arrow, and keep it in
position.
Rotate the body in the direction of the arrow, and remove the FSA-L2.
2
3
1
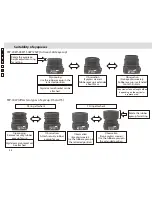
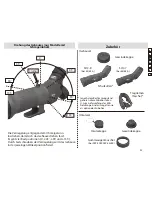
Insert the FSA-L2 into the EDG Fieldscope aligning the inserter/ejector indexes of
both sides.
Screw in the FSA-L2 in the direction of the arrow until you hear a click.
Attach the camera to the FSA-L2, alignng the camera inserter/ejector indexes.
Loosen the clamp screw first. Then align the two camera position indexes, and
tighten up the clamp screw to make the camera position horizontal.
2
1
3
4
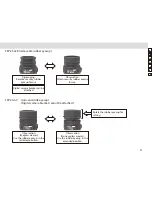
3
1
4
2
2
3
1
Содержание EDG 65
Страница 1: ...Jp Jp En De Fr Es It Ru ...
Страница 2: ......
Страница 3: ...3 ...
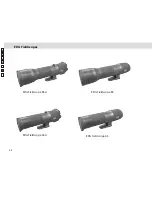
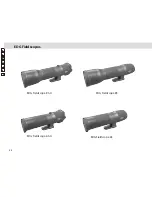
Страница 88: ...88 En Fr Es Ru Jp De It Catalejos EDG Catalejo EDG 85 A Catalejo EDG 85 Catalejo EDG 65 Catalejo EDG 65 A ...
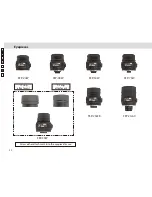
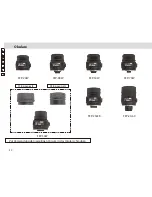
Страница 108: ...108 En Fr Es Ru Jp De It Fieldscope EDG EDG Fieldscope 85 A EDG Fieldscope 85 EDG Fieldscope 65 EDG Fieldscope 65 A ...
Страница 144: ...Printed in Japan 184K 86 1Y 3DE Printed in Japan 213K 1 06 1Y 3DE ...