100
Connecting to a Printer
Con
necting t
o
Televi
si
ons, Computers and
Pri
n
ters
6
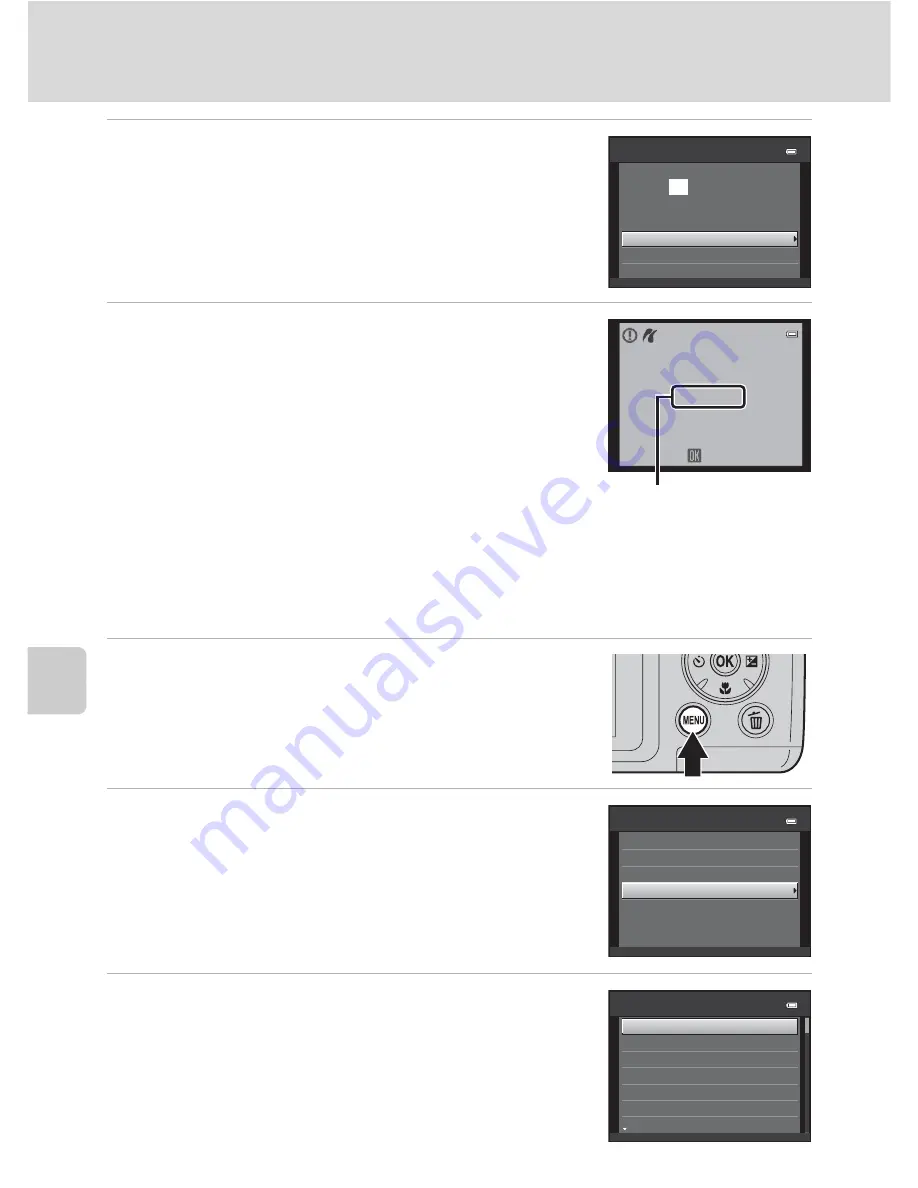
Choose
Start pri
n
t
and press the
k
button.
7
Printing starts.
Monitor display returns to that shown in step 1 when
printing is complete.
To cancel before all copies have been printed, press the
k
button.
Pri
n
ti
n
g Multiple Images
After connecting the camera to the printer correctly (
A
98), print images by
following the procedure below.
1
W
hen the
Pri
n
t selectio
n
screen is displayed,
press the
d
button.
The
Pri
n
t me
n
u
is displayed.
2
Use the multi selector to choose
Paper size
and press the
k
button.
Press the
d
button to exit the print menu.
3
Choose the desired paper size and press the
k
button.
To specify paper size using printer settings, choose
Default
in the paper size menu.
Pi
c
tBridge
Star t
Paper
size
Copies
prints
0 0 4
Printing
Can
c
e
l
0 0 2
/
0 0 4
Current print/ total
number of prints
Pr int
menu
Pr int
se
l
e
c
tion
DPOF
printing
Paper
size
Pr int
a
ll
images
Paper
size
Defau
l
t
Post
c
ard
1
00
×
1
50
mm
4
×
6
in.
8
×
1
0
in.
5×7
in.
3.5×5
in.
Содержание 26253
Страница 26: ...En DIGITAL CAMERA User s Manual ...
Страница 185: ...148 Index Technical Notes W Welcome screen 105 White balance 55 Wind noise reduction 86 Z Zoom control 4 23 87 ...
Страница 187: ...QuockT1m E ...
Страница 188: ...CTOI 01 4tl1 6MM0284NOI Nikon User s Manual COOLP1X L120 ...
Страница 190: ......
Страница 191: ... Ii lh I F0 ...
Страница 194: ......


