background image

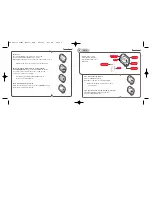
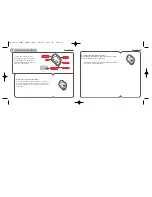
7 Press the ADJUST/RESET button to save the changes 
and activate the alarm.

NOTE: Each alarm is active only in the time zone 
for which it is set. 

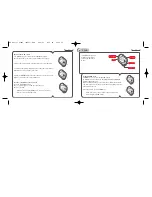
Advance to the next alarm

Press the STOP/NEXT button.
The next alarm number appears at the bottom of 
the display.

Turn the alarm on and off 

Press the START/LAP button. 
The word ON toggles off and on each time you press 
the button.

Turn all alarms off

Press and hold the STOP/NEXT button for 4 seconds. 
“HOLD ALL OFF” flashes and all alarms turn off.

19

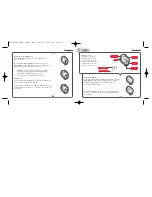
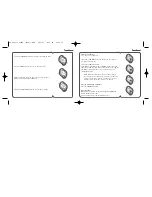
3 Press the START/LAP button to increase the flashing value.
Press once to advance one hour. Hold down for quick advance.

4 Press the STOP/NEXT button to decrease the flashing value.

5 Press the MODE button to cycle to the next 
adjustable value.

6 Repeat steps 3-5 until you have set all values: hour,
minutes, time zone.

18

EN Manual FINAL (RunII) NEW  4/26/99  5:00 PM  Page 18

Содержание TRIAX 120

Страница 1: ...1 2 0 5 0 4 2 2 6 INSTRUCTIONS p 1 MODE D EMPLOI p 2 9 BEDIENUNGSANLEITUNG p 5 7 ISTRUZIONI p 85 INSTRUCCIONES p 113 GEBRUIKSAANWIJZING p 141 BRUKSANVISNING p 169 p 197 1 EN Manual FINAL RunII NEW 4...

Страница 2: ...ds of the running athlete It will provide quick one touch access to a variety of critical information during your training runs and in competition This manual combines step by step operational instruc...

Страница 3: ...ords lap and split times within runs Recalls lap and split time data from recorded runs Countdown interval timer Up to 5 consecutively counting programmable segments a CHRONOGRAPH b DATA c d TIMER COU...

Страница 4: ...The time digits return to zero Your Triax watch will record the next lap times as part of a new run 7 Start measuring a lap Press the START LAP button The lap split time display begins with 1 100 seco...

Страница 5: ...n The chronograph must be stopped to reset a run Press and hold ADJUST RESET for 2 seconds HOLD RESET flashes to reset current run Time returns to zero NOTE Over 100 hours the run will be reset automa...

Страница 6: ...TART LAP ADJUST RESET ELECTROLITE c TIMER 11 Erase data for an individual run Press the STOP NEXT button to select a run that you want to delete Press and hold the ADJUST RESET button for 3 seconds HO...

Страница 7: ...completed segment 2 will begin If segments 3 4 and 5 are set to zero segment 1 will begin at the completion of segment 2 Stop the timer during countdown Press the STOP NEXT button Reset the timer Whe...

Страница 8: ...You can count from 999 to 999 beyond which the counter returns to zero COUNTER MODE STOP NEXT START LAP ADJUST RESET ELECTROLITE d COUNTER 15 Clear all timer segments Timer must be stopped and reset t...

Страница 9: ...n Set an alarm 1 Press the STOP NEXT button to select one of seven alarms to set 2 Press and hold the ADJUST RESET button for 2 seconds HOLD ADJUST flashes in the display then the hours minutes and ti...

Страница 10: ...off and on each time you press the button Turn all alarms off Press and hold the STOP NEXT button for 4 seconds HOLD ALL OFF flashes and all alarms turn off 19 3 Press the START LAP button to increas...

Страница 11: ...lendar information for two time zones NOTE Press and hold the MODE button for one second in any mode for quick return to TIME mode Set time of day and calendar 1 Press and hold the ADJUST RESET button...

Страница 12: ...RESET ELECTROLITE g DEMO 23 Switch between time zones 1 In TIME mode press and hold the STOP NEXT button The alternate time zone time of day information appears 2 Release the button when time zone in...

Страница 13: ...illuminate the display by pressing the Electrolite button Activating the auto Electrolite display illuminates the display at the press of any button Activate the auto Electrolite feature Press and hol...

Страница 14: ...r implied warranties and excludes refund of the purchase price In no event shall NIKE be liable for direct indirect incidental or consequential damages arising out of the use of the watch and any reco...

Страница 15: ...his registration card and retain as proof of warranty OWNER S NAME DATE OF PURCHASE RETAILER IF KNOWN NAME STYLE OF WATCH SERIAL NUMBER LOCATED ON BACK OF WATCH SIGNATURE EN Manual FINAL RunII NEW 4 2...

Отзывы: