


Chapter 24: Internet Viewing
101
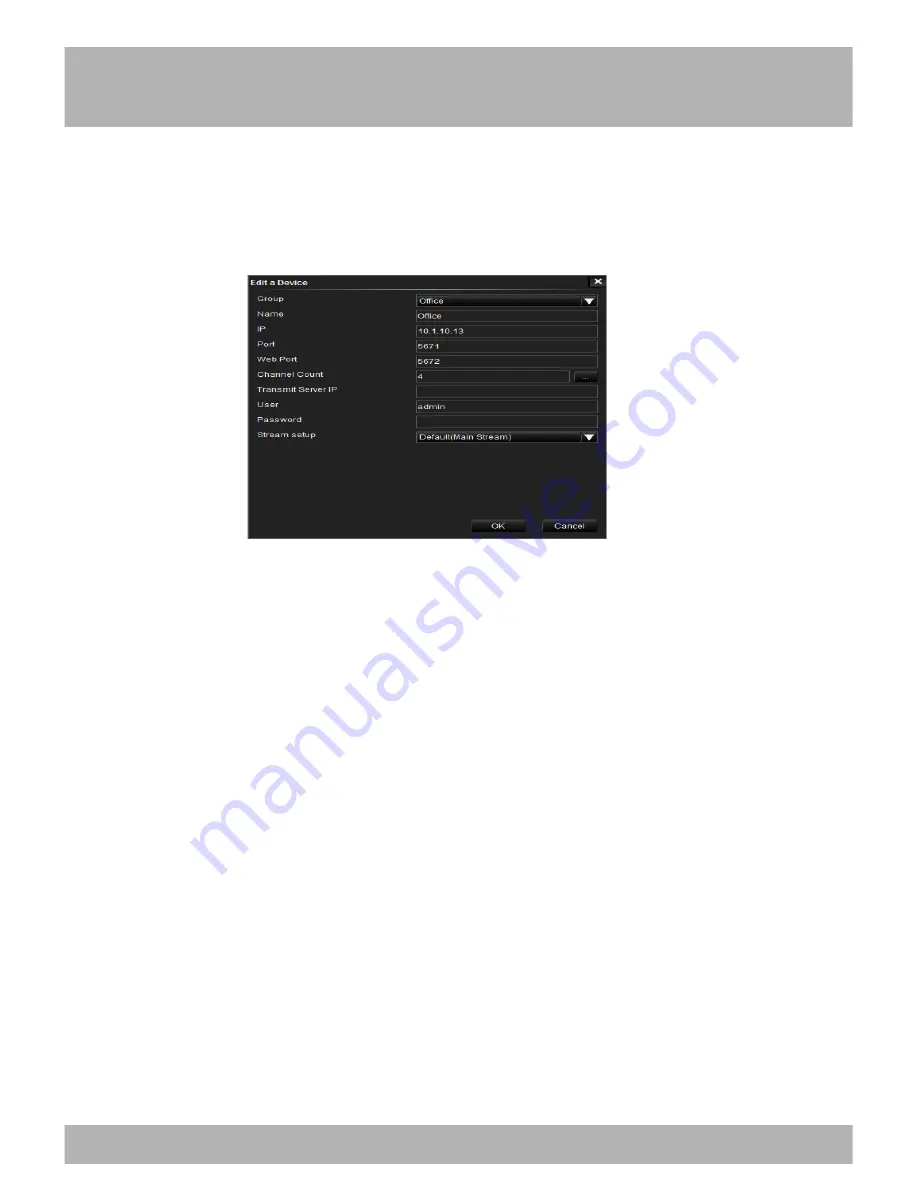
Device Tab
To add a device you must first add a group by selecting the plus (+) sign in
the navigation pane. Next, right-click your mouse on the group that you
would like to add the device to, and then select
Add a Device.
Once you have selected Add a Device you will need to configure the
settings:
•
Group:
Indicates the group you are adding the device to.
•
Name:
Name this anything, such as Home or Office.
•
IP:
Enter the IP Address that was configured in the DVR.
•
Port:
Enter the Media Port that was configured in the DVR.
•
Web Port:
Enter the Web Port that was configured in the DVR.
•
Channel Count:
This indicates the number of channels on the
device.
•
Transmit Server IP:
Select when recording on all channels. This
requires a fast network for transmission.
•
User:
Enter the user name that you created in the Password menu
of the DVR.
•
Password:
Enter the password that was assigned to the User.
•
Stream Setup
: Leave this set to the default (Main Stream). This will
give you the fastest speed for streaming your videos.
Содержание B-X Series
Страница 1: ...PRO Series 8CH Elite Series 8CH...
Страница 7: ...Contents 7 Chapter 2 Package Contents Your DVR Security Kit includes the following items...
Страница 12: ...14 Chapter5 Troubleshooting 12...
Страница 13: ...13 Chapter 6 DVR Components 6 1 Back Panel of DVR...
Страница 14: ...Chapter 6 DVR Components 6 2 Front Panel of DVR 14 14...
Страница 119: ...119 Chapter 26 DVR Specifications...
Страница 124: ...Chapter 28 Warranty 123...


