background image

21

Symbols in this manual


This symbol indicates where cautionary or other information is found in the manual

+

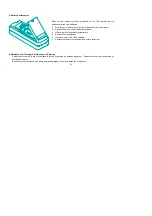
Battery

1-2 Panel 

Description

Refer to Figure 1 and to the following numbered steps to familiarise yourself with the meter’s front panel controls and connectors

1. Transformer 

Jaw 

-

This is used to pick up current signal.  To measure DC/AC current, conductor must be enclosed by the jaw.

2

.

Transformer Trigger - 

This is used to open the jaw.

3.

Function Selector Switch - 

This is used to select the function user desired, such as ACV, ACA, Ohm and Continuity.

4.

Frequency Selection Switch - 

At 50/60Hz position, only the low frequency signal is measured.  At Wide position, signal from

40 - 1KHz is measured.

5.

Data Hold Button - 

Once this button is pushed, reading shall be held on the LCD. Press again to release it.

6.

Max/Min Hold Button - 

This button is used to enable the maximum or minimum value to be displayed and updated during

measurement. Press once, minimum value shall be displayed and updated.  Press again, maximum value shall be displayed

and updated. Press again (the third push), clamp meter return to normal measurement mode.  The Zero/Relative function will be

disabled if Max/Min function is enabled.

Содержание NI 333

Страница 1: ...1 AC LEKSTROOMTANG MULTIMETER NI 333 AC LEAKAGE CLAMP MULTIMETER NI 333 Handleiding Manual...

Страница 2: ...d moet u over de volgende artikelen beschikken 1 Stroomtang multimeter 2 Set meetsnoeren een zwart en een rood 3 Beschermtas 4 Handleiding 5 Batterij 1 2 Veiligheid Veiligheidstekens op het instrument...

Страница 3: ...van het voorpaneel van de meter 1 Transformatortang Ontworpen om de wisselstroom door de geleider te meten 2 Trekker Druk op de hendel om de transformatortang te openen Als u de hendel loslaat gaat de...

Страница 4: ...Als de MIN MAX hold toets voor de derde keer wordt ingedrukt schakelt de meter weer over op de normale weergave Tijdens de MIN MAX functie wordt de Zero Relative functie uitgeschakeld 7 Zero Relative...

Страница 5: ...bargraph geeft op analoge aanwijzing de waarde aan en bestaat uit 40 segmenten 13 MIN MAX Hold symbool E n van de symbolen verschijnen als de MIN MAX hold functie wordt ingeschakeld 14 Doorgangstest...

Страница 6: ...6 Figuur 1...

Страница 7: ...spanning komt Meetfrequentie 2 keer per seconde display nominaal 20 keer per seconde bargraph Binnengebruik Maximum hoogte 2000 meter Installatiecategorie IEC 1010 CAT II 600V CAT III 300V Werktempera...

Страница 8: ...uwkeurigheid Opmerkingen Bereik Resolutie 50 60 Hz Wide 40 1KHz 40mA 10 A 400mA 100 A 4A 1mA 40A 10mA 1 0 3dgts 2 0 5dgts 60A 0 50A 100mA 1 5 3dgts 3 0 5dgts 60A 50 60A 1 100mA 3 0 5dgts 3 5 5dgts 1 A...

Страница 9: ...solutie Nauwkeurigheid Bescherming tegen overbelasting 50 60 Hz 40 1KHz 400V 0 1V 1 5 2dgts 2 0 4dgts AC 800V Weerstand en continu teit open voltage 0 4V Bereik Resolutie Nauwkeurigheid zoemer OL Besc...

Страница 10: ...10 3 Gebruik 3 1 Wisselstroommeting A WAARSCHUWING Zorg dat alle test snoeren van de meter verwijderd zijn als de stroom meting wordt uitgevoerd...

Страница 11: ...ting in de Aardleiding a Zet de draaischakelaar in de gewenste stand b Open de bek van de tang en omsluit volledig de aardleidingsdraad Controleer of de bek geheel gesloten is c Lees de gemeten waarde...

Страница 12: ...wenste stand b Open de bek van de stroomtang en omsluit volledig beide draden enkel fase twee draden drie draden drie fase drie draden of vier draden drie fase vier draden Zorg ervoor dat de bek volle...

Страница 13: ...filter in te schakelen moet de schakelaar op de stand 50 60 Hz worden gezet Het kantelpunt van het filter is 100 Hz met een onderdrukkingskarakteristiek van ongeveer 24dB octaaf WIDE Positie Als het t...

Страница 14: ...g a Zet de draaischakelaar in de gewenste stand b Open de bek van de stroom tang en omsluit compleet een enkele draad fase of nul De bek van de tang moet volledig gesloten zijn c Lees de gemeten waard...

Страница 15: ...die deze waarde overschrijdt Overschrijding van deze limiet kan resulteren in een elektrische schok en beschadiging van de meter a Zet de draaischakelaar op de stand 400V b Sluit de testsnoeren aan op...

Страница 16: ...als 40 zal er een piepsignaal klinken 3 5 Relatieve waarde meeting De ZERO knop kan ook worden gebruikt voor het maken van een relatieve meeting Als de knop wordt ingedrukt zal de huidige aflezig op...

Страница 17: ...ruk op de knop MAX MIN wordt de functie weer uitgeschakeld en staat de meter weer in de normale weergave 3 8 Automatisch uitschakelen De meter zal zichzelf na 30 minuten na inschakelen vanzelf uitscha...

Страница 18: ...r de batterijdeksel 4 Haal de oude batterijen eruit 5 Plaats twee nieuwe 1 5V SUM 3 batterijen 6 Plaats de batterijdeksel weer terug en draai de schroef aan 6 Onderhoud en schoonmaken Reparaties en se...

Страница 19: ...ntlaan 6 3526 AA Utrecht P O Box 7023 3502 KA Utrecht The Netherlands Tel 31 0 30 288 13 11 Fax 31 0 30 289 88 16 E mail sales nieaf smitt nl Internet http www nieaf smitt nl http www nieaf instrument...

Страница 20: ...m its packing you should have the following items 1 Digital Clamp Multimeter 2 Test lead set one black one red 3 Carrying case 4 Instruction manual 5 Battery 1 1 Meter Safety Terms as Marked on Equipm...

Страница 21: ...e function user desired such as ACV ACA Ohm and Continuity 4 Frequency Selection Switch At 50 60Hz position only the low frequency signal is measured At Wide position signal from 40 1KHz is measured 5...

Страница 22: ...the actual reading The reading shown is a offseted value Press and hold the zero button for 2 seconds to disable this function 11 Data Hold Symbol Once the hold button is pressed this symbol appears o...

Страница 23: ...23 Figure 1...

Страница 24: ...ing voltage Measuring Rate 2 times second normal Indoor usage Maximum height 2000 meter Installation category IEC 1010 CAT II 600V CAT III 300 V Working Temperature 10 C until 50 C humidity less than...

Страница 25: ...emarks Range Resolution 50 60 Hz Wide 40 1KHz 40mA 10 A 400mA 100 A 4A 1mA 40A 10mA 1 0 3dgts 2 0 5dgts 60A 0 50A 100mA 1 5 3dgts 3 0 5dgts 60A 50 60A 1 100mA 3 0 5dgts 3 5 5dgts 1Though the meter can...

Страница 26: ...10M Range Resolution Accuracy Overload Protection 50 60 Hz 40 1KHz 400V 0 1V 1 5 2dgts 2 0 4dgts AC 800V Resistance en continuity open voltage 0 4V Range Resolution Accuracy Buzzer OL Protection 40 4...

Страница 27: ...27 3 Operation Instructions 3 1 AC Leakage Current Measurement WARNING Make sure that all the test leads are disconnected from the meter s terminals for current measurement...

Страница 28: ......
Страница 29: ...o Ground Conductor a Set the rotary switch at desired range b Press the trigger to open the jaw and fully enclose the wire goes to the ground Make sure the two half jaws are properly closed c Read the...

Страница 30: ...red range b Press the trigger to open the jaw and fully enclose all two wires single phase two wires three wires three phases three wires or four wires three phases four wires Make sure the two half j...

Страница 31: ...filter out high frequency signal To enable the filter set the switch at the 50 60 position The filter s cut off frequency is set at 100Hz with an attenuation characteristic of approx 24dB octave Wide...

Страница 32: ...ent Measurement a Set the rotary switch at desired range b Press the trigger to open the jaw and fully enclose only one wire No air gap is allowed between the two half jaws c Read the measured value f...

Страница 33: ...measurement that exceeds the limits Exceeding the limits could cause electrical shock and damage to the clamp meter a Set the rotary switch at 400V b Insert the test leads into the input jack c Connec...

Страница 34: ...easured value from the LCD display e If the resistance is lower than 40 a beeping sound shall be heard 3 5 Relative Reading Measurements23 5 Relative Reading Measurements The zero button also can be u...

Страница 35: ...sh again second push the minimum value shall be displayed Push again third push MAX MIN function shall be disabled and return to the normal measurement mode 3 8 Auto Power Off The meter will turn itse...

Страница 36: ...c Lift and remove the battery compartment d Remove the old batteries e Insert two new 1 5V SUM 3 batteries f Replace the battery compartment and secure the screw 6 Maintenance Cleaning16 Maintenance C...

Страница 37: ...ntlaan 6 3526 AA Utrecht P O Box 7023 3502 KA Utrecht The Netherlands Tel 31 0 30 288 13 11 Fax 31 0 30 289 88 16 E mail sales nieaf smitt nl Internet http www nieaf smitt nl http www nieaf instrument...

Отзывы: