Reference: 5724 en - 2020.02 / c
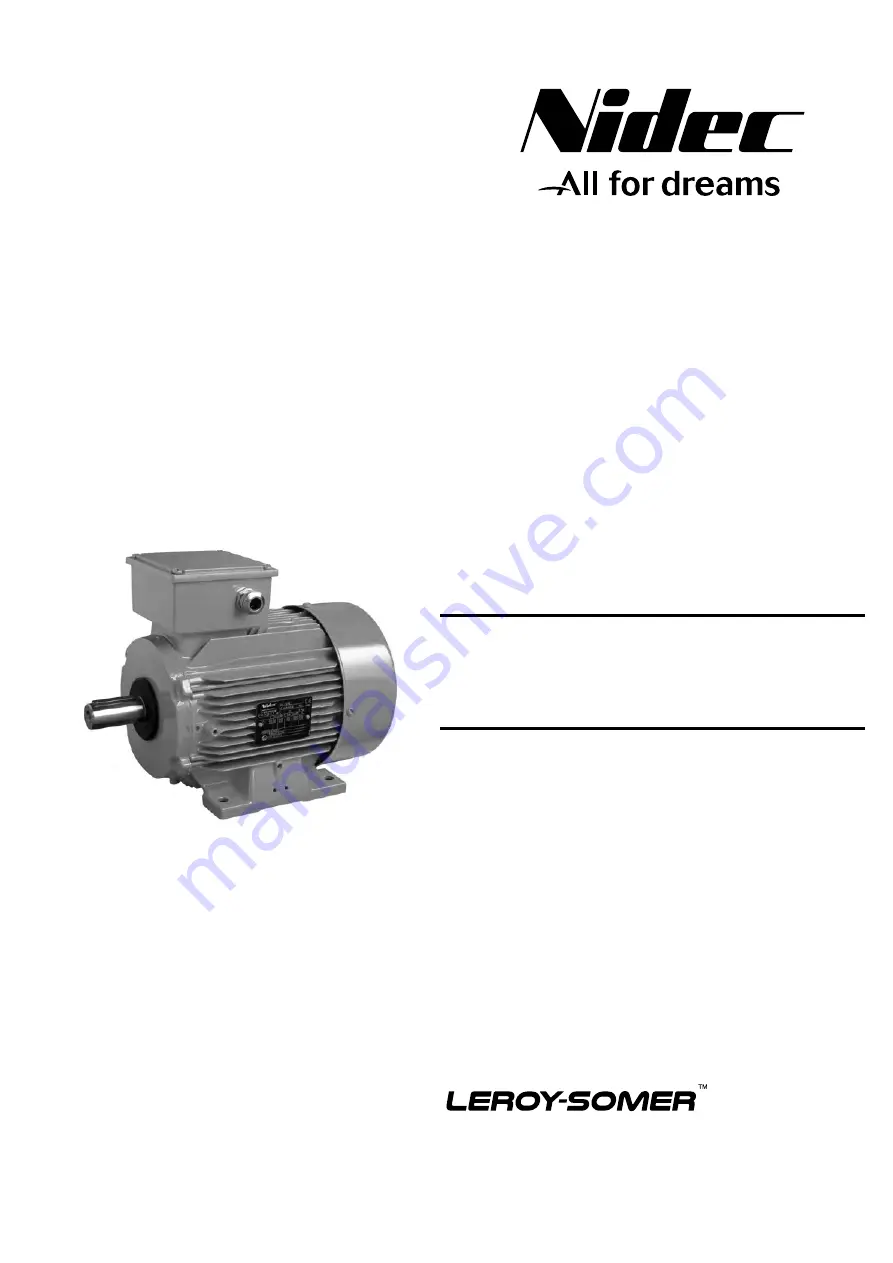
LSN - FLSN
Ex ec IIC T3 Gc
Commissioning and
maintenance guide
Three-phase asynchronous
motors for explosive gas
and dust atmospheres
Страница 1: ...Reference 5724 en 2020 02 c LSN FLSN Ex ec IIC T3 Gc Commissioning and maintenance guide Three phase asynchronous motors for explosive gas and dust atmospheres ...
Страница 2: ... intervene on electrical installations and equipment in explosion risk areas shall be trained and authorized specifically for this type of equipment Indeed knowledge is required about the risks specific to electricity but also those due to chemical properties and physical characteristics of the products used in the installation gas vapours dusts as well as the environment in which the equipment op...
Страница 3: ...r the 25th Consulter le système de gestion documentaire afin de vérifier la dernière version de ce document For the latest version of this document please access the document management system Process POC2 New product development control No Q 0 1 T 5 0 0 EU DECLARATION OF CONFORMITY AND OF INCORPORATION FLSN and FLSES motors Rev A of 10 04 2019 Page 1 1 Beaucourt plant Cancels and replaces Doc typ...
Страница 4: ...Bearing housing maintenance 27 10 6 IP Leak tightness of motor 29 10 7 Groups IIC III paints 29 10 8 Troubleshooting guide 30 10 9 Preventative maintenance 31 10 10 Recycling 31 11 LSN MOTORS REMOVAL AND REFITTING PROCEDURE 32 11 1 LSN 80 to LSN 160MP LR and FLSN 80 to 132 motors 32 11 2 LSN 160M L LSN 180MT LR motors 34 11 3 LSN 180L LSN 200 LSN 225ST MT MR LSN 250MZ motors 36 11 4 LSN 250ME LSN ...
Страница 5: ...perature Ins cl Winding insulation class S Standard operating duty Operating duty d h Number of starts per hour SF Duty factor kg Weight DE Drive end bearing NDE Non drive end bearing g Quantity of grease to be added per bearing at each re lubrication in g h Interval in hours between re lubrication IP Index of protection IK Impact resistance index m Maximum operating altitude V Supply voltage Hz S...
Страница 6: ...ss of the coat must not exceed 2 mm and 0 2 mm for IIC group equipment Otherwise it must be anti static irrespective of its thickness if the motor is II 3G and II 3D 3 COMMISSIONING Before starting users are responsible for checking that the equipment the gas and if relevant dust group and conditions of use are compatible In all cases compatibility of the motor and its environ ment must be guarant...
Страница 7: ...current by 5 of the original value for every 10 C difference While it is drying all the motor orifices must be open terminal box drain holes Before starting replace all plugs so that the motor exhibits the plated degree of protection Clean the orifices and plugs before refitting them Warning Since the high voltage test was carried out at the factory before dispatch If it needs to be repeated this ...
Страница 8: ... impact marks Blocking clogging the cover grille and the housing fins even accidentally will adversely affect the operation of the motor and its safety With vertical operation with shaft extension downwards it is recommended that the motor be equipped with a drip cover to prevent the entry of any foreign matter It is necessary to check that the hot air is not being recycled If it is pipes must be ...
Страница 9: ... second shaft extension is not used in order to conform to the balancing class the half key or key must be firmly fitted in its groove so that it is not ejected during rotation H or F balancing and to protect it against direct contact 4 5 Important information to be taken into consideration during installation Equipment to which this manual applies may not be commissioned before the machinery in w...
Страница 10: ...driven load the torque and current can be altered to match the starting options of the machine and to match the supply options The five essential modes are D O L starting star delta starting soft starting with autotransformer soft starting with resistors electronic starting Electronic starting modes control the voltage at the motor terminals throughout the entire starting phase giving very gradual...
Страница 11: ... of the motor against non transient overloads This device may be accompanied by fused circuit breakers Built in indirect thermal protection Motors may be equipped with thermal sensors as an option These sensors follow the temperature changes at hot spots overload detection cooling check monitoring characteristic points for maintenance of the installation guarantee of hot spot temperatures Thermal ...
Страница 12: ...new seals with the same characteristics after cleaning the components Shaft passage seals must be fitted using the same type of grease as the bearings Employee safety Protect all rotating devices before power up If a motor is started up without a coupling device having been fitted carefully immobilize the key in its housing All measures must be taken to provide protection against risks associatedw...
Страница 13: ...uency range thermal reserve CHANGES IN MOTOR PERFORMANCE When power is supplied by a drive changes are observed in the above parameters due to certain phenomena voltage drops in the drive components current increase in proportion with the decrease in voltage difference in motor power supply according to the type of control flux vector or U f The main consequence is an increase in the motor current...
Страница 14: ...motor equipped with an auxiliary fan IC416A or radial fan IC416R Thethermalprotectiondevicesmustbeconnectedtoadevice which de energises the motor when the setting value is reached and before the maximum temperature at any point on the surface of the motor reaches the classification temperature shown on the nameplate This device must operate under normal conditions and must be in addition to and fu...
Страница 15: ...vibration etc Motors are designed to operate at the speeds shown on the nameplate do not exceed the maximum speeds stated in our technical catalogues When high speed motors are used they often need to be adapted and an in depth mechanical and electrical design exercise is needed CHOICE OF MOTOR There are two possibilities a The frequency inverter is not supplied by Nidec Leroy Somer All the motors...
Страница 16: ... force and the axial thrust are within the limits indicated in the catalogue for bearing performance Direct connection using a coupling sleeve Selection of the coupling sleeve should take account of the rated torque to be transmitted and the safety factor dependent on the starting conditions for the electric motor The machines must be carefully aligned so that any lack of concentricity and paralle...
Страница 17: ...e shaft too little tension vibration wearing of the bearing unit Fixed distance between centres Place a belt tensioning pulley on the slack side of the belts smooth pulley on the outside of the belt grooved pulley on the inside of the belts when using V belts Adjustable distance between centres The motor is usually mounted on slide rails which enables optimum adjustment of the pulley alignment and...
Страница 18: ...anced using grease These threads must be sealed using silicone or polyurethane sealant or bonded using thread locking compound Installers are responsible for ensuring that the leak tightness of cable passages is achieved see the motor nameplate and the cable gland fitting instructions All accessories must be of a type that is attested or certified for the group the application gas and or dust and ...
Страница 19: ...on energisation of the auxiliary motor Stopping the auxiliary motor must cause de energisation the main motor The installation must include a device which prevents the main motor from operating if there is no ventilation Donotconnectthemotorifyouareunsurehowtointerpret the connection circuit diagram or if the latter is missing please contact us Installers are responsible for ensuring that the rule...
Страница 20: ... torque at the same time as the connector and the connector link using the nut 1 slotted terminal 4 connector links 2 retaining nut 5 winding connection connector 3 lock washer 6 slot for mains supply cable Tightening torque N m on the slotted terminal block nuts Terminal KS7A KS8A KS10A KS14A KS18A Steel 5 6 6 10 16 Max connection cross section for slotted terminal blocks Terminal KS7A KS8A KS10A...
Страница 21: ...ing of power connection connectors in eb and ec box Positioning of stator power supply cables on the terminal block Stator cables Terminal block Connection bar Client cables Heat shrink sleeving Crimped connectors Lock nut Cables must be parallel with each other in order to ensure that the 14 mm air gap distances between phase and between phase and earth are achieved For FLSN motors with frame siz...
Страница 22: ...UR 2 4 6 ISO M32 x 1 5 1M32 1M16 200 2 4 6 ISO M40 x 1 5 1M40 1M16 225 SR MR 2 4 6 225 M 2 4 6 ISO M50 x 1 5 1M50 1M16 250 2 4 6 280 2 4 6 ISO M63 x 1 5 1M63 1M16 315 2 4 6 ISO M75 x 1 5 1M75 1M16 355 2 4 6 Series Type Polarity Terminal box material Power auxiliaries Number of holes Hole diameter LSN 80 2 4 6 Aluminium alloy 1 2 if auxiliaries ISO M20 x 1 5 1M20 1M16 90 2 4 6 100 2 4 6 112 2 4 6 1...
Страница 23: ...nd maximum size of holes for cable glands per eb terminal block FLSN 160 to 225 4 ISO20 or 2 ISO40 2 ISO20 FLSN 250 280 8 ISO20 or 2 ISO75 2 ISO20 FLSN 315 355 10 ISO20 or 2 ISO83 2 ISO20 FLSN 400 14 ISO40 or 4 ISO90 4 ISO20 9 9 Cable temperatures Tcable For T amb 40 C no T cable For 40 C T amb 50 C T cables 80 C For 50 C T amb 60 C T cables 90 C ...
Страница 24: ...t to return to the as built condition whilst scrupulously adhering to the starting configuration of the motor is mandatory Failure to comply with this requirement may affect equipment safety for example protection index which is not IP compliant or the surface temperature e g rewinding of the motor Service centres Centres de Service CDS are Saqr ATEX trained and approved in order to ensure safe ma...
Страница 25: ...lomerations sealant etc clean bearing housings and recesses if necessary apply antiflash lacquer inside the flanges carefully clean the bearing caps and grease valves if these are fitted to the motor 10 2 3 Fitting bearings onto the shaft This is a critical operation The slightest traces of ball marks left on the bearing tracks could result in noise and vibration Lightly grease the shaft supports ...
Страница 26: ...ge Always clean at a pressure of less than 10 bars fromthecentreofthemotortowardstheextremities to avoid introducing dust and particles under the seals Draining off condensation water Temperature differences cause condensation to be produced inside the motor Condensation must be removed before it adversely affects motor operation Condensation removal holes located at the low points of the motors d...
Страница 27: ... you detect any of the following on the motor abnormal noise or vibration abnormal heating at the bearing although it is properly greased the condition of the bearings must be checked Damaged bearings must be replaced as soon as possible to prevent worse damage to the motor and the equipment being driven When one bearing needs to be replaced the other bearing must also be replaced The free bearing...
Страница 28: ... LA LB LD 4 6328 C3 6328 C3 93 4600 2300 1100 450 LA LB LC 6 6328 C3 6328 C3 93 10000 6000 3000 bearing housings with grease nipples on request LSN bearings with grease nipples Series Type Polarity Type of bearings for bearing housings with grease nipples Quantity of grease Lubrication intervals in hours 3000 rpm 1500 rpm 1000 rpm N D E D E g 25 C 40 C 55 C 25 C 40 C 55 C 25 C 40 C 55 C LSN 160 M ...
Страница 29: ...all seals are correctly positioned bond them onto one of the components and that the screws are correctly tightened in order to guarantee the IP degree of protection that is marked on the nameplate 10 7 Groups IIC 200 µm and group III paints electrostatic risk IEC EN 60079 0 7 4 reminder Preventing electrostatic charge development on an item of equipment Maximum thickness of non metallic layer pai...
Страница 30: ...ing of the connectors Abnormal voltage Check the power supply line Phase imbalance current Check the winding resistance and the balancing of the network voltage Motor heats abnormally Faulty ventilation Check the environment Clean the fan cover and the cooling fins Check that the fan is correctly mounted on the shaft Faulty supply voltage Check Terminal connection fault Check Overload Check the cu...
Страница 31: ...allation This report highlights problems such as eccentricity misalignment the condition of the bearings as well as structural problems electrical problems etc M 01V M 02V M 02A M 02H M 01H 1 3 4 2 5 Detector Measurement Measurement points position M 01V M 01H M 02V M 02H M 02A Shaft E01 E02 E03 1 2 3 4 5 Accelerometer Vibration 1 2 3 4 5 Photo electric cell Speed and phase measurement balancing 1...
Страница 32: ...en the nuts diagonally to the recommended torque see 10 2 4 fit the flange seals 39 54 308 using grease fit the fan 7 wedging it in place with a drift check that the motor turns freely by hand and that there is no radial play refit the cover 13 and fix it in place with the screws 27 11 1 3 Refitting motor with flange and circlips Fit the front bearing 30 in the flange 5 resting supported on the ou...
Страница 33: ...32 Item Designation Item Designation Item Designation 1 Wound stator 22 Shaft end washer 59 Preload washer 2 Housing 23 Shaft extension screw 60 Retaining ring circlip 3 Rotor 25 Lifting ring 71 b Metal terminal box 5 Coupling side flange 26 Nameplate 78 Cable gland 6 Rear flange 27 Cover fixing screw 84 Terminal plate 7 Fan 30 Coupling side bearing 85 Terminal plate screw 13 Fan cover 39 Coupling...
Страница 34: ...ke contact with the winding fit the pre load washer 59 with a little grease in the bottom of the rear flange bearing cage 6 then refit the rear flange 6 positioning it on the stator for fitting the cap 33 screw a threaded rod of the same diameter as the screws 40 into one of the threaded holes of thecaptoensurethecorrectangularpositioningduringrefitting of the front flange 5 for a flange fit a new...
Страница 35: ...MT LR Item Designation Item Designation Item Designation 1 Wound stator 14 Assembly rods 39 Coupling side seal 2 Housing 21 Key 40 Cover fixing screws 3 Rotor 26 Nameplate 50 Rear bearing 5 Coupling side flange 27 Cover fixing screw 54 Rear seal 6 Rear flange 30 Coupling side bearing 59 Preload washer 7 Fan 33 Coupling side internal cap 70 Terminal box body 13 Fan cover 38 Coupling side bearing ci...
Страница 36: ...ar flange bearing cage 6 then refit the rear flange 6 positioning it on the stator for fitting the cap 33 screw a threaded rod of the same diameter as the screws 40 into one of the threaded holes of thecaptoensurethecorrectangularpositioningduringrefitting of the front flange 5 for a flange fit a new seal 39 spring towards the exterior refit the flange 5 taking care with the positioning of any cap...
Страница 37: ...gnation Item Designation Item Designation 1 Wound stator 25 Lifting ring 50 Rear bearing 2 Housing 26 Nameplate 54 Rear seal 3 Rotor 27 Cover fixing screw 59 Preload washer 5 Coupling side flange 30 Coupling side bearing 70 Terminal box body 6 Rear flange 33 Coupling side inner cap 74 Terminal box cover 7 Fan 38 Coupling side bearing circlips 319 Right foot 13 Fan cover 39 Coupling side seal 320 L...
Страница 38: ...thecaptoensurethecorrectangularpositioningduringrefitting of the rear flange 6 fit the pre load washer 59 with a little grease in the bottom of the rear flange bearing cage 6 then refit the rear flange 6 positioning it on the stator fix the cap 53 with the screws 62 when fitting the cap 33 screw a threaded rod of the same diameter as the screws 40 into one of the threaded holes of thecaptoensureth...
Страница 39: ...Wound stator 30 Coupling side bearing 59 Preload washer 2 Housing 33 Coupling side internal cover 60 Rear bearing circlips 3 Rotor 38 Coupling side bearing circlips 62 Cover fixing screws 5 Coupling side flange 39 Coupling side seal 70 Terminal box body 6 Rear flange 40 Cover fixing screws 74 Terminal box cover 7 Fan 42 Grease nipples 270 Coupling side flange fixing screw 13 Fan cover 50 Rear bear...
Страница 40: ...shers 59 apply new grease the bearings housing must be filled to 50 of the free volume with new grease refit the new bearings 30 et 50 on the shaft see 5 3 fitting the bearings introduce the rotor 3 into the stator 1 taking all precautions not to make contact with the winding screw in a threaded rod of the same diameter as the screws 40 and 62 into one of the threaded holes of the caps 33 and 53 t...
Страница 41: ...ng 53 Rear inner cap 2 Housing 32 Coupling side outer cap 54 Rear seal 3 Rotor 33 Coupling side inner cap 55 Rear fixed grease valve 5 Coupling side flange 34 Coupling side fixed grease valve 56 Rear mobile grease valve 6 Rear flange 35 Coupling side mobile grease valve 59 Pre load spring or washer 7 Fan 39 Coupling side seal 62 Cover fixing screws 13 Fan cover 40 Cover fixing screws 70 Terminal b...
Страница 42: ...ntact with the shaft support surface change the bearings hot fitting only 12 1 4 Re fitting Fit the bearings on the rotor shaft do not forget the front inner cover 33 slide the front bearing housing 5 over the bearing 30 re fit the fixing screws 40 of the inner cover 33 introduce the rotor bearing housing assembly into the stator without making contact with the winding present the bearing housings...
Страница 43: ...ver fixing screw 59 Rear preload washer 2 Frame 30 Coupling side bearing 64 Rear grease nipple 3 Rotor 33 Front inner cover 70 Stator terminal box body 5 Coupling side flange 39 Front lip seal 74 Terminal box cover 6 Rear flange 40 Cover fixing screws 81 Cable gland support plate 7 Fan 42 Front grease nipple 270 Front flange fixing screw 13 Fan cover 50 Rear bearing 273 Rear flange fixing screw 21...
Страница 44: ... rear follow put to one side the components 55 56 for the rear and 34 35 for the front change the bearings hot fitting only 12 2 4 Re fitting Fit the front bearing 30 on the rotor shaft do not forget the inner cover 33 as well as the rear bearing 50 if and only if the inner Ø of the stator allows the rear inner cover 53 to pass through fit in place the fixed part of the grease valves item 55 for t...
Страница 45: ... Rotor 35 Mobile part of the front grease valve 64 Rear grease nipple 5 Coupling side flange 39 Front lip seal 70 Stator terminal box body 6 Rear flange 40 Cover fixing screws 74 Stator terminal box cover 7 Fan 42 Front grease nipple 81 Cable gland support plate 13 Fan cover 50 Rear bearing 270 Front flange fixing screw 21 Shaft end key 53 Rear inner cover 273 Rear flange fixing screw 27 Cover fix...
Страница 46: ...he end of the shaft extension Avoid making contact with the shaft support surface change the bearings hot fitting only 12 3 4 Re fitting Fit the front bearing 30 on the rotor shaft do not forget the inner cover 33 and the circlips 38 as well as the rear bearing 50 if and only if the inner Ø of the stator allows the rear inner cover 53 to pass through introduce the rotor into the stator taking care...
Страница 47: ... box cover fastening screws 6 Rear flange 38 Front bearing circlips 77 Terminal box cover seal 7 Fan 40 Cover fixing screws 81 Cable gland support plate 10 Fan or turbine screw 280 4p 42 Front grease nipple 270 Front flange fixing screw 11 Lock washer not shown 280 4p 50 Rear bearing 271 Front flange fixing nut 12 Lock washer 280 4p 53 Rear inner cover 273 Rear flange fixing screw 13 Fan cover 59 ...
Страница 48: ...12 4 3 Changing the bearings using a suitable lifting device extract the rotor without making contact with the winding extract the bearings 30 and 50 using a suitable tool whilst protecting the end of the shaft extension Avoid making contact with the shaft support surfaces change the bearings hot fitting only 12 4 4 Re fitting Fit the front bearing 30 on the rotor shaft do not forget the inner cov...
Страница 49: ... 41 Coupling side cap sealed toothed washer 272 Coupling side flange fixing washer 7 Fan 42 Front grease nipple 273 Flange opposite coupling side fixing screw 10 Fan or turbine screw 50 Bearing opposite coupling side 275 Flange fixing washer opposite coupling side 11 Lock washer 53 Cap opposite coupling side 406 Front grease valve closure plate 12 Lock washer 60 Retaining ring 456 Rear grease valv...
Страница 50: ... removing the rotor move the inner covers 53 and 33 back so as to facilitate fitting the bearing extraction tool Extract the bearings 12 5 4 Re fitting Fit the front 30 and rear 50 bearings on the rotor shaft do not forget to refit the pre load washers 59 in their housing start with the rear bearing housing 6 Fit a pin in one of the inner cover 53 threaded holes to align the grease feed pipes fini...
Страница 51: ...te 6 Rear flange 40 Cover fixing screws 89 Connector terminal box flare 7 Fan 42 Front grease nipple 121 Mixer 10 Fan or turbine screw 43 Front grease nipple extension 230 Auxiliary terminal box from 355 LK to 450 11 Lock washer not shown 44 Front preload washer 270 Front flange fixing screw 12 Lock washer 50 Rear bearing 271 Rear flange fixing nut 13 Fan cover 53 Rear inner cover 273 Rear flange ...
Страница 52: ...Moteurs Leroy Somer SAS Headquarters Boulevard Marcellin Leroy CS 10015 16915 ANGOULÊME Cedex 9 Joint stock company with a capital of 65 800 512 RCS Angoulême 338 567 258 www leroy somer com ...