NI Climbing Frames Karlas Kingdom Скачать руководство пользователя страница 1

Karlas Kingdom Instruction Manual 


Содержание Karlas Kingdom

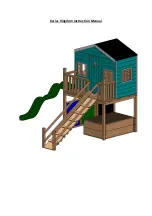
Страница 1: ...Karlas Kingdom Instruction Manual...

Страница 2: ...Parts List Item Number Description Image Quantity 1 Railings 3 2 1245mm decking 4 3 1656mm decking 4 4 1710mm x 1060mm sandpit lid 1 in 2 parts...

Страница 3: ...5 2280mm post 2 6 1385mm post 2 7 2220mm post 2 8 1720mm post 2...

Страница 4: ...9 8ft x 6ft base 1 10 1900mm x 3 x 1 5 2 11 2220mm x 3 x 1 5 2 12 Decking screws Approx 250 13 200mm index screws 24...

Страница 5: ...14 120mm screws 20 15 Sides for playhouse 2 16 Front for playhouse 1...

Страница 6: ...17 Rear for playhouse 1 18 Floor for playhouse 1 19 Roof Panels felt for playhouse 2 of each...

Страница 7: ...20 3m ramp 1 21 Sensory panels 2 1 1720mm x 1040mm 1 1060mm x 1040mm 22 8ft Slide 1...

Страница 8: ...ew covers 18 24 3m x 3 x 1 5 8 25 1575mm posts 4 26 6x60 screws 2 27 Sandpit Base 1 Other components included Handgrips telescope steering wheel fascia side trims and bottom trims for playhouse 20mmm...

Страница 9: ...8m clearance beyond the end of the slide and 1 2m clearance for the steps rock module and swing module 2 Once you are happy that the layout is correct remove the slide 3 Mark out clearly the centre of...

Страница 10: ...eference to the parts list please refer back to the parts list to ensure you are assembling the correct components for each step Step 1 Platform H Frame Assembly Lay out a 2280mm post and a 1385mm pos...

Страница 11: ...of both posts Using the 1900mm 3 x 1 5 timber and using the 65mm decking screws screw the timber to the frame this is to strengthen the H frame structure without this additional support at the bottom...

Страница 12: ...Step 3 Repeat steps 1 2 for the other side of the platform...

Страница 13: ...Step 4 Connecting the Two Sides of the Platform Screw the two sides of the platform together using a 2220mm post at each side and 2 x 200mm screws into each of the 32mm holes...

Страница 14: ...Step 5 Screw the two pieces of 2220mm 3 x 1 5 to the 1900mm x 3 x 1 5 timber supports using decking screws...

Страница 15: ...Step 6 Lift the platform and place it into the holes that have been dug...

Страница 16: ...ners with the small vertical posts and should sit on top of these posts The 3 x 1 5 base supports should sit onto the horizontal posts Secure the base to the posts using the 120mm screws provided They...

Страница 17: ...respective slots The double timbers on the side rails should be on top and the single timber should be at the bottom Secure the bottom rail to the base using decking screws Using the 120mm screws scr...

Страница 18: ...Step 9 Repeat for all railings...

Страница 19: ...loor 4 walls and 2 roof pieces Place the floor on the appropriate side of the base At this stage you will need to fit the T G front and side trims to cover the edges of the base These should fit tight...

Страница 20: ...m decking screws supplied Screw through the 2 x 1 5 timber to secure the walls to each other and to the floor of the playhouse You will also need to apply a bead of silicone between each corner where...

Страница 21: ......

Страница 22: ...Step 12 Now add the roof panels and screw down using the 40mm chipboard and 65mm decking screws All that remains is nailing down the felt supplied onto the roof with the 20mm roof nails supplied...

Страница 23: ...rm Once the playhouse is complete screw decking screws up through the 8ft x 6ft base into the supports of the playhouse base Also screw decking screws from the inside of the playhouse into the railing...

Страница 24: ...x 3 x 1 5 to the width of the 3m ramp and secure this to the front of the platform using 120mm screws this will be used to support the ramp Place the ramp on top of this piece of timber and secure the...

Страница 25: ...Step 15 Position the 2 x 1575m posts at the end of the ramp Dig the holes for these posts and once the posts are in the holes secure the ramp to the posts using 120mm screws...

Страница 26: ...Step 16 Use the 3m x 3 x 1 5 to make the handrails for the ramp and secure in position using decking screws You ll need four of these pieces of timber in total two for each side...

Страница 27: ...Step 17 Slide Assembly Using 2 x 6x60 screws secure the slide to the bottom timber of an open railing through the pre drilled holes in the slide...

Страница 28: ......

Страница 29: ...Step 18 H Frame Supports Removal Remove the 3 x 1 5 platform supports that were added at the beginning of the assembly...

Страница 30: ...Step 19 Sandpit Assembly Step 1 Place the sandpit base to the inside of the posts under the frame...

Страница 31: ...Step 20 Sandpit Assembly Step 2 Place the 1245mm decking on the base and secure the 1245mm decking to the inside of the posts using decking screws...

Страница 32: ...Step 21 Sandpit Assembly Step 3 Place the 1656mm decking on the base and inside the 1245mm decking and secure the decking boards together using decking screws...

Страница 33: ...Step 22 Sandpit Assembly Step 4 Place the sandpit lids on the sandpit...

Страница 34: ...Step 23 Sensory Panel Assembly Secure the sensory panels to the posts using decking screws...

Страница 35: ...e other sensory panel Step 25 Concreting structure Using postcrete and following the manufacturer s instructions concrete all the posts into the ground The frame should be left overnight before it is...

Страница 36: ...to the playhouse press the screw covers into the 32mm holes and give everything a good sand down to avoid the children getting splinters from any rough edges All screws should also be checked to ensu...

Страница 37: ...used on your climbing frame has been pressure treated This essentially means that it has been put into a pressurised vessel and has been impregnated with wood preserve With time and due exposure to w...

Отзывы: