V012015
USER MANUAL
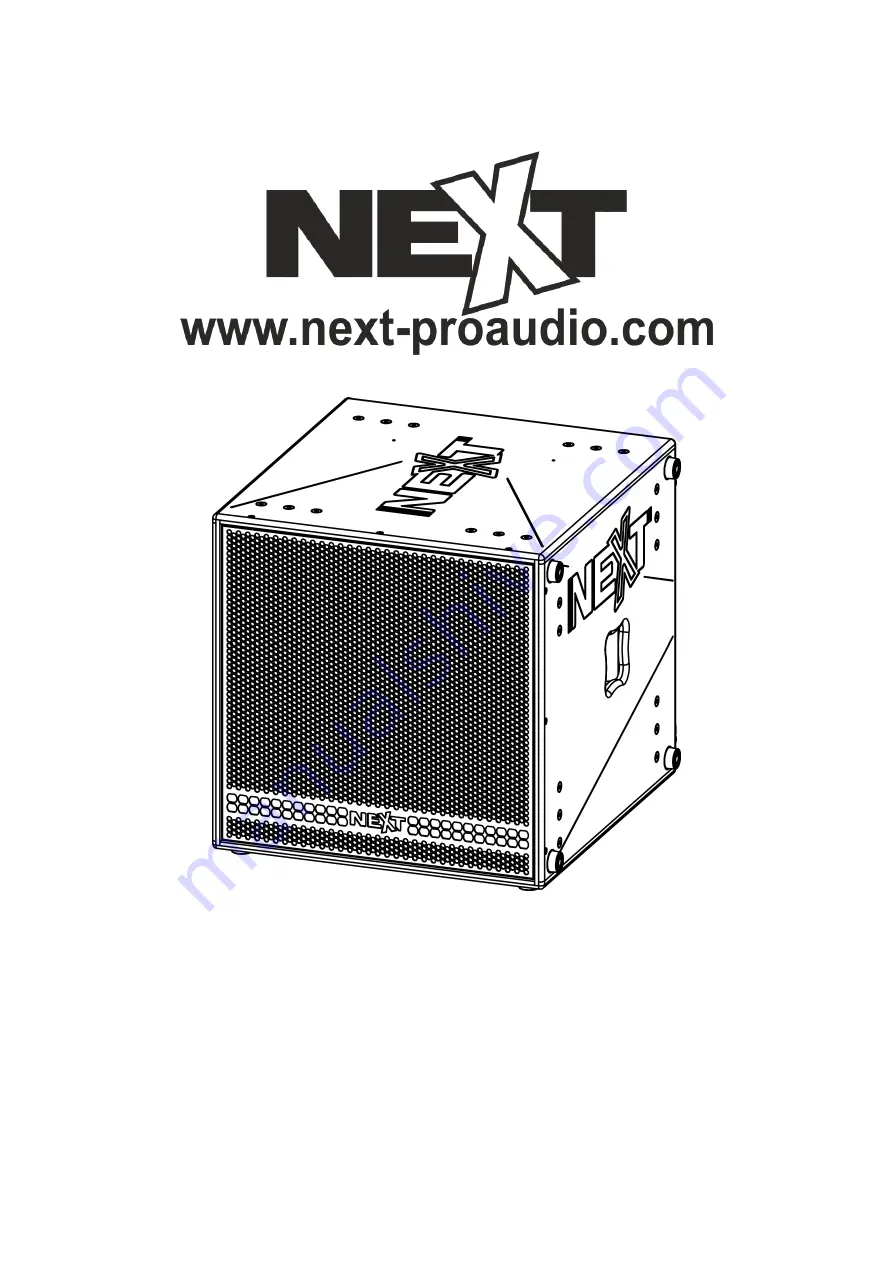
PXH64
PX System Mid/High Element
사용자매뉴얼
PX 시스템 미드/하이 스피커
Страница 1: ...V012015 USER MANUAL PXH64 PX System Mid High Element PXH64 PX...
Страница 2: ...ON 2 SAFETY FIRST 2 UNPACKING 3 PX SYSTEM OVERVIEW 4 PXH64 OVERVIEW 5 CABLE SELECTING 5 CONNECTION AND ELECTRIC DIAGRAM 6 AMPLIFICATION 8 PX SYSTEM DEPLOYMENT 8 TROUBLESHOOTING 14 TECHNICAL SPECIFICAT...
Страница 3: ...ing of some specific featu res of the PXH64 will help you to operate your system to its full potential SAFETY FIRST It s important that loudspeaker systems are used in a safe manner Please take some t...
Страница 4: ...t use them replace them immediately Do not use hardware that isn t l oad rated or that its rating is not enough to handle the system s weight with a good safety factor Don t forget that the hardware w...
Страница 5: ...ve offering easier set up les s cabling and simpler operation High quality components combined with the n ew Mid High coaxially mounted horns the hybrid ba ss horns and the latest processor DSP techno...
Страница 6: ...by a Neodymium 1 4 driver with a 3 voice coil and a Constant Q horn whilst coverage in the mid range from 150Hz to 1 25kHz is provided by a low power compression 12 driver loaded into a midrange horn...
Страница 7: ...located on back of the cabinet The 8 pins of the 2 NL8 Speakon sockets are wired in parallel within the enclosure Either connector can be used to connect to the amplifier or another Sub See the table...
Страница 8: ...Next PXH64 User Manual www next proaudio com Electric Diagram MF V012015 7 HF MF Grey HF Red MF Black HF White...
Страница 9: ...any other exterior component the powe r surge will occur When powering up a sound system it is important to switch on the amplifiers last after the mixer and control electronics have stabilised When...
Страница 10: ...Those lines aren t just an a esthetic element They tell you how to position your system to achieve your desired coverage p attern Let s proceed with a standard stack Step 1 Start with PXL118 Sub 1 and...
Страница 11: ...ser Manual www next proaudio com Step 2 Place the PXA8000 on top of the PXL118 SUB 2 Step 3 Last place the PXH64 on top of the PXA8000 It s as easy as it can be 10 Step 2 PXL118 SUB2 PXA8000 Step 3 PX...
Страница 12: ...PXH64 For that you will need the PX Splay adjustment kit me ntioned earlier This splay kit allows frontward tilt in 5 or 10 This kit can be applied connecting the PXH64 to the PXA8000 power rack or co...
Страница 13: ...PXH64 rear group as shown in the image Step 3 Follow the full standard assembly as described earlier Then place the adjustment guides on the PXA8000 one at each side like in the image below Position...
Страница 14: ...y it will enter the cavity o f the nearest angle So if you pull halfway and then let go you will have a 5 splay and if you pull it over to the top it will enter the 10 cavity Notice that this system o...
Страница 15: ...quipment and can be easily undertaken by users The technique should be to segment the system in order to iden tify the faulty system component signal source controller amplifier loudspeaker or cables...
Страница 16: ...previous inspection test or repair TECHNICAL SPECIFICATIONS PXH64 TECHNICAL SPECIFICATIONS Design CoaxialHorn Nominal Impedance Mid High 8 8 Continuous Power Handling Mid High 800W 160W Sensitivity 1W...
Страница 17: ...o service age nt or distributor NEXT proaudio cannot be held responsible for defects caused by unauthorized modificati ons improper use negligence exposure to inclement weather conditions act of God o...
Страница 18: ...n just Write us NEXT proaudio Rua da Venda Nova 295 4435 469 Rio Tinto Port ugal Contact us Tel 351 22 489 00 75 Fax 351 22 480 50 97 Send an e mail info next proaudio com Search our website www next...