


2.3. Two isolated LANs
contained only one network address while the other contained two.
This is the ideal situation for using two VLANs. Multiple VLANs can be setup on the switch.
2.3.1
Implementation
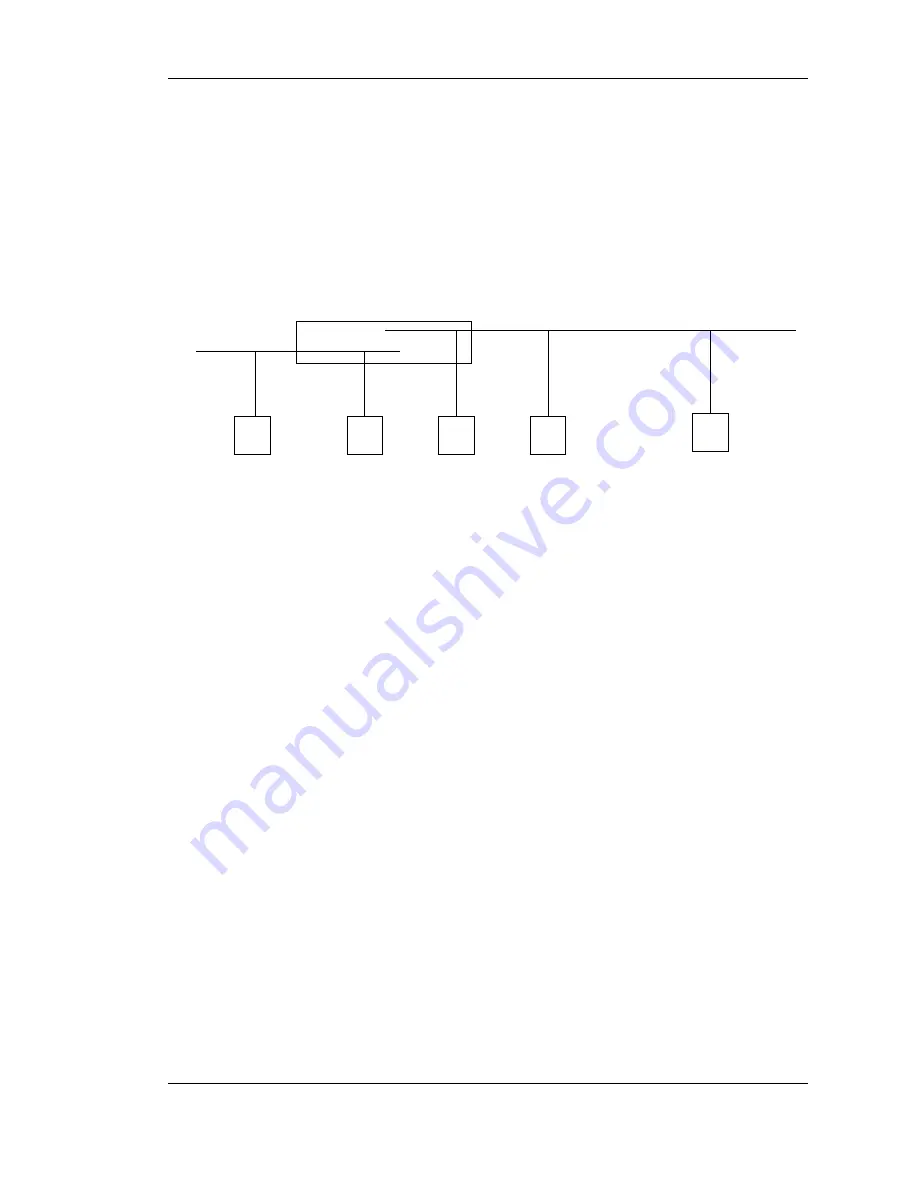
Figure 2.2 shows the implementation of the required two LANs. Each LAN is implemented as a separate
VLAN. Collected on each VLAN are devices having a common network address. The ports used to
house each device are the same as in Section 2.1 and in Table 1.2.
switch
192.168.8.7
wireless extender
192.168.8.240
PC 1
PC 2
NAS
192.168.14.107
VLAN−B−22
g7
g23
g19
g2
g1
printer
VLAN−A−12
192.168.14.31
192.168.14.9
Figure 2.2: Switch forming two LANs
Initially all five network devices connected to the switch were connected to the default VLAN, having
the default name VLAN 1.
Two VLANs having names
VLAN-A-12
and
VLAN-B-22
with identifications 12 and 22, respectively,
were used to form the LANs. The switch menu sequence:
Switching
→
VLAN
→
VLAN Configuration
gave the VLAN creation screen. For
VLAN-A-12
, the value 12 was typed into the window labelled
VLAN ID
and
VLAN-A-12
into the window labelled
VLAN Name
. Then the
ADD
button at the bottom of
the right-hand side of the screen was clicked to create the new VLAN. By typing 22 into the
VLAN ID
window, and
VLAN-B-22
into the
VLAN Name
window, followed by clicking the
ADD
button, the other
VLAN was created. The two new VLANs appear in the
VLAN Configuration
tabulation.
Next, the devices connected through the ports of the switch were assigned to each VLAN. The PC on
port 19 was moved to port 13 of the switch to act as the control. The menu sequence:
Switching
→
VLAN
→
Advnaced
→
VLAN Membership
gave the screen which enabled such assignments. First VLAN 1 was called up on screen using the pull-
down list of the
VLAN ID
window. The
U
which appears under each port label indicated that port was
attached to this VLAN. The
U
of ports 1, 2, 7, 19, and 23 were set to
blank
, then the
APPLY
button
clicked to disconnect those ports from VLAN 1.
Having freed the ports to be used, those freed ports were then connected to the two newly created
VLANs. VLAN 12 was then called up using the
VLAN ID
pull-down list. A
U
was set under port labels
2, and 7, before clicking the
APPLY
button. VLAN 22 was then called using the
VLAN ID
window and a
U
set under port labels 1, 19, and 23 before clicking the
APPLY
button.
To activate the two VLANs, the menu sequence:
Switching
→
VLAN
→
Advnaced
→
Port PVID Configuration
was used to enable setting a PVID for each VLAN. In the
Configured PVID
the value 12 was entered
for VLAN 12. The box at the left of the g2, and g7 port labelled lines were clicked resulting in a tick
appearing in that box and each line being displayed in orange. Then the
APPLY
button was clicked.
This sequence was repeated for VLAN 22 using the value 22, then ports 1, 19 and 23 were ticked to link
them into VLAN 22.
11


